Fortify WordPress: 11 New cPFence Security Tools for Enhance Servers

Managing Enhance Servers Security for our clients has been an eye-opener. We’ve encountered a myriad of security vulnerabilities caused by improper server management and a lack of adherence to best security practices. Let’s face it – server admins often don’t have the time (or patience) to implement all those tedious security measures. And who can blame them? It’s a time-consuming task that can make even the most seasoned admins pull their hair out.
At cPFence, we decided to tackle this challenge head-on. Enter our latest innovation: a robust suite of bulk WordPress security tools designed to transform your server into a fortress. Security doesn’t have to be a pain in the neck anymore.
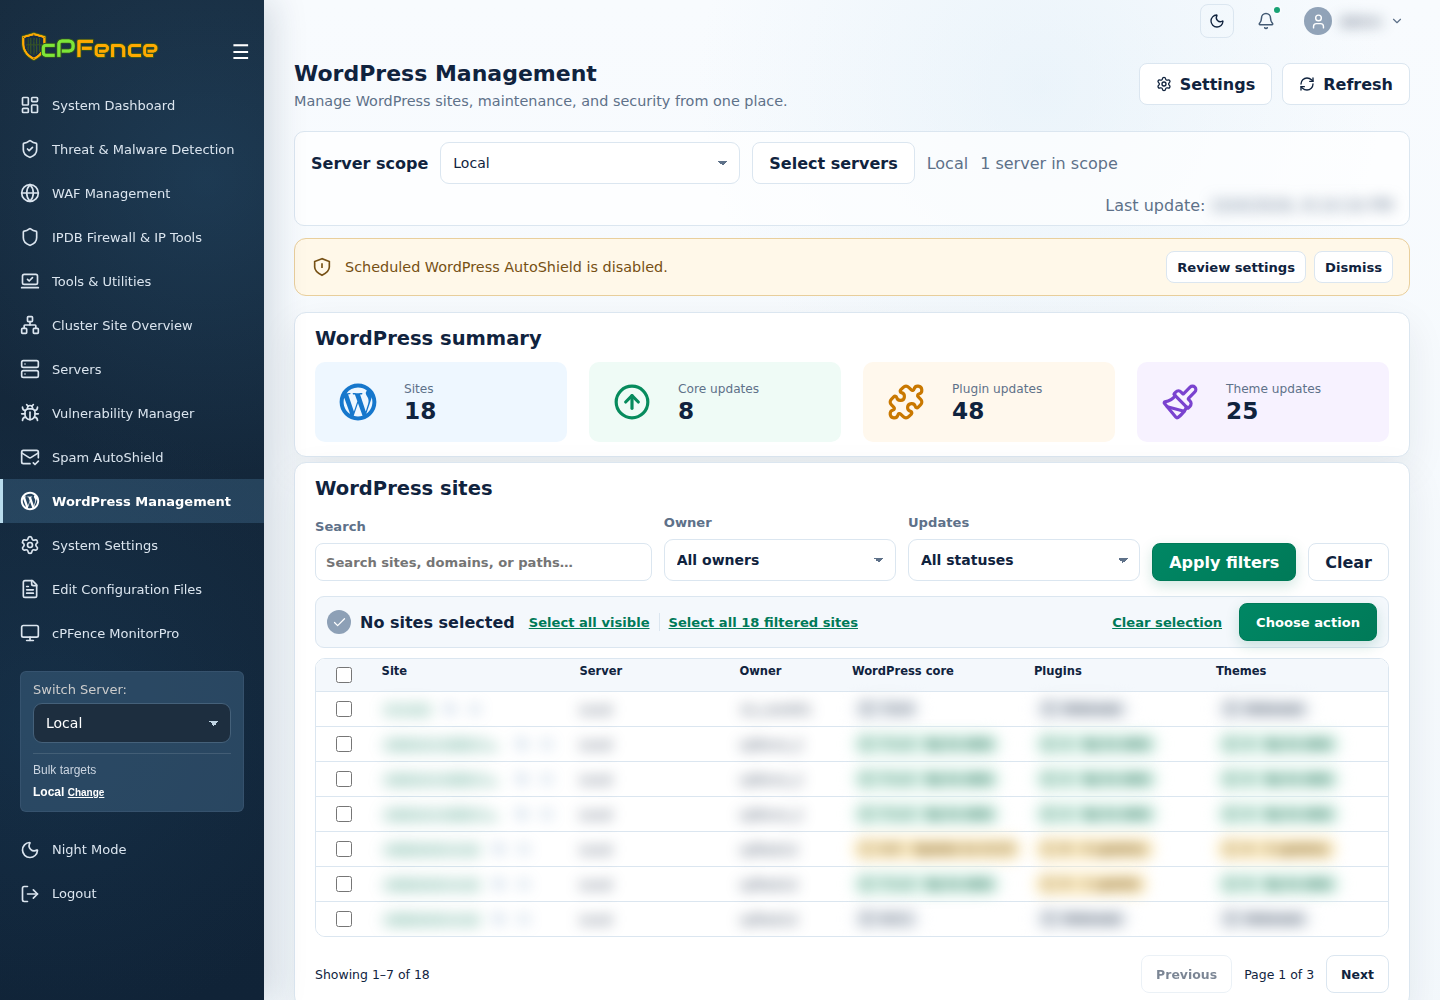
No passwordless SSH needed for normal cPFence v4+ operation. Only remote WordPress backups/restore and MultiRun need it. If you do not use those two features, you can disable passwordless SSH access and the rest of v4+ will keep working.
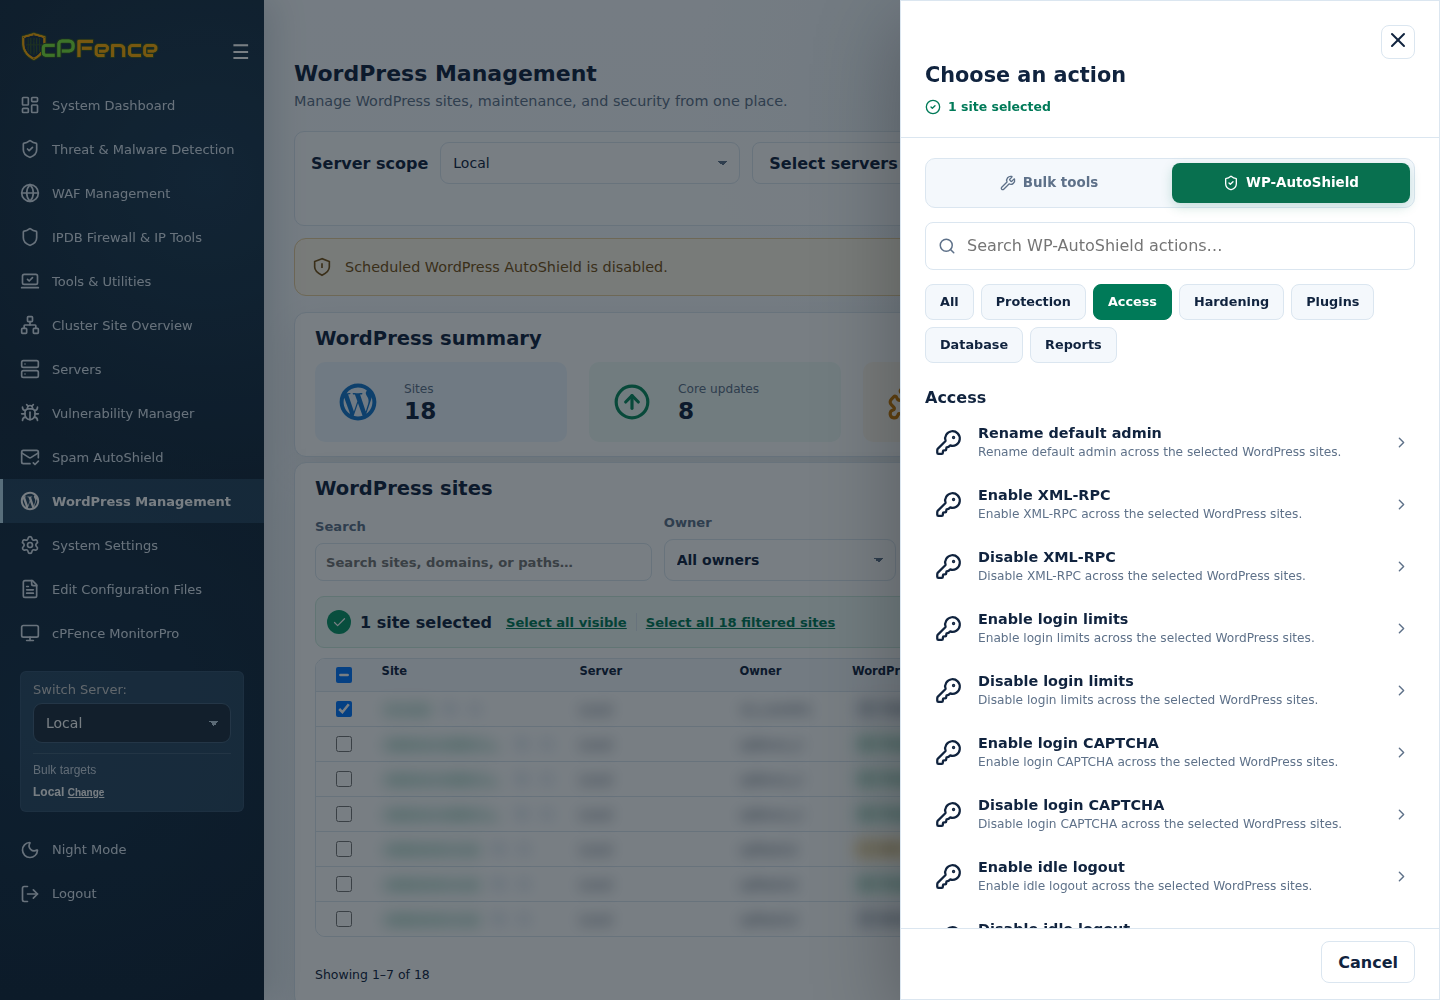
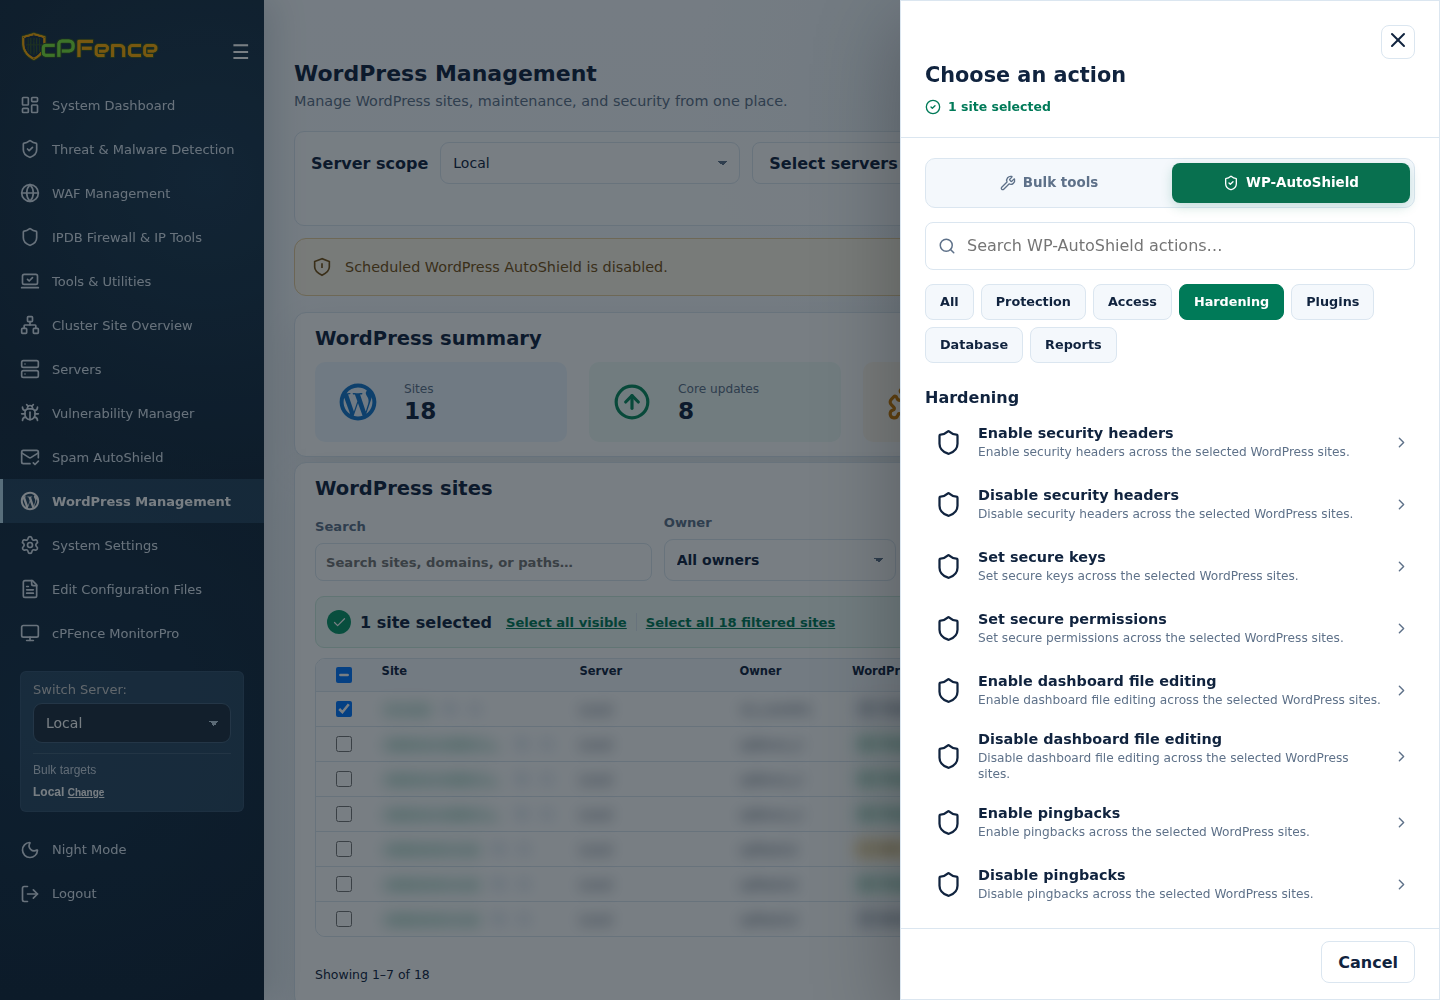
In cPFence v4+, open WordPress Management, choose the server scope and explicitly select the sites. Use Choose action → WP-AutoShield and the Access or Hardening category. Review each confirmation and read every site’s final result. For recurring enforcement, use that server’s Settings and keep WordPress AutoShield enabled. Run CLI commands as root against a reviewed local site list; WebUI selection does not set CLI targets.
Here’s what the cPFence team has cooked up for WordPress admins:
1. Fully Disable XML-RPC Server-Wide
cpfence --bulk-disable-wp-xmlrpc

cpfence --bulk-enable-wp-xmlrpc
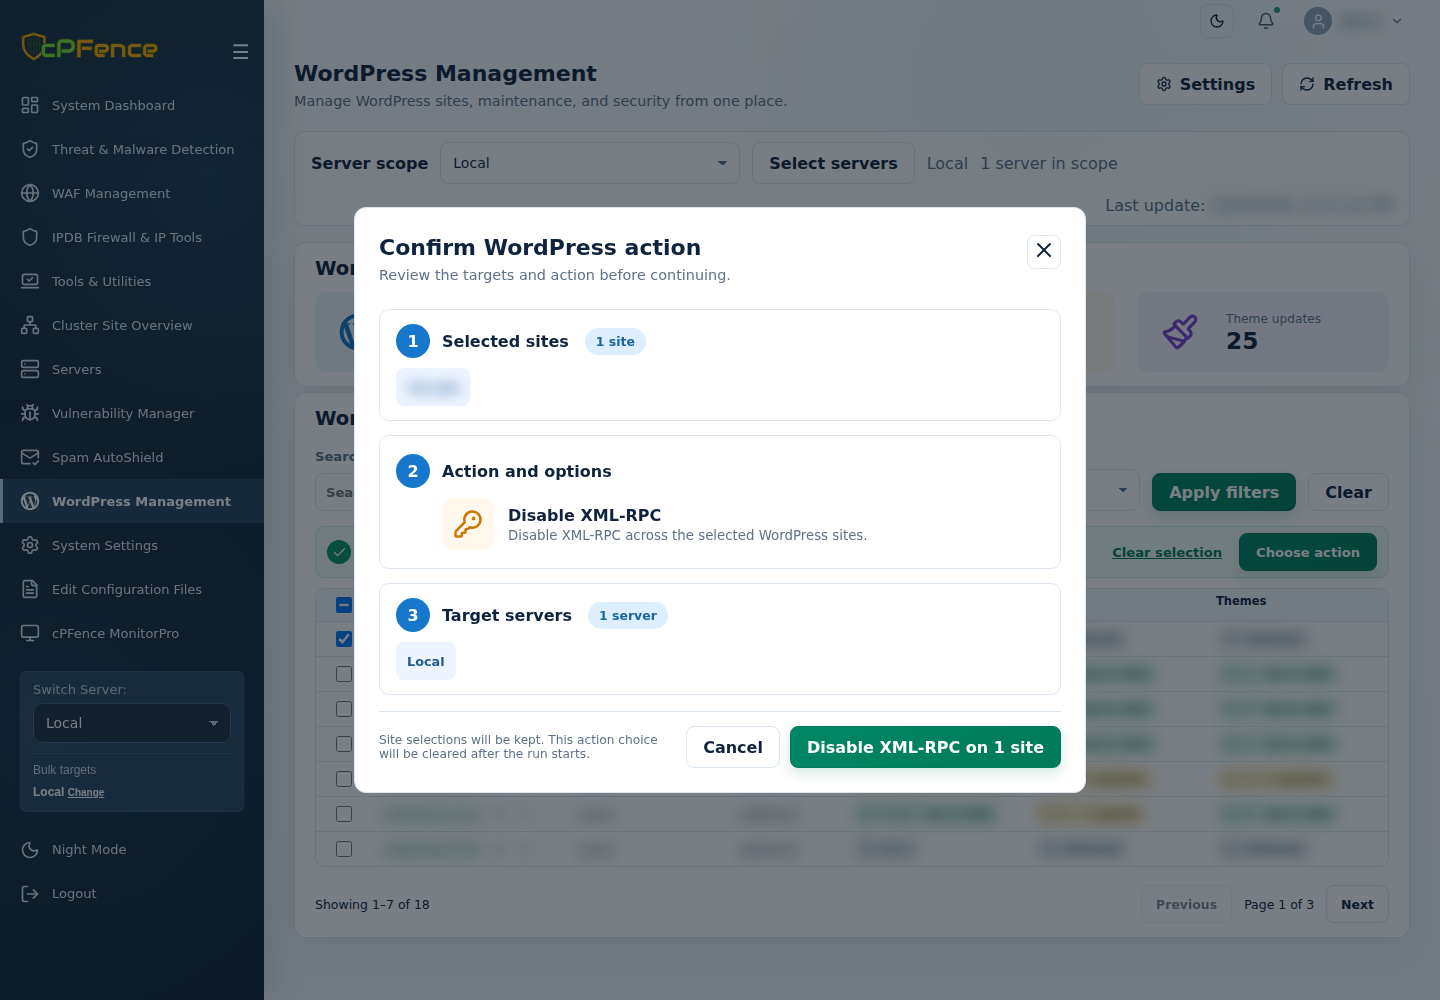
XML-RPC abuse is a common cause of DDoS attacks and server overload. Our tool allows you to completely disable XML-RPC for all listed WordPress sites, returning a 403 Forbidden error with a nifty message to deter abusers. Bulk disable or enable XML-RPC across your server with ease—no plugins needed. Peace of mind, guaranteed.
2. Limit Login Attempts to Protect wp-login
cpfence --bulk-enable-wp-limit-login

cpfence --bulk-disable-wp-limit-login
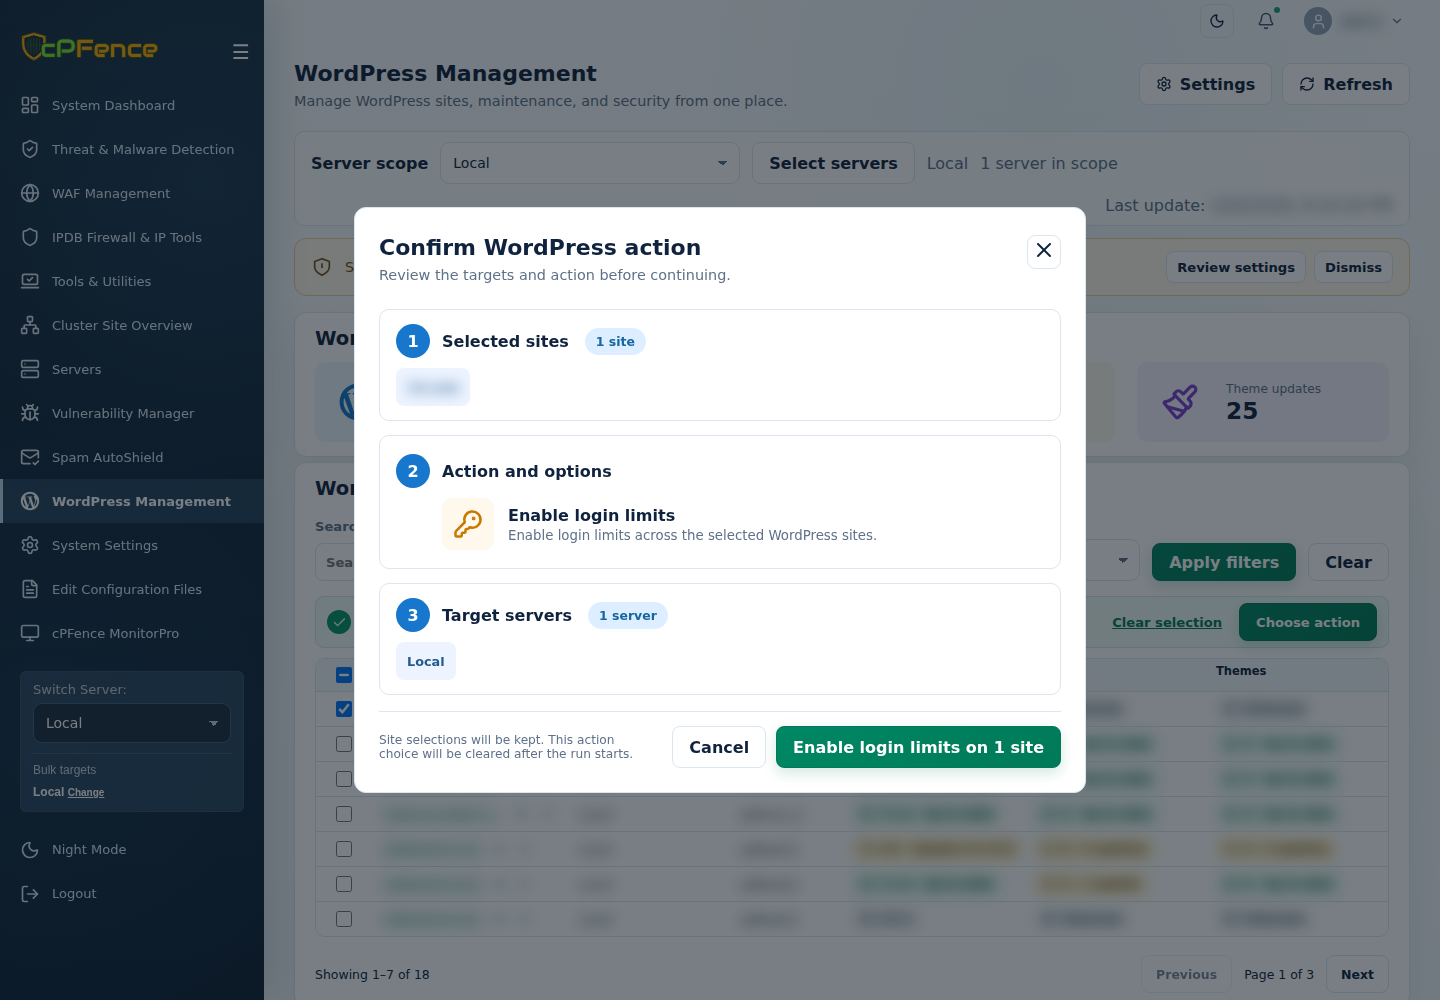
Tired of seeing your login page under siege? With cPFence, you can enforce a limit of 5 login attempts in 5 minutes server-wide. Attackers who exceed the limit are met with a 403 Forbidden response, and their IP is blocked – even if they’re behind proxies or CDNs like Cloudflare. No slow redirects, no bloated plugins—just pure efficiency.
3. Set Secure WordPress Keys
cpfence --bulk-set-wp-secure-keys
WordPress uses keys like AUTH_KEY and SECURE_AUTH_KEY to encrypt sensitive information in user cookies. Many hacked sites we’ve seen lack proper keys because admins skip this step during installation. With cPFence, you can initialize missing or empty secure keys across listed sites. Existing nonempty SECURE_AUTH_KEY values are retained; this is not a bulk key-rotation tool. Setting keys can invalidate existing sessions, so plan for users to sign in again on affected sites.
4. Fix File and Folder Permissions
cpfence --bulk-set-wp-permissions
Incorrect file and folder permissions are an open invitation for hackers. Our tool scans all WordPress installations for insecure permissions and fixes them automatically. Directories are set to 755, files to 644, and wp-config.php to 600. Plus, the public_html directory gets an extra layer of protection with 750.
5. Apply WordPress Hardening Measures
cpfence --bulk-enable-wp-hardening

cpfence --bulk-disable-wp-hardening
Why install resource-heavy plugins when you can harden WordPress in one click? Our hardening measures include:
- Blocking PHP execution in
uploads. - Securing
wp-config.phpagainst unauthorized access. - Preventing malicious scripts in
wp-includes.
Your server’s security, streamlined.
6. Disable File Editing in WordPress Dashboard
cpfence --bulk-disable-wp-file-edit

cpfence --bulk-enable-wp-file-edit
Disabling file editing in the WordPress admin panel adds a crucial layer of protection. It prevents compromised admin accounts from injecting malicious code into plugins or themes.
7. Disable WordPress Pingbacks
cpfence --bulk-disable-wp-pingback

cpfence --bulk-enable-wp-pingback
Pingbacks can be exploited for DDoS attacks. This feature disables pingbacks server-wide, closing another avenue for attackers.
8. Manage WordPress Cron Jobs
cpfence --bulk-disable-wp-cron

cpfence --bulk-enable-wp-cron
WordPress Cron jobs can bog down high-traffic sites, leading to performance issues. Enhance CP handles Cron jobs well, but it can occasionally miss sites. With cPFence, you’re in full control, enabling or disabling WordPress Cron jobs as needed.
Why cPFence WordPress Security?
These exciting new features allow you to bolster WordPress security across your entire server without relying on plugins or manually applying best practices. With cPFence, you save time, reduce effort, and enhance your server’s security posture—all in just a few clicks.
But that’s not all. Last week , we introduced WordPress Auto-Updates—a powerful tool to automatically keep your WordPress core, plugins, and themes up-to-date while ensuring security and stability. Learn more about it here: Introducing WordPress Auto-Updates: Secure, Automate, Verify.
Ready to take your WordPress security to the next level? Try cPFence Web Security today. Because your peace of mind shouldn’t come at the cost of hours of frustration.
Update! On 27th December 2024
3 New cPFence WordPress Security Tools
cPFence has always been about bringing next-level protection to your WordPress sites on Enhance servers, and now we’re taking it even further. When it comes to fortifying WordPress, these tools mean business – think of them as a cyber shield, but cooler. We’ve already introduced features like WordPress Integrity Check, automated quarantine for malicious files, and more. But wait, there’s more! Let’s dive into the latest upgrades to keep WordPress rock solid.
9. Automatic Idle Logout Protection
Ever had an admin walk away from their desk, leaving a logged-in WordPress dashboard wide open for the taking? No worries. Now you can prevent these slip-ups with just one command:
cpfence --bulk-enable-wp-idle-logout
Protect all listed WordPress sites by logging out idle users after 120 minutes of inactivity by default; existing custom timeouts are retained. It’s like having a virtual doorman politely showing people the way out if they linger too long.cpfence --bulk-disable-wp-idle-logout
Changed your mind? Disable idle logout protection just as easily. Your call.
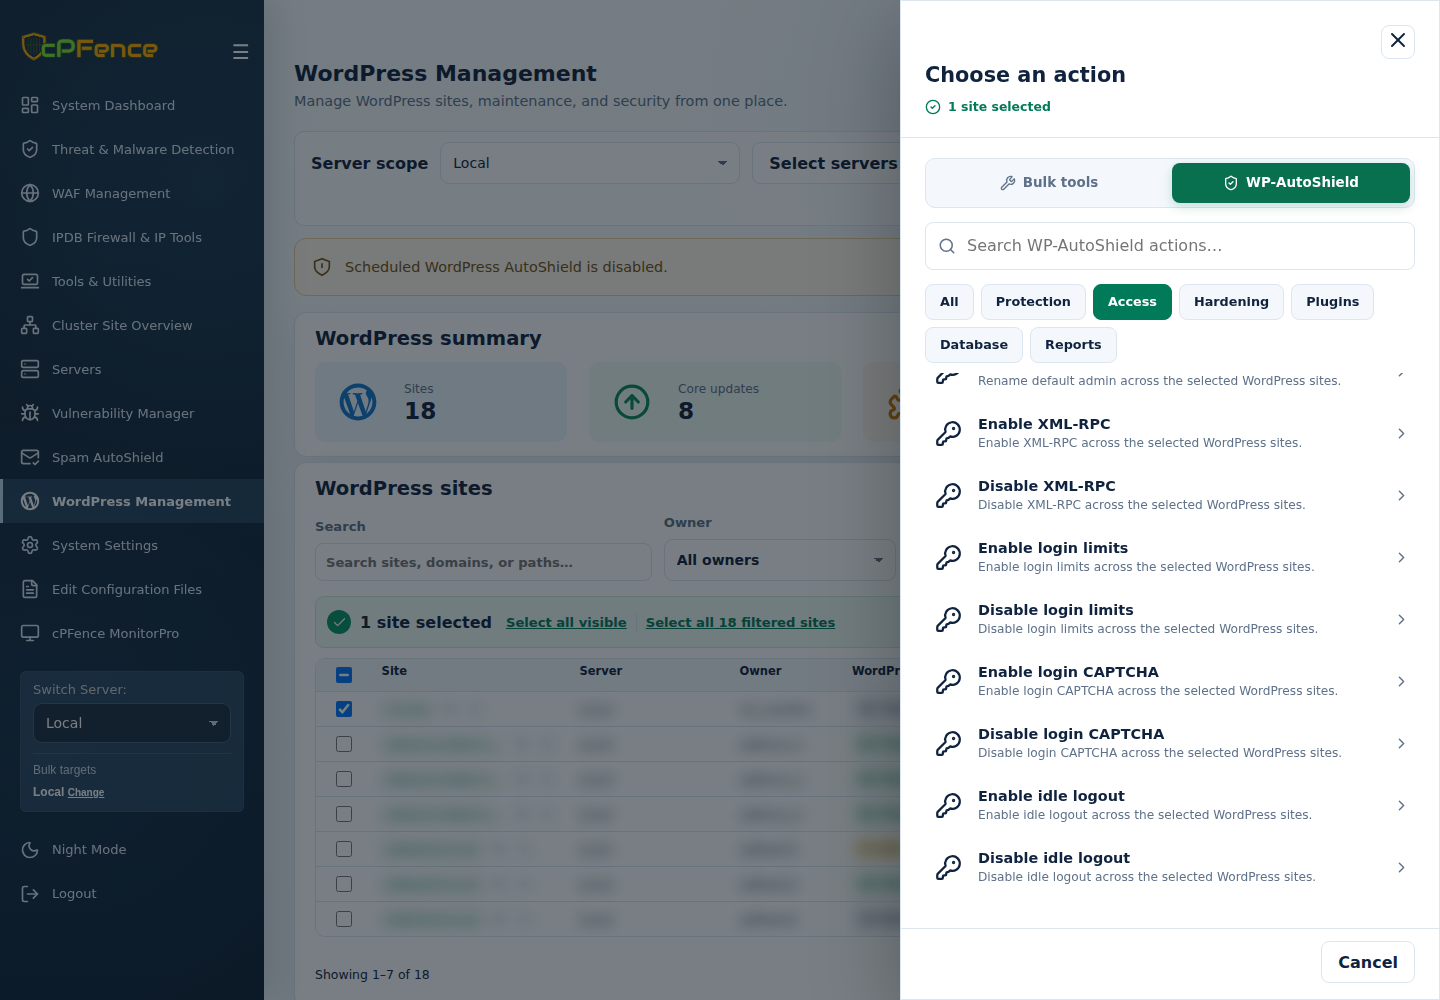
10. Rename the Default Admin User
Gone are the days of leaving ‘admin’ as the default username – it’s practically an open invitation for hackers. Secure those WordPress sites in bulk with:
cpfence --bulk-rename-wp-admin
This command renames the default ‘admin’ username to a unique, secure name across all listed sites. Because your admin account deserves better than being Hacker’s Choice. You can find a report of changed usernames in ‘/var/log/wordpress-rename-admin-success.log’.
11. Enhanced XSS Protection in Posts
Cross-site scripting (XSS) vulnerabilities are no joke, but with cPFence, you’re ahead of the game. Keep risky code like iframes, embeds, and scripts in check:
cpfence --bulk-disable-xss-in-wp-posts
Disable XSS and other risky elements in WordPress posts for all listed sites. Heads up: Avoid enabling this for developer clients or those requiring full access to editor features like WPBakery or Elementor. This restricts unfiltered HTML on future edits; it does not clean existing injected content. Check editor and frontend behavior, since custom embeds or plugins may depend on the affected capabilities.cpfence --bulk-enable-xss-in-wp-posts
Want to re-enable those risky features? This command gives you the power to do just that.
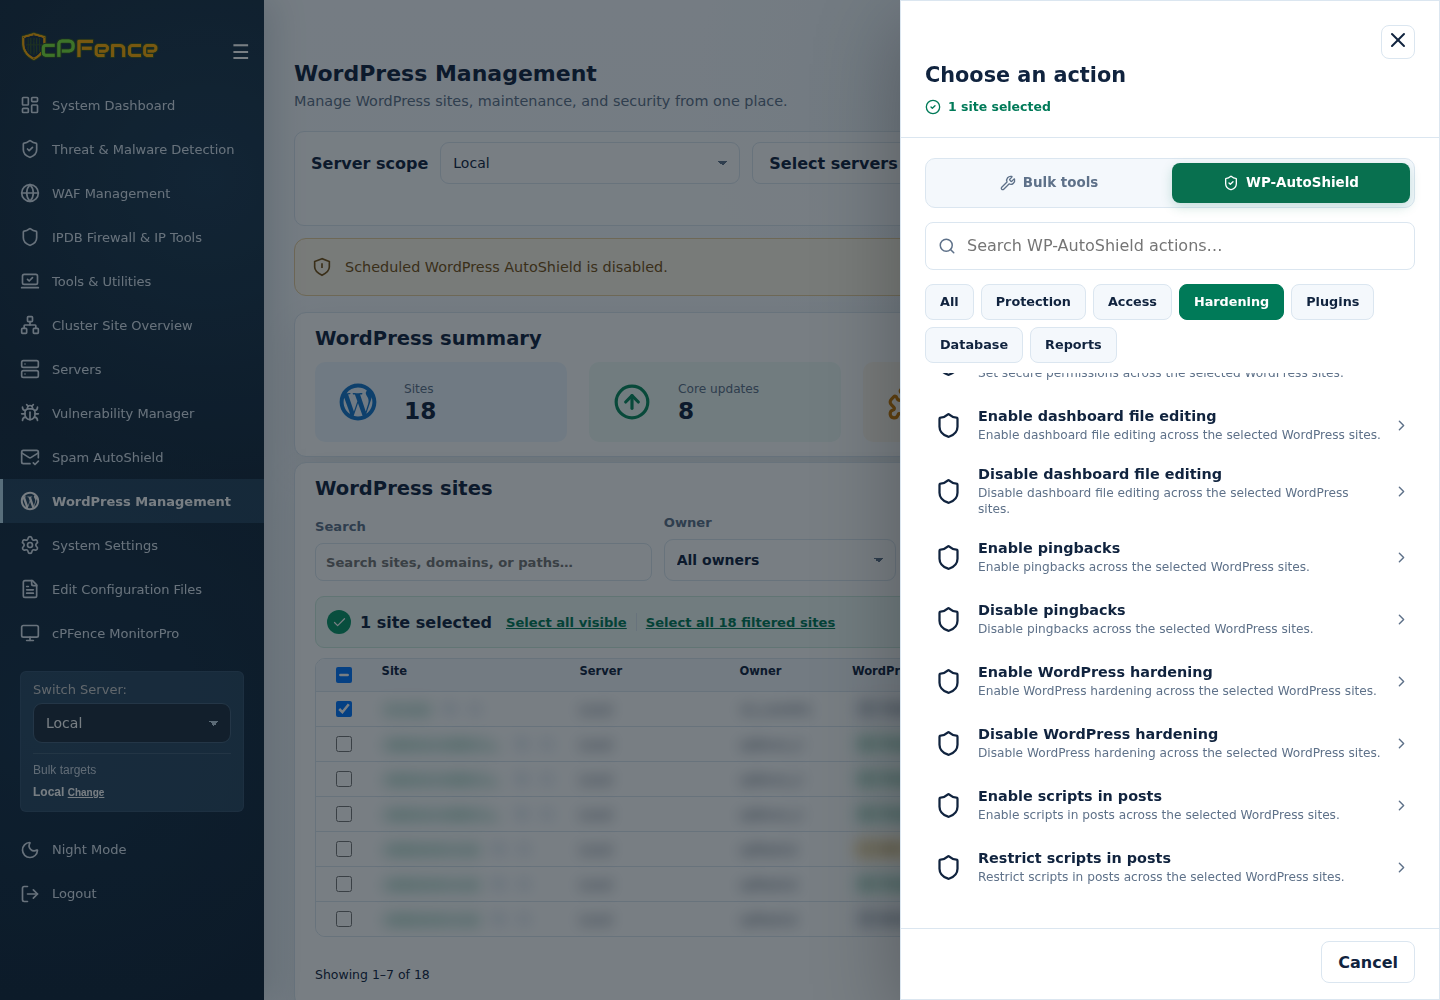
The current WebUI also offers paired Enable/Disable login CAPTCHA actions under Access and Enable/Disable security headers under Hardening. CLI equivalents are cpfence --bulk-enable-wp-captcha / cpfence --bulk-disable-wp-captcha and cpfence --bulk-enable-sec-headers / cpfence --bulk-disable-sec-headers. Preserve a backup before permission, administrator or editor changes, and save the private rename report before log rotation.
Why These Upgrades Matter
WordPress security isn’t just about patching vulnerabilities; it’s about proactive, hassle-free management. With these new cPFence commands, you can lock down every corner of your WordPress setup, ensuring peace of mind without lifting a finger (okay, maybe a few keystrokes).
These features, alongside the existing suite of tools, position cPFence as the ultimate WordPress guardian for Enhance servers. Remember: when WordPress sleeps soundly, so do you.
Stay tuned for more updates, because cPFence never stops evolving.
Fortify Your WordPress Sites
Manage WordPress protections from one place with cPFence v4+. Try it free and choose the controls your sites need.
Start free trial