How to Backup Your Enhance v12 Backups (Full System Restore)

Backups are meant to protect against worst-case scenarios, but how confident are you that your Enhance v12 backup server can be fully recovered if it’s completely lost? In this guide, we’re not just backing up our backups—we’re deleting the backup server entirely and restoring everything from scratch.
If you rely on Enhance for hosting, this walkthrough helps you prepare a recovery plan. Whether it’s a hardware failure, accidental deletion, or a migration to a new server, the goal is to bring your backup data back on a replacement server.
Key Features :
– Securely back up your Enhance v12 backups to a remote server.
– Ability to sync only selected sites.
– Ability to exclude specific sites from the backup.
– Seamlessly restore your entire backup infrastructure without skipping a beat.
Let’s get started.
Before You Begin: Important Notes
Use an administrator account on your Enhance backup servers, running Ubuntu 22.04 or 24.04. The Enhance screenshots below are from the original v12 walkthrough. Rehearse the deletion and recovery steps on disposable servers with a verified independent copy of the backups.
First, download and review the script, save it as enhance_backup_sync.sh, and make it executable. Set LOCAL_BACKUP_DIR, REMOTE_SERVER and REMOTE_BACKUP_DIR for your servers. Leave the site arrays empty for a full backup; otherwise review which sites receive full or partial copies.
1- Ensure Both Servers Have the Same Time Zone
Matching time zones make the two servers’ log timestamps easier to compare. Run this on both servers to check:
timedatectl
If they don’t match, update the timezone:
timedatectl set-timezone [Your/Timezone]
2- Set Up Password-less SSH Login
For this standalone rsync script, ensure the local server can SSH into the remote server without a password. Run a manual test before you begin. This is the script’s own prerequisite; normal cPFence v4+ features do not need passwordless inter-server SSH, except MultiRun and remote WordPress backup/restore.
3- Tested on Enhance-Powered ext4 Servers
This guide was tested on two Enhance v12 servers using the ext4 filesystem. Your setup may vary if you’re using a different filesystem.
4- Use the Same Backup Directory Name on Both Servers
Make sure that the backup directories on both the local and remote servers have the same name.
Step 1: Run a Dry Run of the Backup
Before committing to a full sync, let’s simulate the backup process to verify everything works as expected:
./enhance_backup_sync.sh --dry-run
This previews file transfers and skips remote account changes. It still writes a local log and lock file. Review the proposed deletions as well as transfers.
Step 2: Perform the Backup
Warning: The script uses rsync --delete, so it can remove destination files absent from the source. It also creates or modifies remote users and groups. Use a dedicated backup destination, keep an independent recovery copy, and run outside Enhance’s backup window.
If everything looks good, proceed with the actual backup:
./enhance_backup_sync.sh
This script will:
- Sync all backups from
/backupsto the remote server. - Ensure users and permissions match on the remote system.
- Preserve all
snapshot-*,wip-snapshot-*, and thecurrentsymlink.
Check /var/log/enhance_backup_sync.log for errors and verify the remote files before continuing. An “Operation finished” message alone does not prove every transfer succeeded.
Step 3: Add a New Backup Server
Now, we’ll create a completely new backup server.
- Deploy a new Enhance-powered server.
- Add it to your Enhance cluster.
- Assign the Backup Role to it.
Right now, this new backup server has no backups—just an empty backup role.
Step 4: Decommission and Delete the Backup Server
Now, in your disposable recovery rehearsal, we’ll delete the old backup server. Confirm that you selected the old server and that its independent backup copy is readable before proceeding.
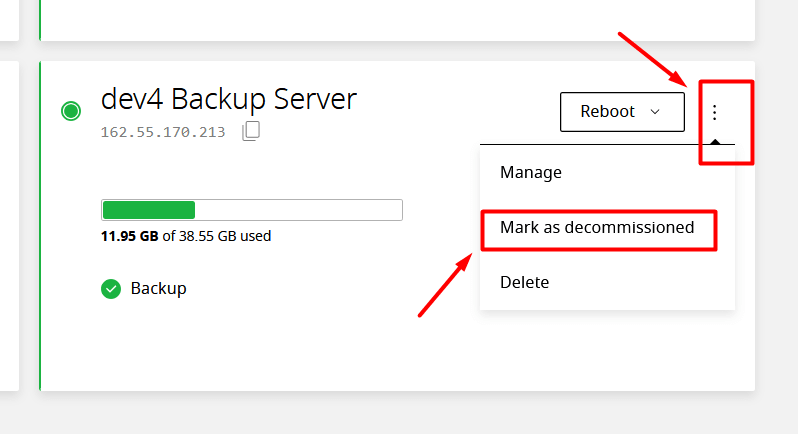
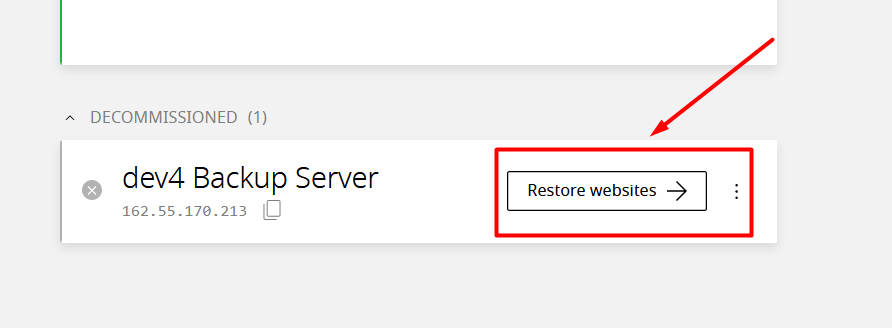
- In the Enhance control panel, navigate to your backup server settings.
- Click the three-dot menu and select Mark as Decommissioned.
- Confirm the action (this cannot be undone!).
- When the server appears in the ‘Decommissioned’ server group, select Restore websites. This will take you to the ‘Move server’ page with all the website on the decommissioned server preselected. From here you can select the new backup sever for the websites.
- Once migration to new backup server is done, delete the old backup server entirely.
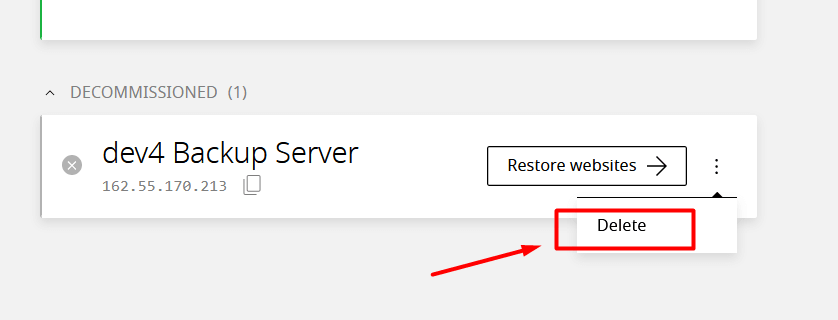
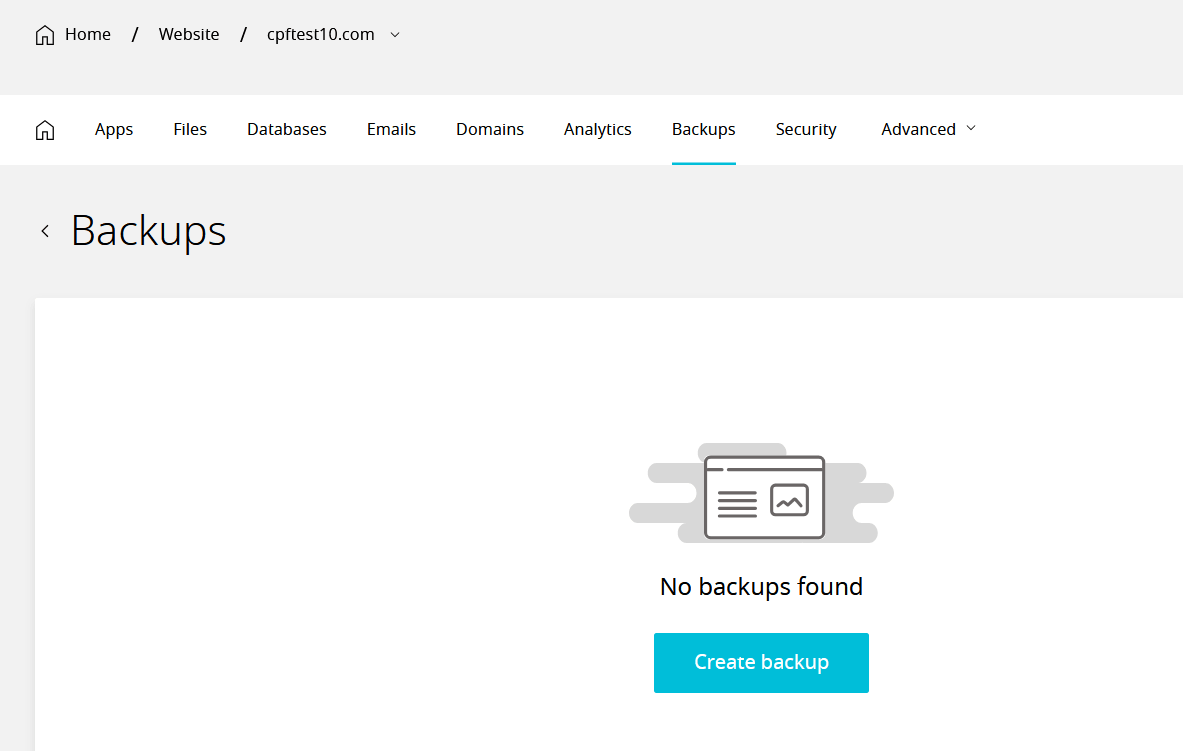
At this point, your old backup server is gone; the independent remote copy must still exist. If you check the Enhance UI, you’ll see that all backups are gone.
Step 5: Restore All Backups to the New Server
Here comes the fun part. Run the script on the new backup server, with REMOTE_SERVER still pointing to the independent copy. Preview with ./enhance_backup_sync.sh --restore --dry-run, then restore:
./enhance_backup_sync.sh --restore
This will:
- Restore all
snapshot-*,wip-snapshot-*, andcurrentsymlink. - Ignore all other system files (like .profile & .bashrc ..etc) to prevent breaking Enhance’s backup system.
- Copy the matching backup data to the new server. Restore mode processes every remote site directory; the site-selection arrays apply only to backup mode. It does not recreate local users or groups.
Step 6: Verify That Backups Are Fully Restored
Go back to the Enhance UI and check the Backups section. You should now see all your backups fully restored just as they were before.
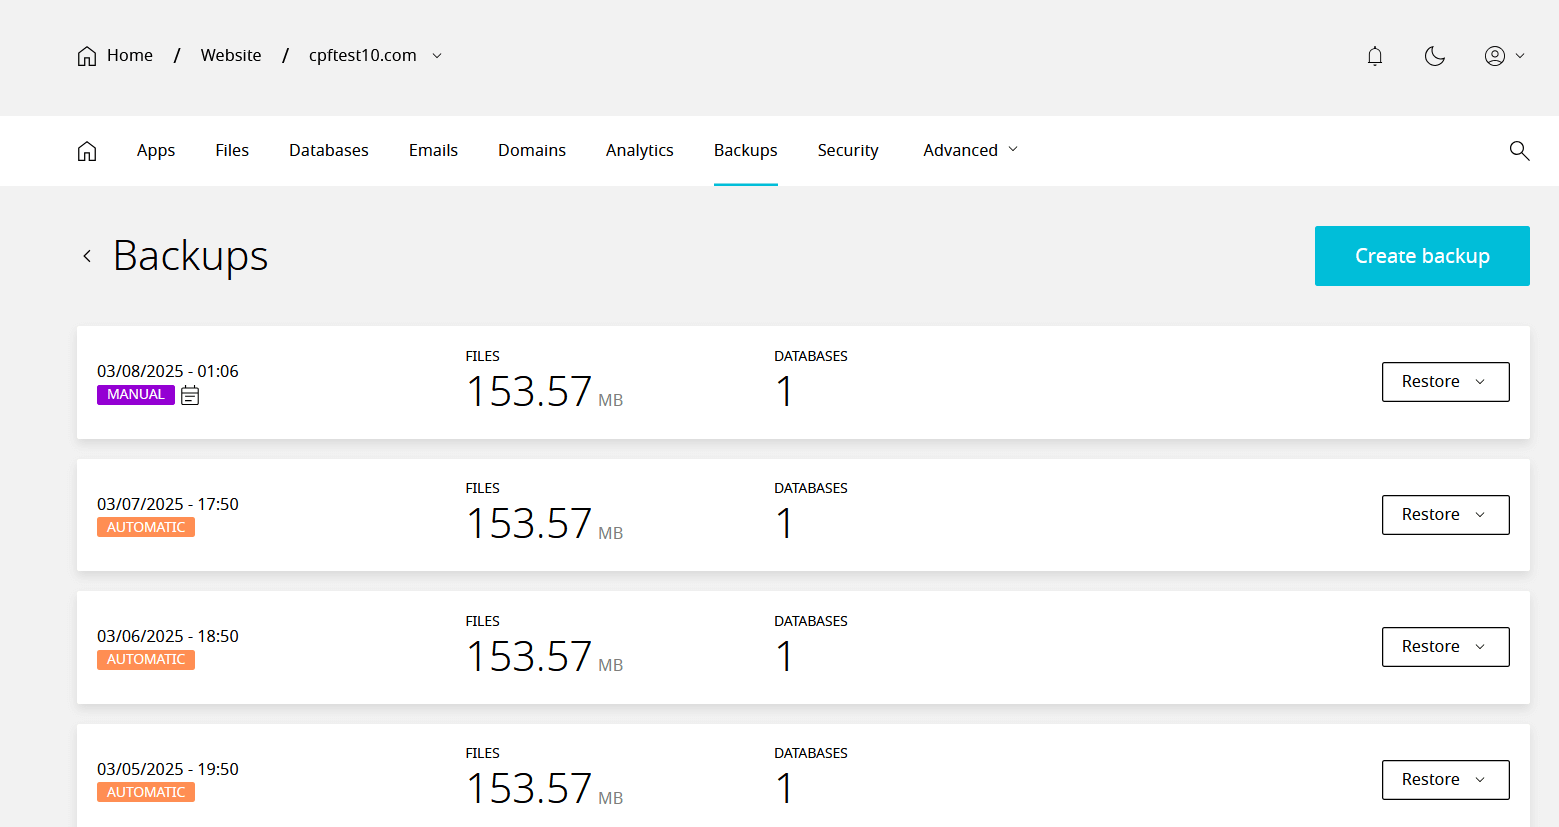
To confirm everything works:
- Try creating a new backup manually—it should save successfully.
- Restore a previously deleted website backup—it should restore without issues.
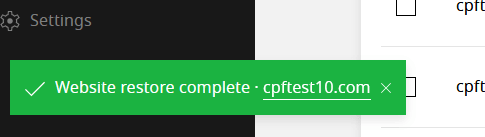
Once a new backup and a restore both complete successfully, you have checked the recovery path for your setup. The original result screenshots illustrate that check; verify your own jobs and restored website before calling recovery complete.
Conclusion
Disasters happen, but losing your backups shouldn’t be one of them. With this script, you can confidently:
- Backup your Enhance v12 backups securely to a remote server.
- Rehearse decommissioning and replacing your backup server.
- Check your restored backups and website recovery.
The original walkthrough recorded a successful recovery. Repeat the rehearsal for your own setup before relying on it in an emergency.
Ready to prepare your Enhance backup recovery plan? Download the script and start protecting your hosting infrastructure today.
Backups and protection belong together
Keep your recovery copies ready, and add cPFence v4+ protection to your Enhance servers.
Start free trial