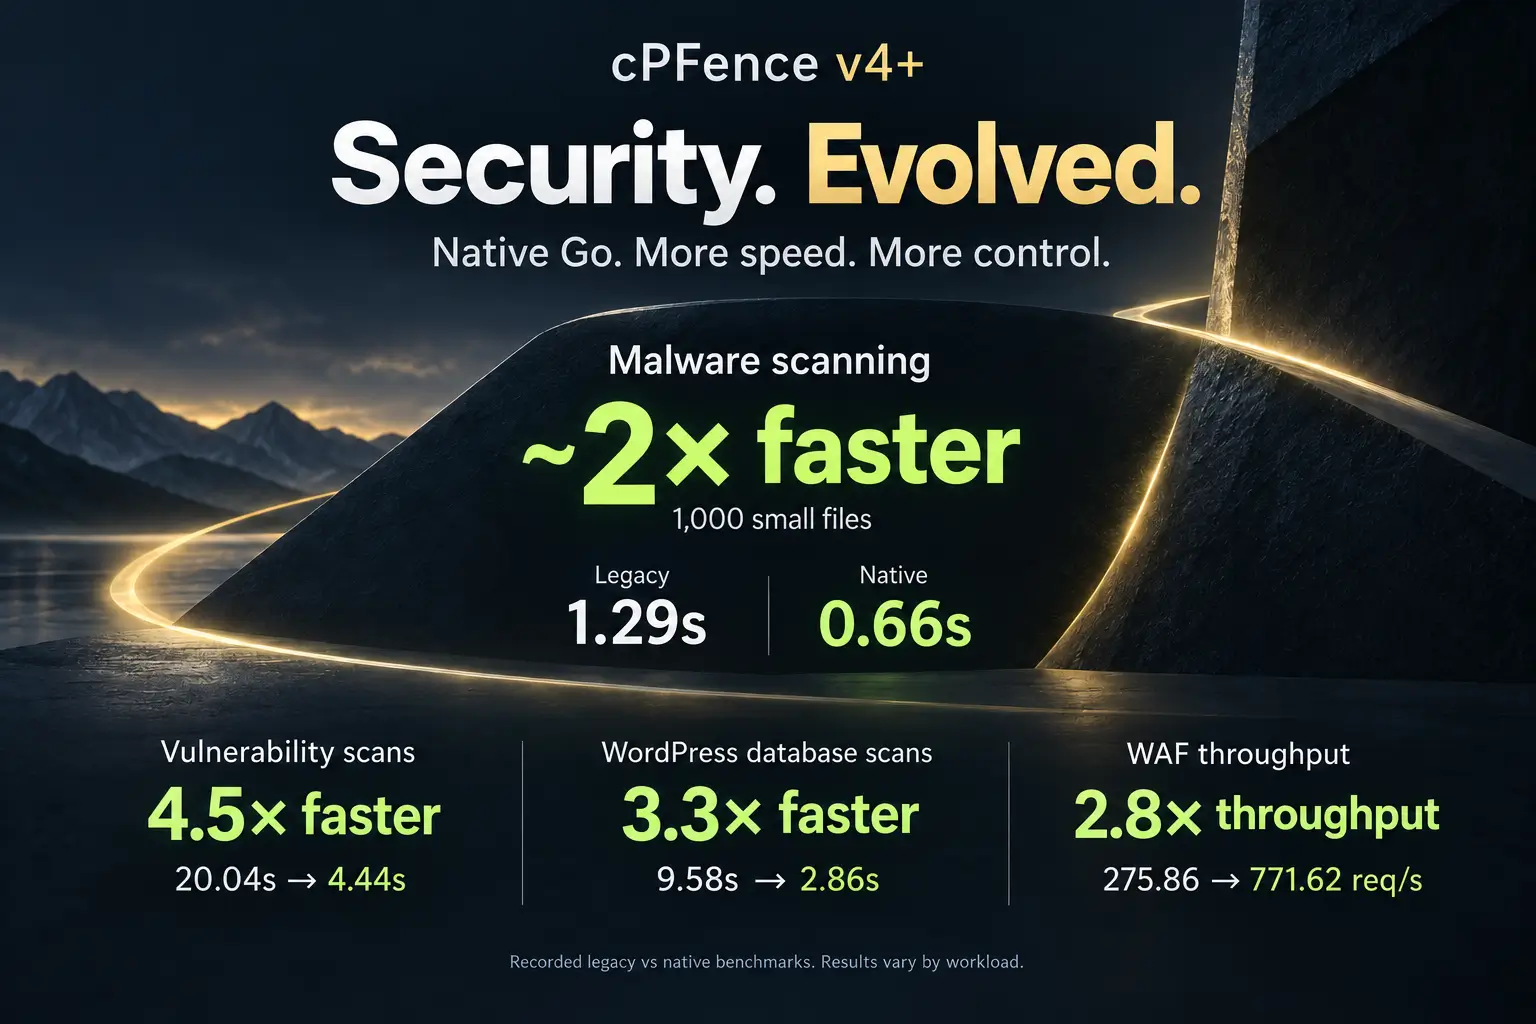
The cPFence Central Dashboard is Here – One Panel. Full Power.

Now Live: Meet the New cPFence WebUI — One Dashboard to Rule Them All!
The wait is finally over. After months of development and feedback from our community, we’re excited to introduce the cPFence Central Dashboard – your single, unified interface to effortlessly control, secure, and monitor all your servers and WordPress sites from one powerful panel. Simplify your workflow, boost efficiency, and take total command with ease. Welcome to the future: One Panel. Full Power.
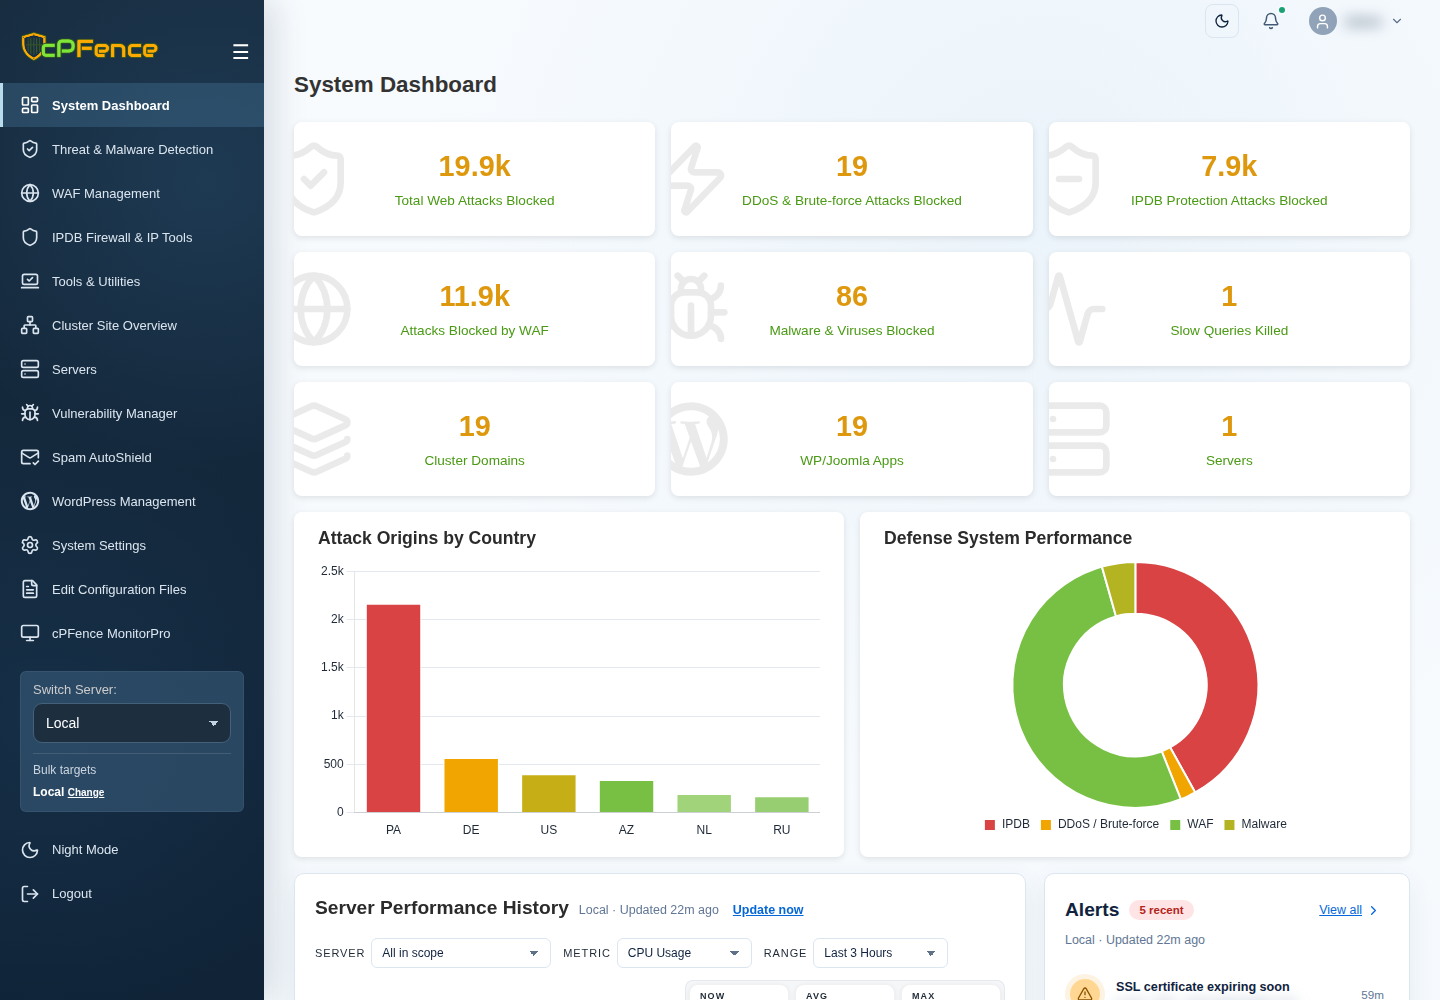
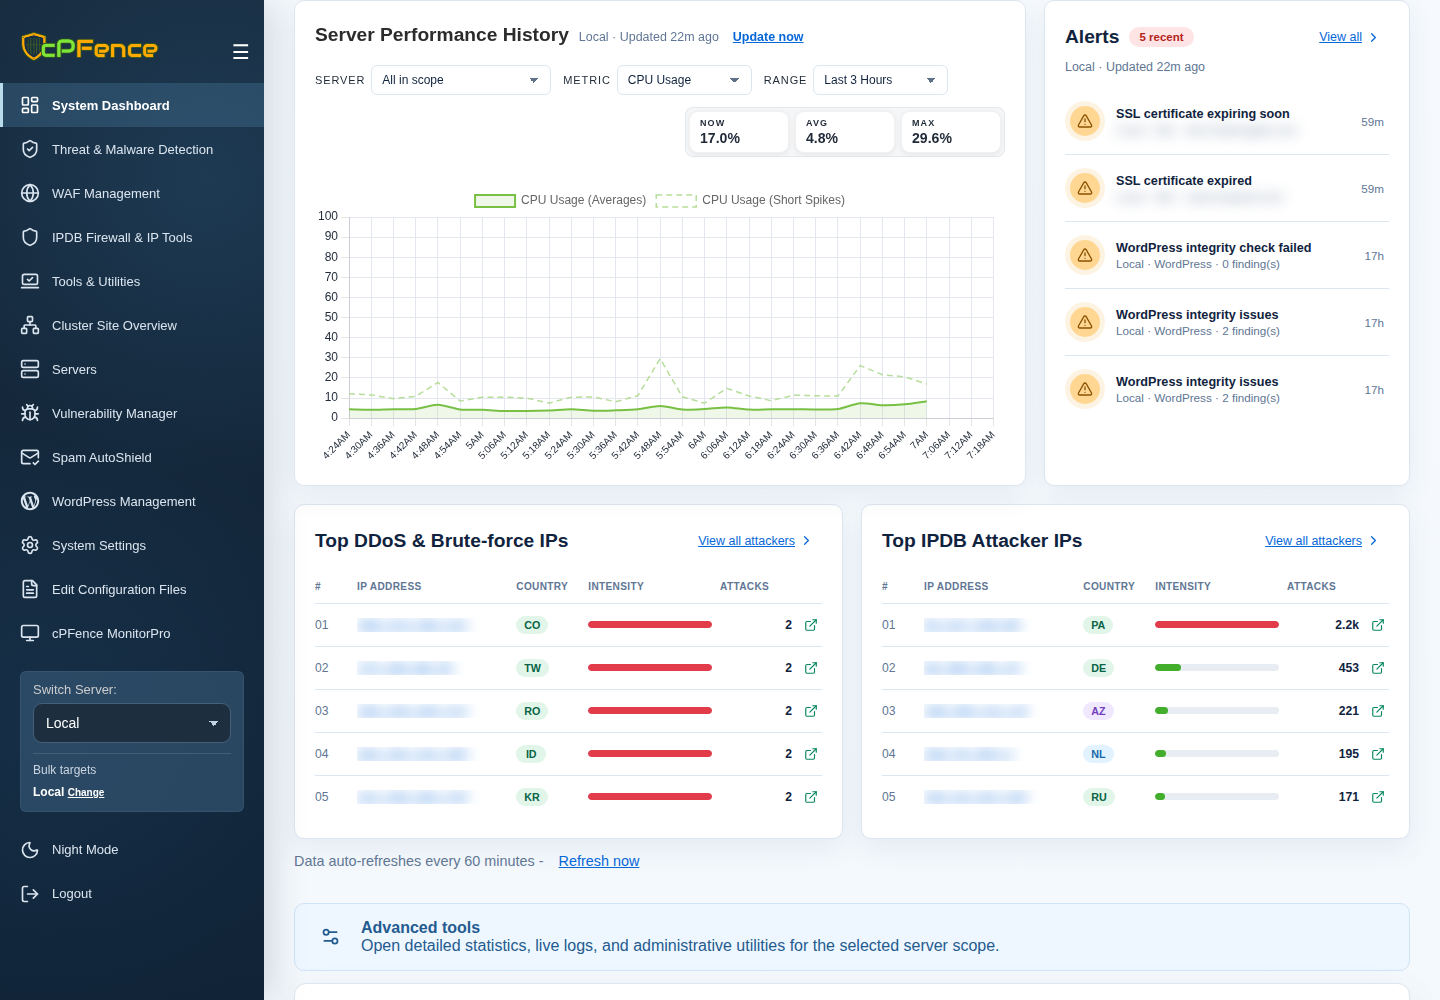
Gone are the days of hopping between servers, drowning in SSH sessions, and wrestling with tedious WordPress admin tasks. cPFence WebUI transforms server management into an effortless, unified experience. Whether you’re managing a single VPS or hundreds of WordPress sites across a sprawling cluster, your life is about to get a whole lot simpler.
What’s All the Buzz About?
Here’s why our clients are loving the new WebUI:
- One Dashboard, Full Control: View real-time security metrics, monitor malware detections, and handle all your servers from a single, sleek dashboard.
- Look Back, Dig Deeper: Use Server Performance History to spot trends, then inspect retained alerts and incident details instead of relying on a single snapshot. Owl keeps roughly 30 days of history by default.
- Bulk Power: Update WordPress core, plugins, and themes, install plugins or security tweaks, disable risky functions, and perform server tasks—all in bulk. One click now equals hours saved.
- Mobile Magic: Manage your entire infrastructure from your smartphone or tablet. Yes, real-time malware scanning and security management from your favorite café or your comfy couch.
- Zero Hassle Setup: Already using cPFence? Just enable the WebUI, whitelist your IP, and you’re set. No complicated installations or headaches.
- Built-In Security: Fully secure with robust password protection and strict IP whitelisting. Your data stays on your server, safe and private—fully GDPR compliant.
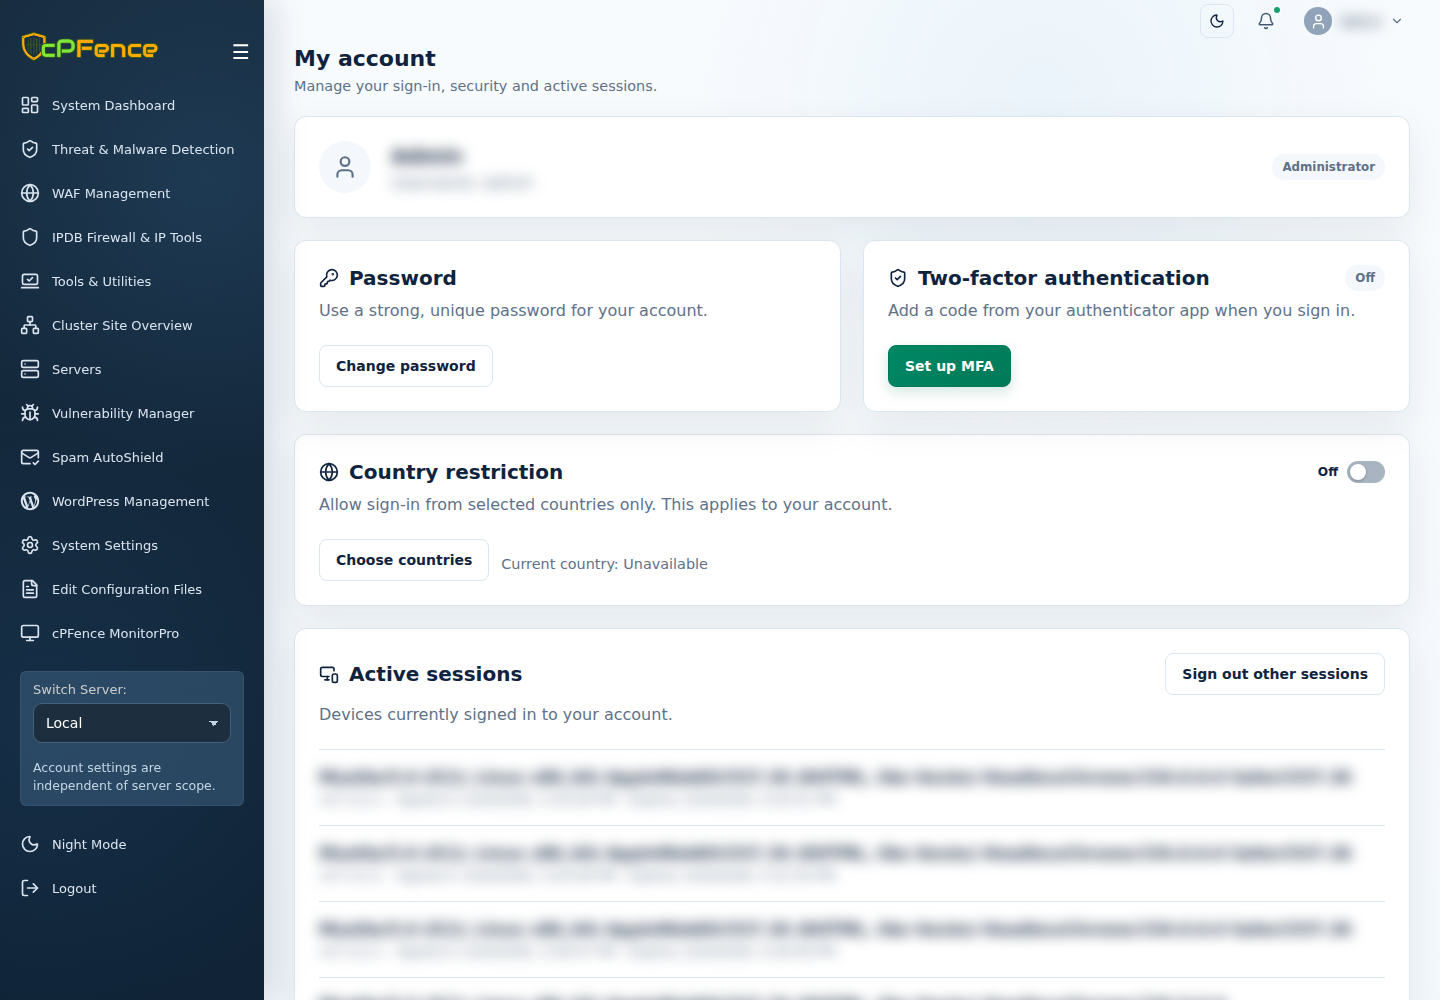
- Safer Team Access: Turn on MFA, restrict countries and review active sessions in My account. Give support staff their own accounts with allowed servers and operation permissions—no shared admin password needed.
It’s Bulk, or Bust!
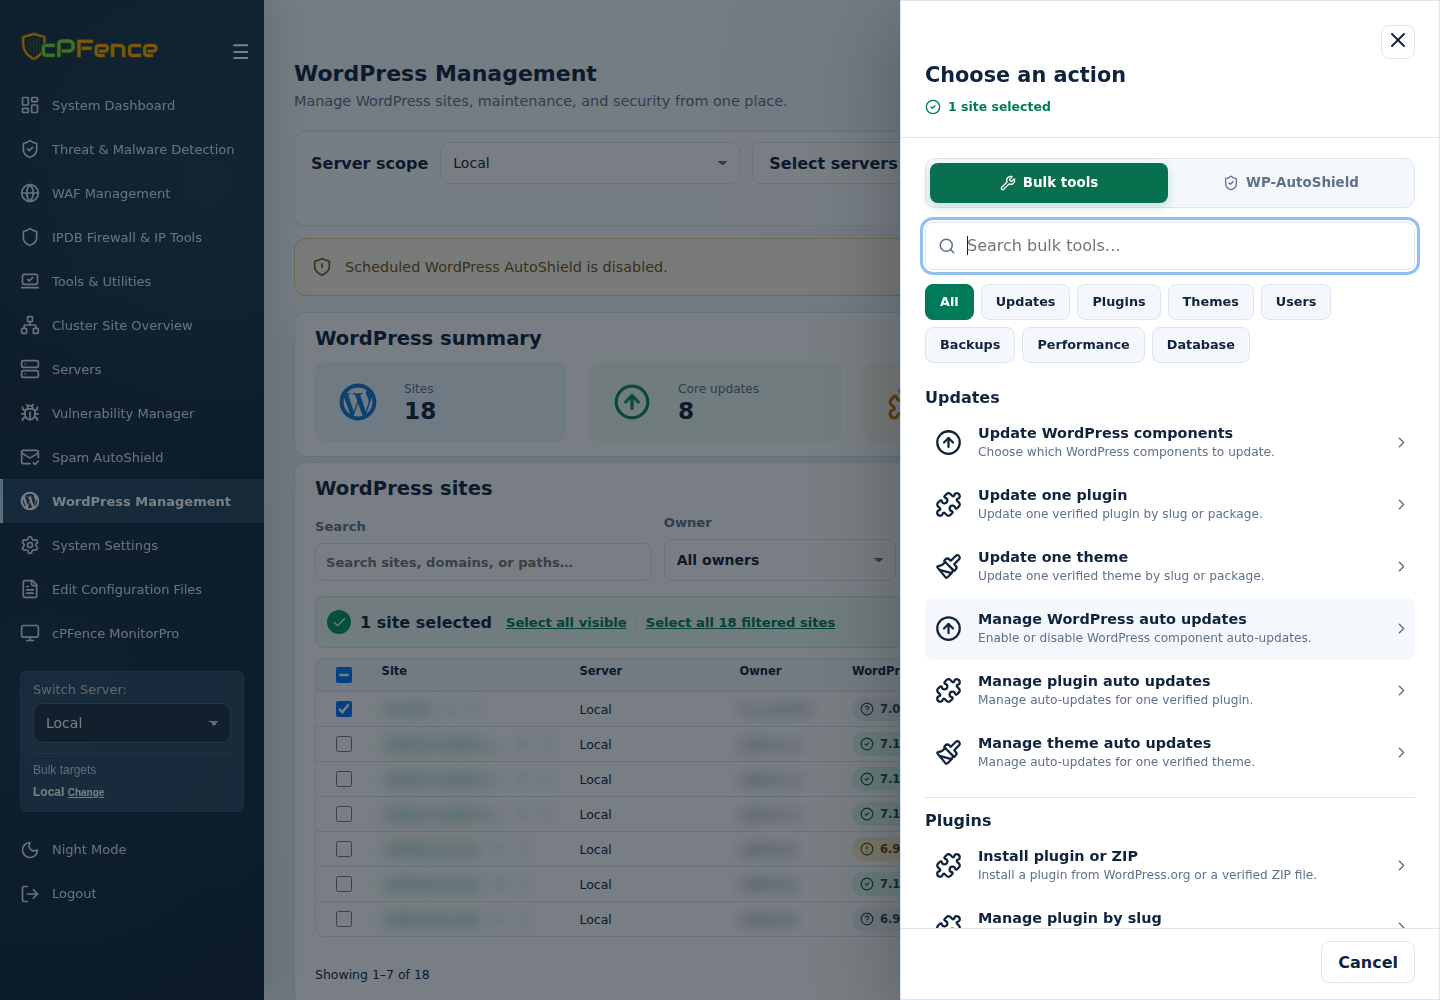
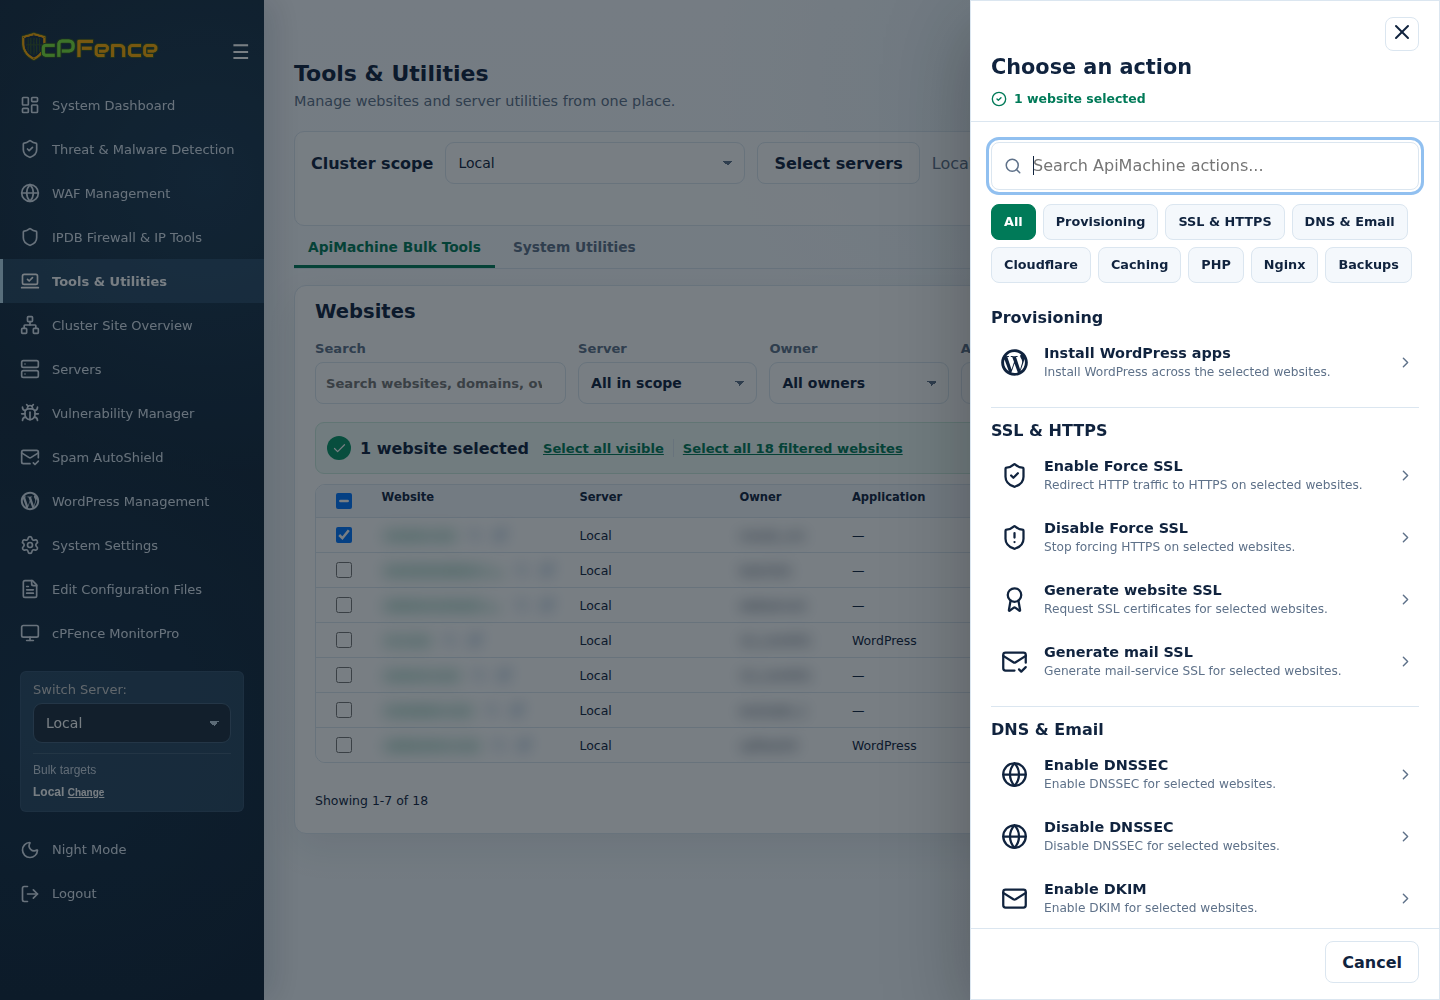
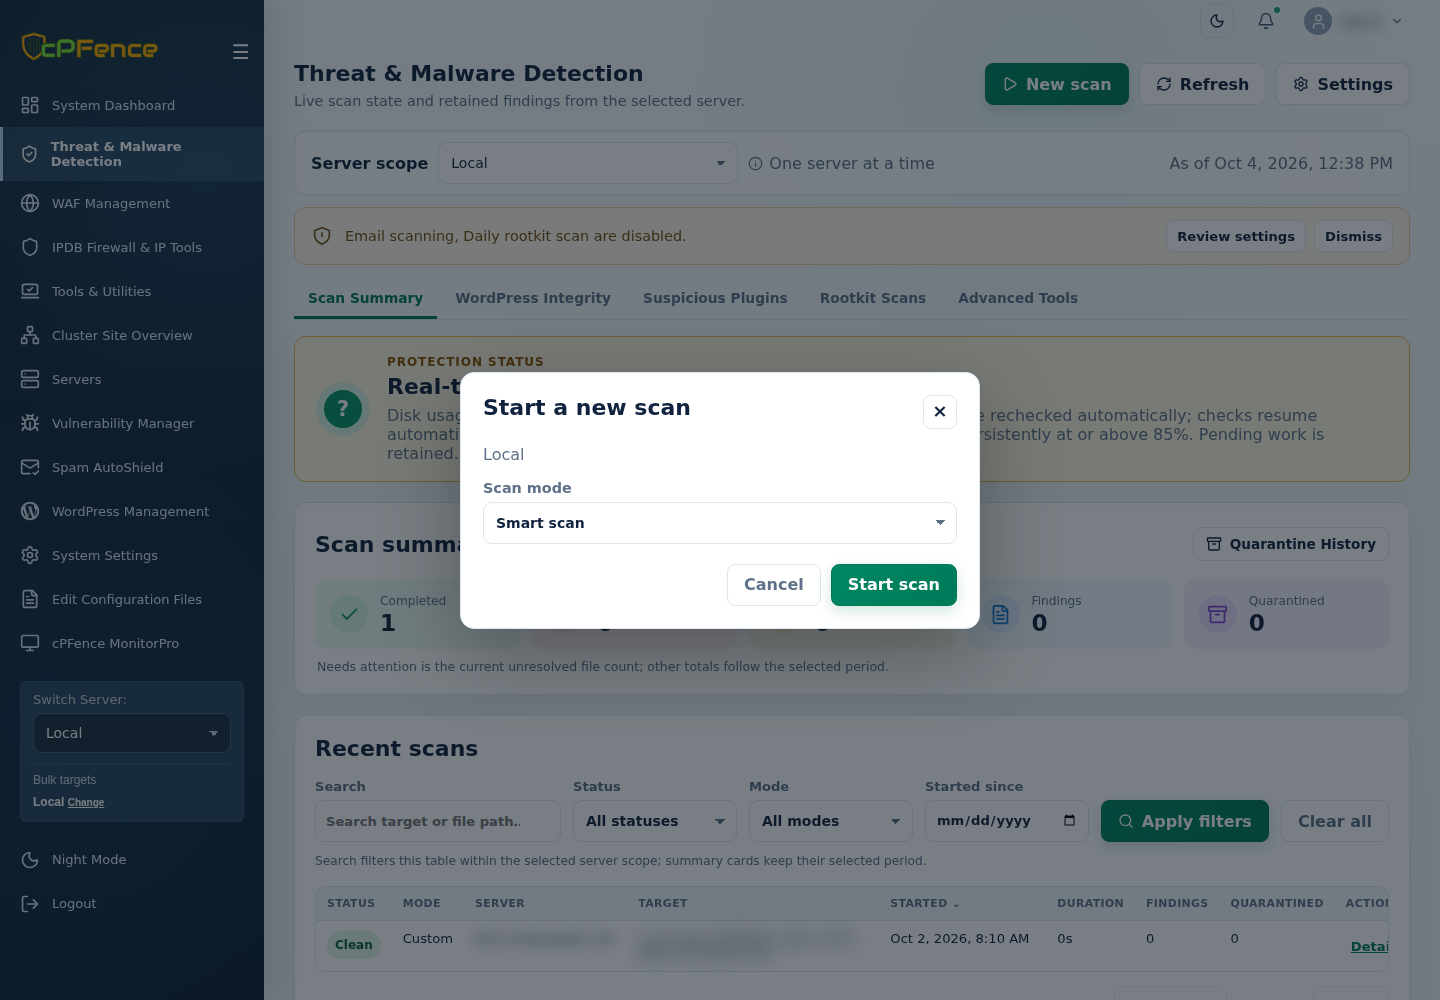
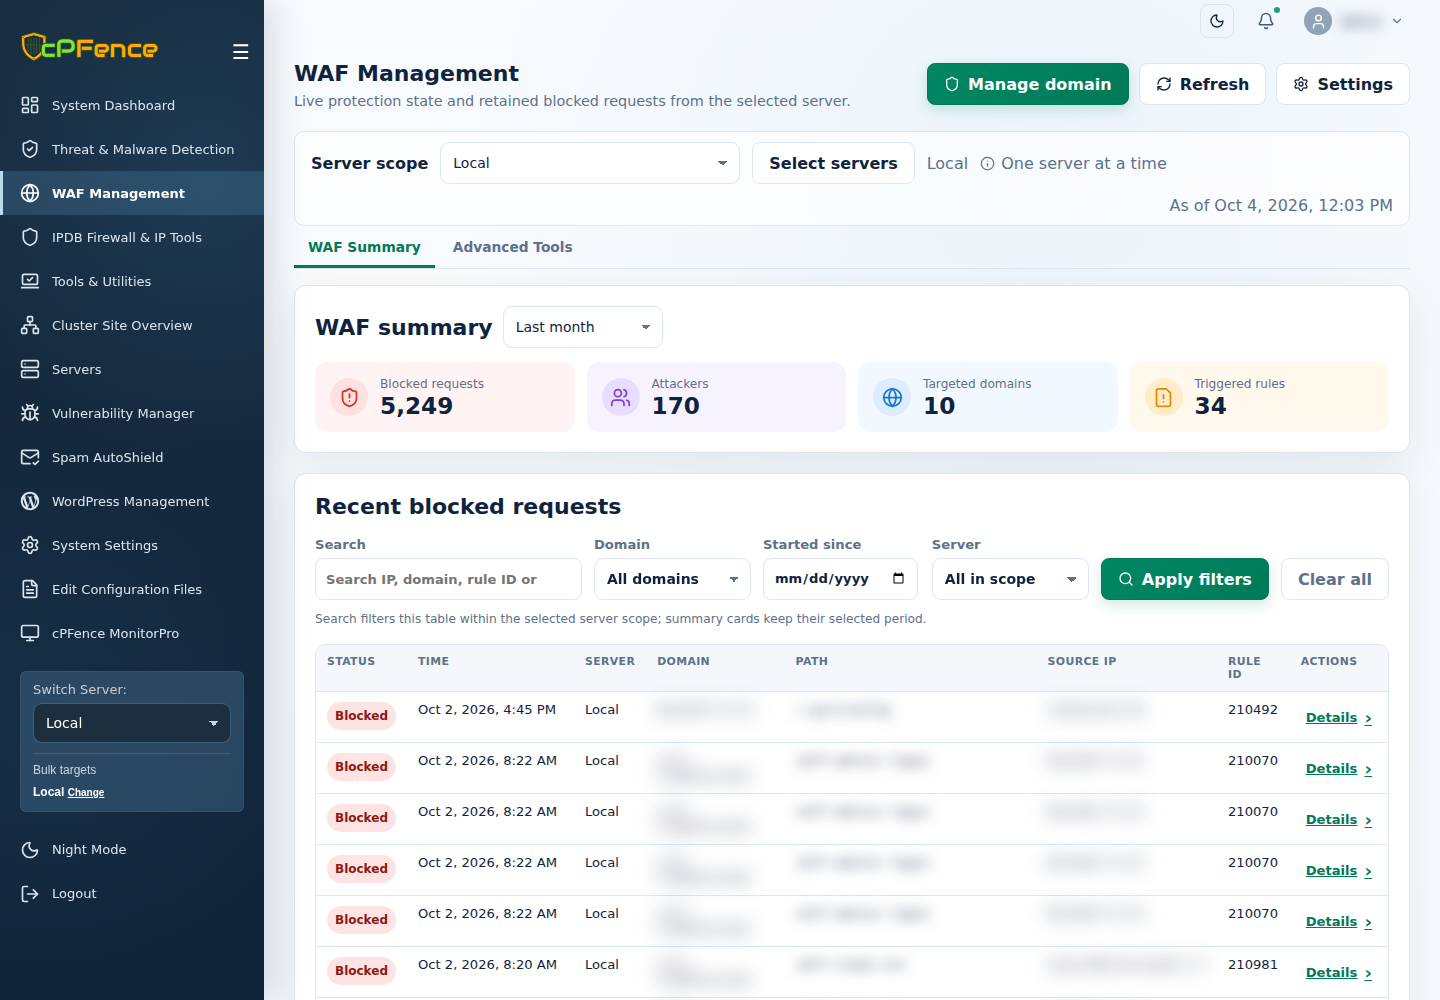
We’ve packed the new WebUI with the full power of cPFence’s security automation — now available in bulk across all your servers and WordPress sites. All the features below can be run on a single server, across your entire cluster, or just on selected sites — your choice, full control!
- Bulk WordPress Hardening: Disable file editing, XML-RPC, pingbacks, and XSS in posts. Set secure permissions, enable idle logout, and enforce critical security tweaks across your entire cluster.
- Bulk Malware Detection: Instantly scan all WordPress files and databases for known malware signatures — clean up infections in one click.
- Bulk Vulnerability Management: Export detailed vulnerability reports for every server, then act on them directly from the dashboard.
- Bulk SSL & Mail SSL Generation: Generate SSL certificates for all domains and mail services, force HTTPS, or disable it—all at once.
- Bulk Redis Caching: Enable or disable object caching via Redis across all sites with a single toggle.
- Bulk DKIM & DNSSEC Configuration: Secure your outbound mail and domain zone integrity cluster-wide.
- Bulk WordPress Management:
- Update core, plugins, themes, and translations.
- Back up all sites.
- Install or remove plugins (including blacklisted ones).
- Switch language settings.
- Configure LiteSpeed Cache and Redis support.
- Restore WP core files or run due WP cron jobs.
And that’s just scratching the surface, with 60+ more bulk tools designed to simplify your workflow!. From hardening to housekeeping, you now have the tools to lock down and streamline your entire hosting operation—without touching a single terminal.
Want another layer against threats that try to stick around? cPFence v4+ also offers scheduled persistence checks for cron jobs, shells, wp-config.php and plugins. As root on the server you want to protect, use cpfence --enable-persistence-protection; cpfence --persistence-protection-run requests a check now. Read the final output rather than treating a submitted request as a clean bill of health.
How to Get Started (Easy, we promise!)
Before you begin:
Enable the WebUI using the following command on your main control panel server:
cpfence --enable-webui
Note: This only works on the main control panel. You need an active license on that server for the WebUI to run.
Keep access tight from day one. As root on the main control panel server, add your actual public IP before enabling the WebUI IP restriction, so you don’t lock yourself out:
cpfence --add-webui-ip YOUR_PUBLIC_IP
cpfence --enable-webui-ip-restriction
This is the WebUI access list, not a replacement for your hosting-provider firewall. Once logged in, open My account to set up MFA and keep its recovery information safe; see account security and recovery.
Step 1: Log into your cPFence Central Dashboard
- Open the HTTPS address printed by the command, on port
9095. - Username:
admin - Password: Follow the setup prompts; an existing password is retained.
(To reset:cpfence --reset-webui-pass)
Step 2: Check your servers
Open Servers to review automatic secondary-server enrollment and connection status. There is no servers.txt list to edit for the v4+ WebUI.
Step 3: Choose what you want to manage
Use the sidebar server selector for your dashboard view. For WordPress, open WordPress Management, choose the server scope, select your sites, then open Choose action. Review the targets before confirming and check the final results.
Step 4: Check your provider firewall
Allow TCP 9095 on the main control panel server for WebUI access. On every secondary server, allow TCP 9096 from the main control panel server’s IPs. cPFence manages the required server-local rules; configure the hosting-provider firewall separately.
Read More : How to Secure SSH While Allowing cPFence WebUI Access?
Common Issues
1. Can’t Connect Your Servers to the WebUI?
Open Servers and inspect the affected secondary server’s connection status. Confirm cPFence v4+ is installed on it and its provider firewall allows TCP 9096 from the main control panel server’s IPs.
Normal cluster communication no longer depends on passwordless SSH. It is still needed for remote WordPress backups and MultiRun.
2. Sudo users not supported
You must use the root user. Running cPFence WebUI via sudo users is not supported at this time.
3. SSH access for backups and MultiRun
For these SSH-based tasks, set up passwordless root access from the main control panel server to the intended secondary servers. Follow the linked SSH guide rather than changing SSH settings to connect ordinary WebUI pages.
4. IPv6 access issue
Check that your provider firewall allows WebUI access on TCP 9095 for the address family you use. Open the HTTPS address printed during WebUI setup; do not edit the retired allowed_ips.txt file.
5. Accessing WebUI While Behind Cloudflare
If your main control panel is behind Cloudflare, port 9095 might be blocked. To access the WebUI, use the server’s direct IP address instead:
https://your-server-ip:9095/
6. WordPress App Count Is Zero or Incorrect
Open WordPress Management, confirm the server scope, and select Refresh to reload its saved site list. If a secondary server is unavailable, inspect its connection in Servers. Use the WebUI’s site-list generation tool when discovery needs updating, instead of the retired collector script and copied log file.
7. VPS or Server Provider Firewall Blocking Port 9095
If your WebUI works locally but is unreachable from other servers, your VPS or hosting provider may be blocking inbound connections on port 9095. This is common with some providers who restrict non-standard ports by default.
To verify that the WebUI is working locally on the server, run this command:
curl -k -I https://127.0.0.1:9095/
If it responds with HTTP headers, the WebUI is running. If it times out externally but works locally, the issue is likely a provider-side firewall.
Log in to your provider’s control panel and look for firewall, security group, or network rule settings. Ensure TCP port 9095 is allowed for inbound traffic, either globally or from the specific IPs you need.
Note: If you’re using cloud infrastructure providers such as AWS, Azure, GCP, DigitalOcean, Linode, or Vultr, make sure to explicitly allow inbound traffic on port 9095 in the cloud firewall or security group associated with the server.
If you don’t find any such option or the issue persists, contact your provider to confirm whether port 9095 is blocked at the network level.
Ready to revolutionize your server management?
Experience the power of the new cPFence Central Dashboard — streamline your workflow and take full control in just a few clicks.
Start free trial