
Installation guide and quick start
Follow these steps to install cPFence v4+ and prepare your Enhance cluster.
Before you start
Section titled “Before you start”- Enhance must already be installed on Ubuntu 22.04 or 24.04.
- Use root and a valid cPFence license for each server.
Already using v3? Follow Migrate from v3.
1. Get your license
Section titled “1. Get your license”Sign in to the client area and retrieve your license key and installation command. Choose a billing model if you need a new license.
2. Install cPFence
Section titled “2. Install cPFence”Start with the main control panel server. Replace YOUR_LICENSE_KEY with your key and run:
bash <(curl -ks https://api.cpfence.app/v4/install.sh) -k YOUR_LICENSE_KEYA new installation needs the -k key. Without it, the installer stops before changing anything and shows the command to use.
To repair a server that already runs v4, run the installer without a key and choose Back up and reinstall, keeping settings and data:
bash <(curl -ks https://api.cpfence.app/v4/install.sh)3. Check the installation
Section titled “3. Check the installation”The installer handles setup automatically. Wait for Installation completed successfully. and read its license, protection, update, and configuration notices.
cpfence --statuscpfence --show-statsConfirm an Active license and review protection status. Fresh installations enable firewall, WAF, website real-time protection, WordPress AutoShield, Owl AutoMySQL, and automatic software updates. Website auto-quarantine and mailbox scanning start off.
To follow current protection logs, use:
cpfence --monitor-ipdb-blockscpfence --monitor-owl-logsRun one stream at a time; Ctrl-C closes it without disabling protection.
4. Set up email notifications
Section titled “4. Set up email notifications”Set your notification address on each server:
Replace the example address with your own. If mail does not arrive, configure SMTP:
cpfence --enable-cpfence-smtp5. Allow your cluster IPs
Section titled “5. Allow your cluster IPs”cPFence automatically includes the Enhance cluster addresses in the main control panel server’s IPDB allow list. Check the secondary servers too; they do not receive that cluster list automatically.
For a quick list of commands, run this helper on the main control panel server:
bash <(curl -ks https://api.cpfence.app/whitelist_your_ips.sh)The helper displays addresses and commands; it does not apply them. Review the IPv4 and IPv6 entries, then run the generated cpfence --add-whitelist-ip commands on each secondary server that needs them. Repeat this review when cluster addresses change. For browser-based controls, see IP allow lists.
6. Review the recommended modules
Section titled “6. Review the recommended modules”These controls enable WordPress protection, eligible MySQL query limits, and website monitoring:
cpfence --wp-autoshield-oncpfence --owl-automysql-oncpfence --monitorpro-onWordPress AutoShield and Owl AutoMySQL already default On; MonitorPro defaults Off. Review each server’s role and settings before enabling them. AutoMySQL can terminate eligible long-running queries.
See WordPress protection, Owl AutoMySQL, and MonitorPro for policy, exclusions, and monitoring domains.
7. Run your first full scan
Section titled “7. Run your first full scan”cpfence --full-scanAllow the scan to finish, then inspect results. Large servers can take considerably longer than installation.
8. Configure quarantine and integrity checks
Section titled “8. Configure quarantine and integrity checks”After reviewing the initial results and keeping recovery backups, enable the recommended actions:
cpfence --enable-quarantinecpfence --enable-integrity-checkcpfence --enable-auto-file-actioncpfence --set-check-frequency hourlyAuto-quarantine moves detected website malware into quarantine. Integrity monitoring checks WordPress core; automatic file action can quarantine unexpected files and repair eligible core files. Hourly increases the integrity schedule from its daily default. Review exclusions and verify site health after actions. These controls do not enable mailbox quarantine.
9. Open the WebUI
Section titled “9. Open the WebUI”On the main control panel server only, with an Active license, run:
cpfence --enable-webuiFollow the password prompts, then open the printed HTTPS address on port 9095. Sign in as admin with your new password. An existing password is retained.
Open Servers. Secondary servers connect automatically after v4 installation. Select Details to check Cluster identity verified and the connection status.
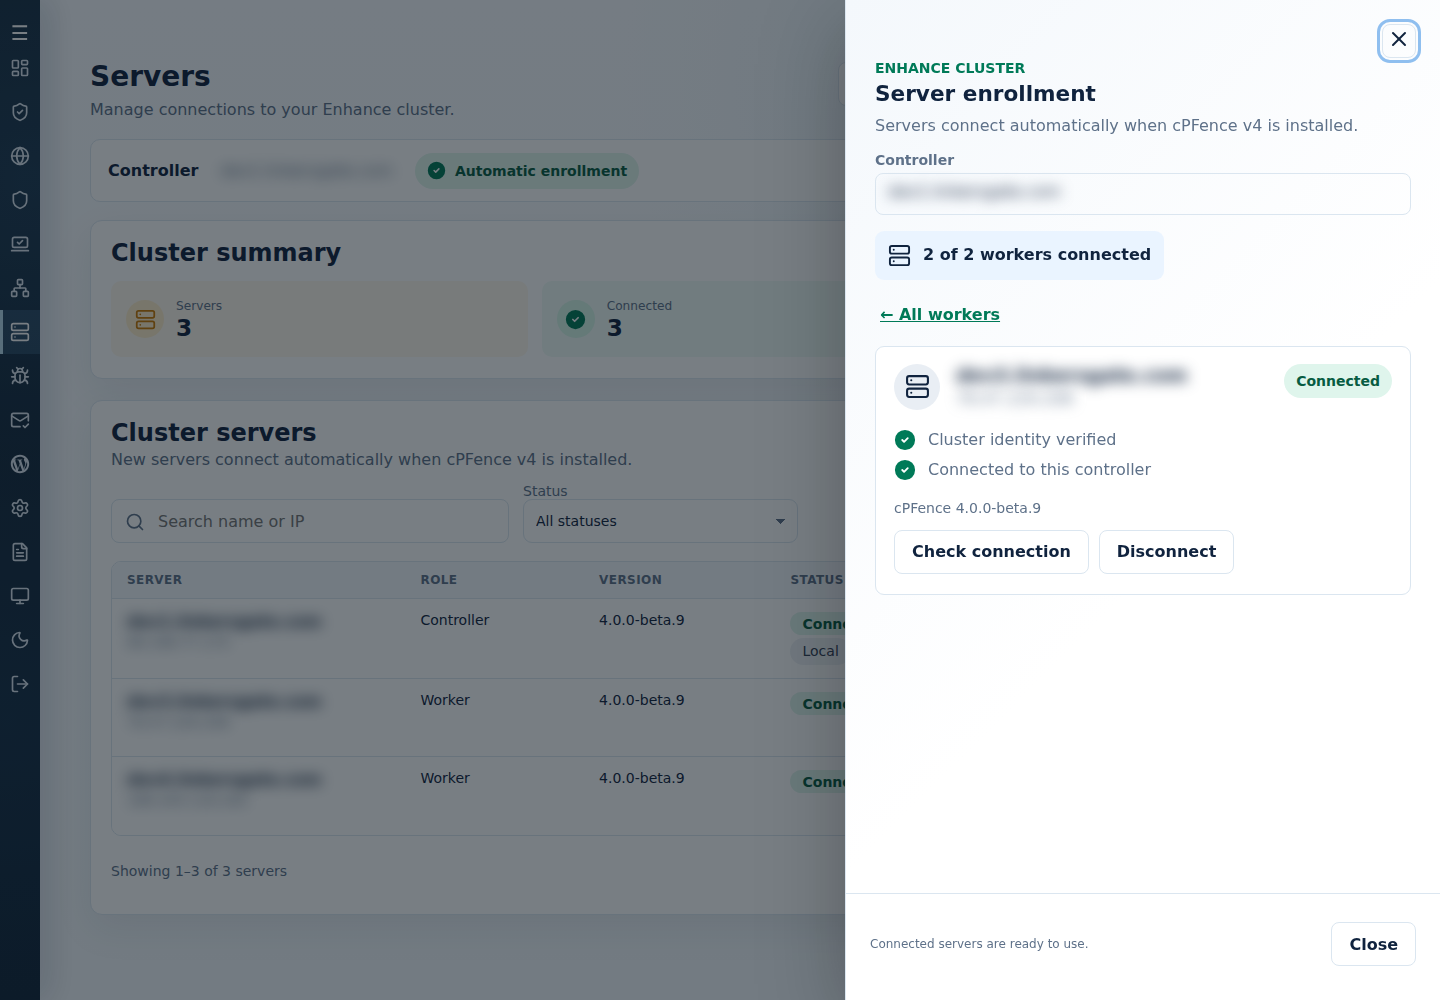
Start with Local in System Settings. Open My account to set up MFA and save recovery codes.
Need help?
Section titled “Need help?”- License not accepted or inactive: check the key, then run
cpfence --install-license cPFence-XXXXXXXXXXXXXXXX, replacing the placeholder with your key from the client area. cPFence stays installed when the installer cannot accept the key. See license activation. - Dashboard unavailable: check the printed HTTPS address, port 9095, and approved-IP restrictions before opening a support ticket.
- Forgot the admin password: run
cpfence --reset-webui-passon the main control panel server. - Secondary server unavailable: follow connection troubleshooting.
- Installation stopped: follow its error. The private log is
/var/log/cpfence-v4-install.log.
Continue with System Settings and configuration files. For wider Enhance setup advice, see 20 Tips to Set Up Your Enhance Server Like a Pro.