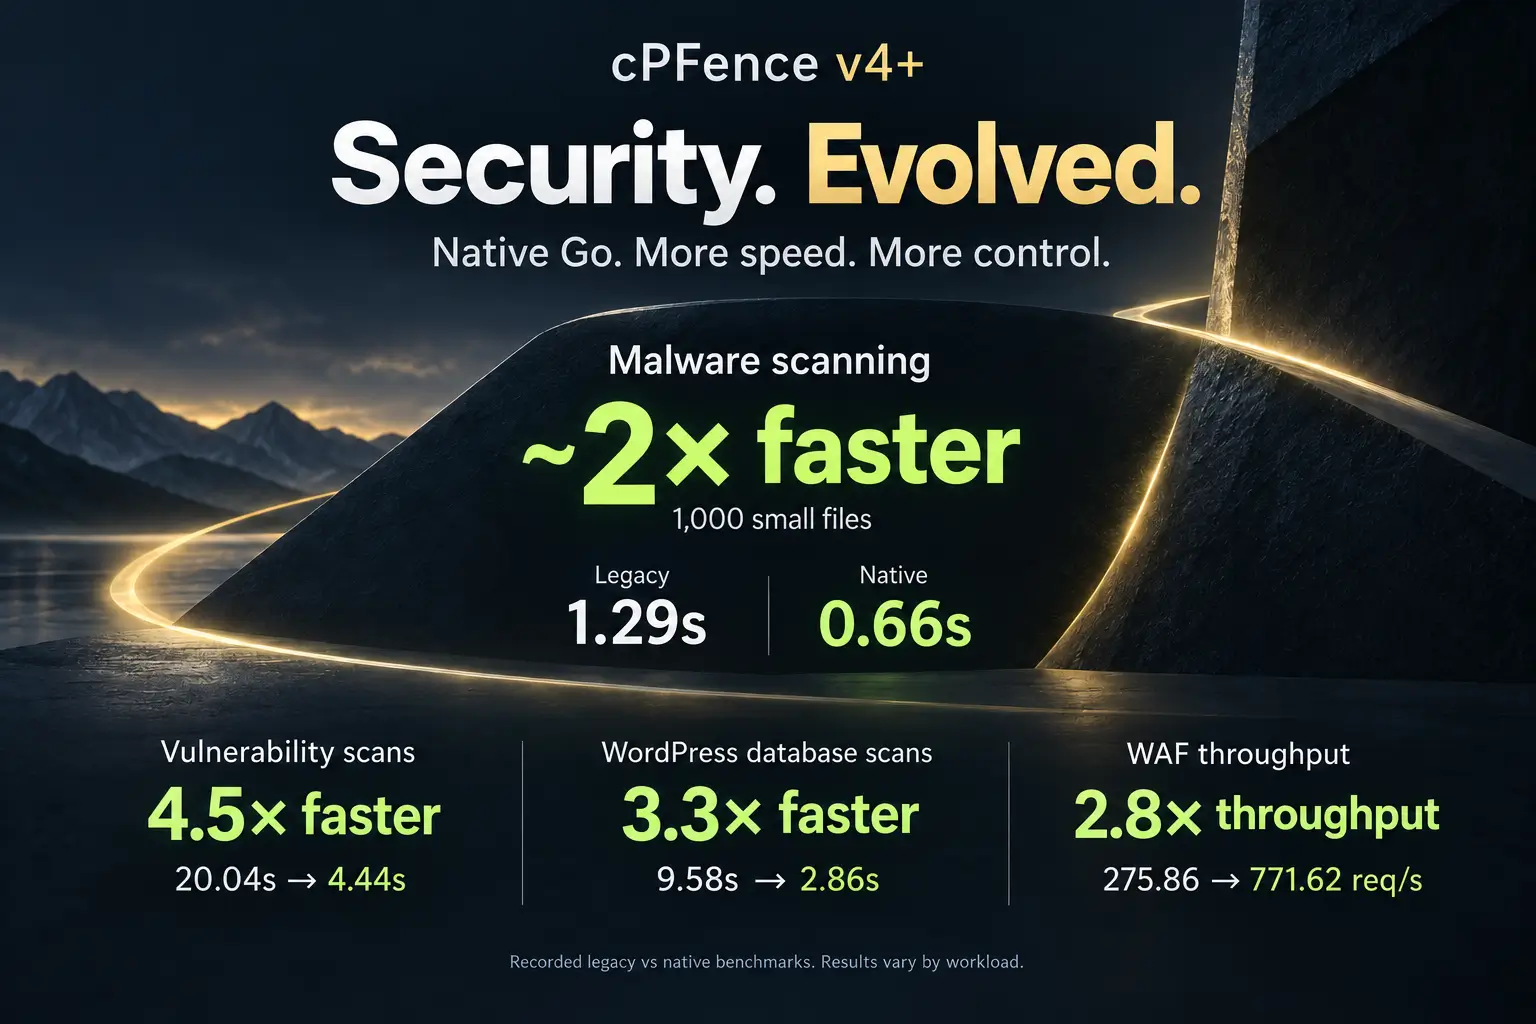
Spam AutoShield®: Total Server-Wide Spam Control for Enhance Servers

Seeing new and exclusive modules pop up in cPFence has become a habit for our clients—because we just keep shipping. While others are playing catch-up, we’re focused on giving server owners real tools to solve real problems. Today, we’re proud to announce our latest: the Spam AutoShield module. This powerful new addition is built to give you total spam control across your entire Enhance server environment, without breaking a sweat.
In our previous post, we covered how to upgrade Rspamd to the latest version and activate the WebUI for manual training and inspection. That’s great for power users—but let’s face it, most admins don’t have time to babysit spam filters every day.
This is where Spam AutoShield steps in.
Update – 20 Oct 2025:
Spam AutoShield is now fully operational from the WebUI and supports blocking and whitelisting by ASN.
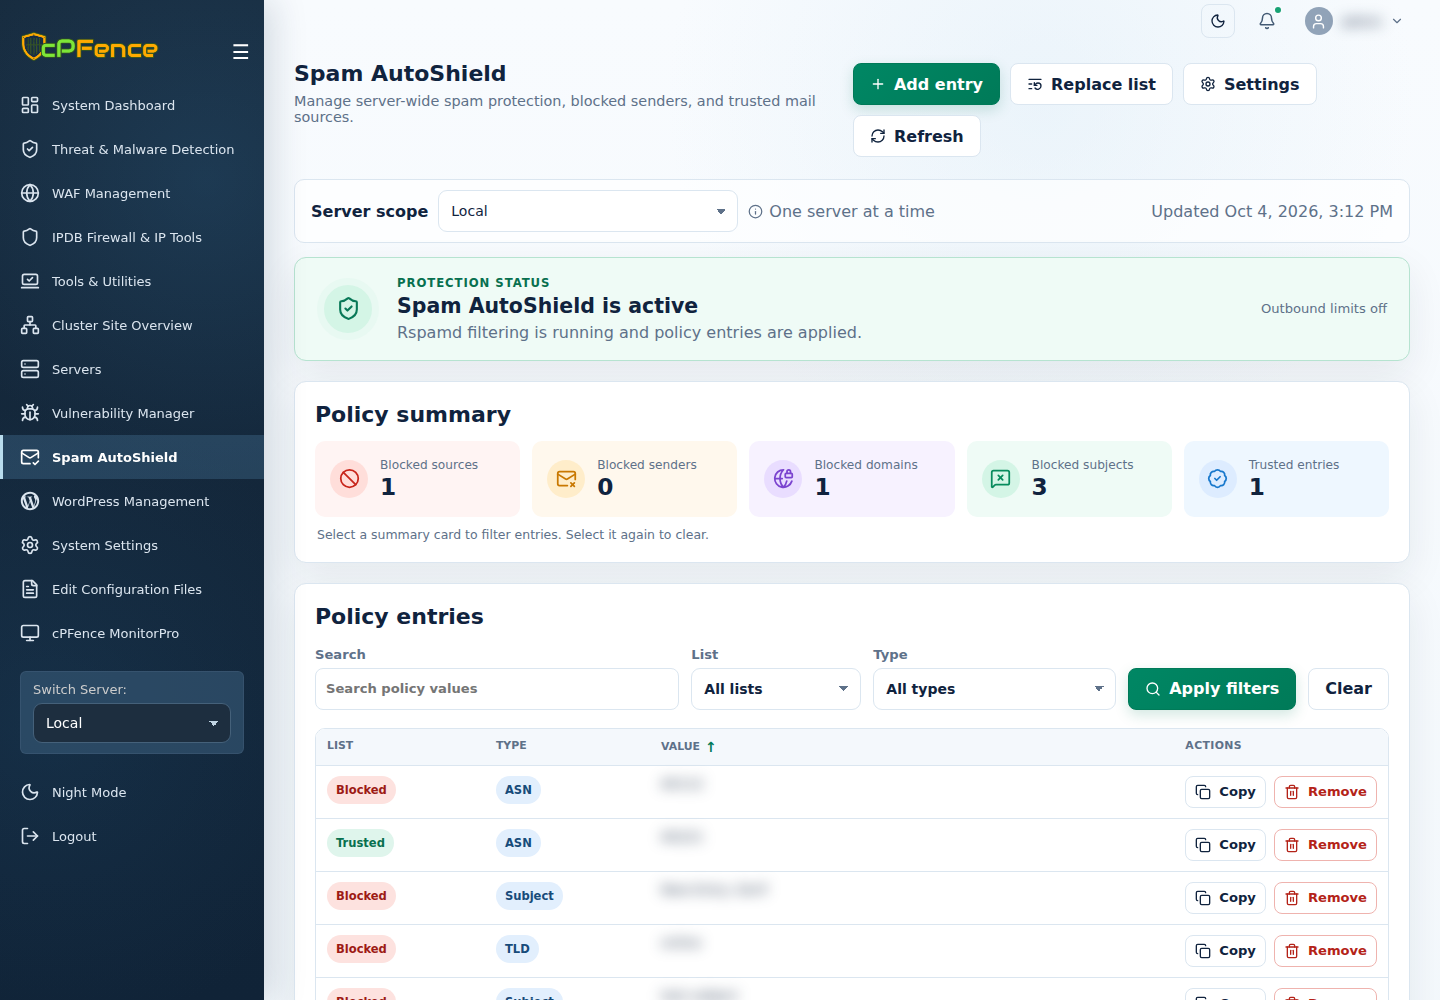
Getting Started Is Instant—and Powerful
One of the strongest points of Spam AutoShield is how quickly you can go from “default setup” to “fully optimized spam defense.” No complex guides, no hours of manual tuning. In cPFence v4+, open Spam AutoShield, choose one Server scope, then open Settings. Review Apply actions to before using Turn on, Apply recommended configuration and Train spam filter. Review and confirm each intended action separately, then read every target’s final output. Training requires spare resources; keep custom mail configuration backed up.
Behind the scenes, Spam AutoShield does the heavy lifting:
- It auto-configures the tricky parts of your mail server for optimal filtering.
- It trains Rspamd with the curated spam dataset to strengthen detection. Allow the job to finish and inspect its output; starting training does not mean it has completed.
- It gets your entire server ready for serious spam control—without you writing a single custom rule.
Curious how much smarter Rspamd became? Run:
rspamc stat
You’ll see a significant jump in the Total learns, and even more in your inbox quality.
And that’s just the beginning—Spam AutoShield gives you the tools to take full control of spam filtering across your entire server, with precision and ease. Let’s break them down.
Advanced Spam Blocking Tools Explained
These tools can be accessed quickly through Spam AutoShield → Add entry in the cPFence v4+ WebUI. Choose Block, select the matching Entry type, enter its Value, and review Apply to before confirming Add blocked entry. For the email examples below, choose Incoming email. Check every target’s result, then refresh the selected server’s policy. To unblock an entry, find it with Search, List and Type, then use its Remove control and review the confirmation. The CLI examples below remain available.
Run CLI alternatives as root on the mail server you intend to change; their policies affect that server, not the whole cluster automatically. Replace the example values with your real targets.
Block by Sender IP
Example:
cpfence --add-spam-autoshield-ip 123.123.123.123
Use Case:
Some spam operations send bulk emails from specific IP addresses. If you identify an IP consistently sending spam, block it instantly server-wide. This protects every mailbox on your server from this spammer.
Unblock:
cpfence --del-spam-autoshield-ip 123.123.123.123
Block by Email Address
Example:
cpfence --add-spam-autoshield-email [email protected]
Use Case:
Occasionally, spam emails are cleverly disguised or targeted at specific users. Blocking a specific sender email address ensures no messages from known malicious senders slip through again.
Unblock:
cpfence --del-spam-autoshield-email [email protected]
Block by Domain
Example:
cpfence --add-spam-autoshield-domain spamfactory.com
Use Case:
Some domains are notorious spam factories. Blocking an entire sending domain is highly effective when the spam sender frequently rotates sender emails but always uses the same domain.
Unblock:
cpfence --del-spam-autoshield-domain spamfactory.com
Block by Email Subject (Partial Match)
Example:
cpfence --add-spam-autoshield-subject
(You’ll be prompted to enter the spammy subject line.)
Creative Usage:
Spam emails often have repetitive subjects like “You won!” or “Urgent invoice”. This tool is flexible—it will match any email containing your entered text. For example, entering “invoice” blocks any email with subjects like “invoice”, “urgent invoice”, or “invoice payment overdue”.
Unblock:
cpfence --del-spam-autoshield-subject
Block by Top-Level Domain (TLD)
Example:
cpfence --add-spam-autoshield-tld
(You’ll be prompted to enter the TLD, e.g., .click, .xyz, .cyou)
Creative Usage:
Spam often originates from obscure or cheaply available TLDs rarely used for legitimate business communications. Blocking spammy TLDs dramatically reduces inbox clutter. For instance, blocking .xyz can immediately cut down a large percentage of incoming spam, since this TLD is heavily abused by spammers.
Unblock:
cpfence --del-spam-autoshield-tld
Block by Sending ASN
Example:cpfence --add-spam-autoshield-asn AS64512
Use Case:
A sender keeps rotating IPs within the same network? An ASN block covers that sending network. In Add entry, choose Block → ASN. Check legitimate senders first: one ASN may carry mail for many unrelated customers.
Unblock:cpfence --del-spam-autoshield-asn AS64512
Block a Compromised Outgoing Sender
Example:cpfence --add-spam-autoshield-out-email [email protected]
Use Case:
A compromised mailbox is sending spam? Block its outgoing address while you investigate. In Add entry, choose Block → Outgoing email; this is different from an incoming-sender block.
Unblock:cpfence --del-spam-autoshield-out-email [email protected]
Clean up the compromise and secure the account before lifting the block.
Trust Legitimate Senders
Example:cpfence --add-spam-autoshield-wl-email [email protected]
Use Case:
Keep an established sender’s mail flowing with a narrow trust entry. Open Add entry → Trust, choose Email, Domain or ASN, enter the value, and review Apply to before confirming. Prefer one email address over a whole domain or network when that solves the problem; trust is not a promise to bypass every mail-security check.
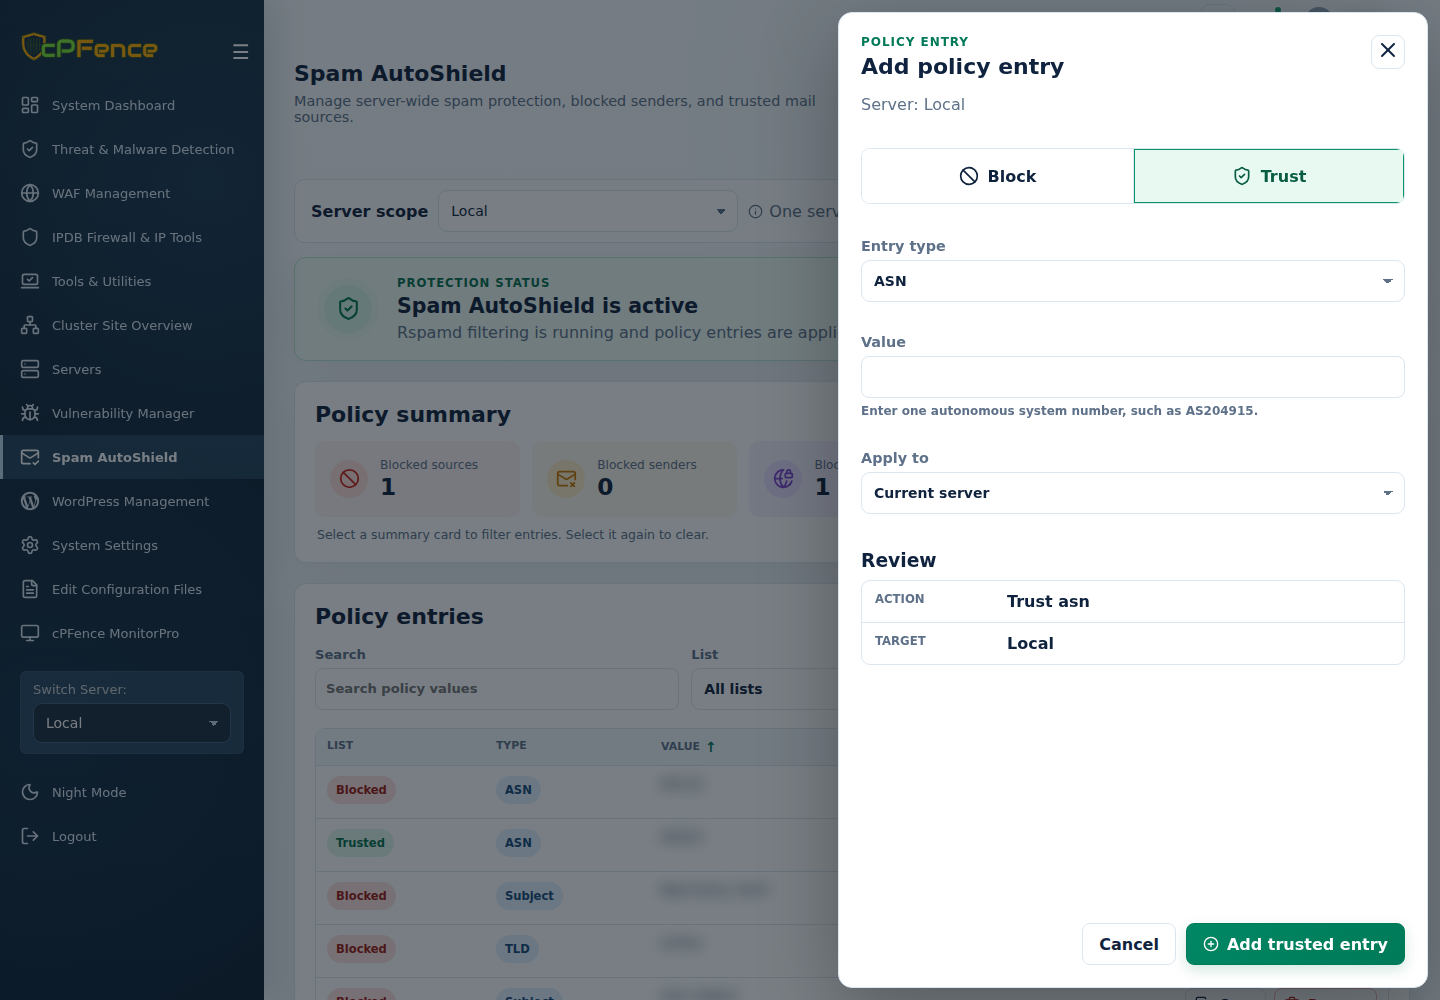
For wider exceptions, use cpfence --add-spam-autoshield-wl-domain example.com or cpfence --add-spam-autoshield-wl-asn AS64512.
Remove Trust:cpfence --del-spam-autoshield-wl-email [email protected]
The matching domain and ASN commands are --del-spam-autoshield-wl-domain and --del-spam-autoshield-wl-asn. In the WebUI, find the trust entry and use Remove.
Replace a Complete Policy List
Example:
cpfence --replace-spam-autoshield-list asn_block /PATH/TO/asns.txt
Use Case:
Already maintain an ASN blocklist? Replace just that typed list in one operation. In the WebUI, open Replace list, choose its list and target scope, and review Preview before confirming.
Before You Replace:
Save the existing list first. This replaces the entire chosen list, not just the entries you paste; an empty list clears it. Use a complete replacement and read every target’s final result.
Put Limits on Outgoing Mail
Use Case:
Limit the impact of a compromised mailbox or website. Open Spam AutoShield → Settings → Edit rate limits, then check the same server in System Settings. Enable the Spam AutoShield master and Outbound rate limits, set SMTP limits per mailbox and website limits per website, then save and read the result.
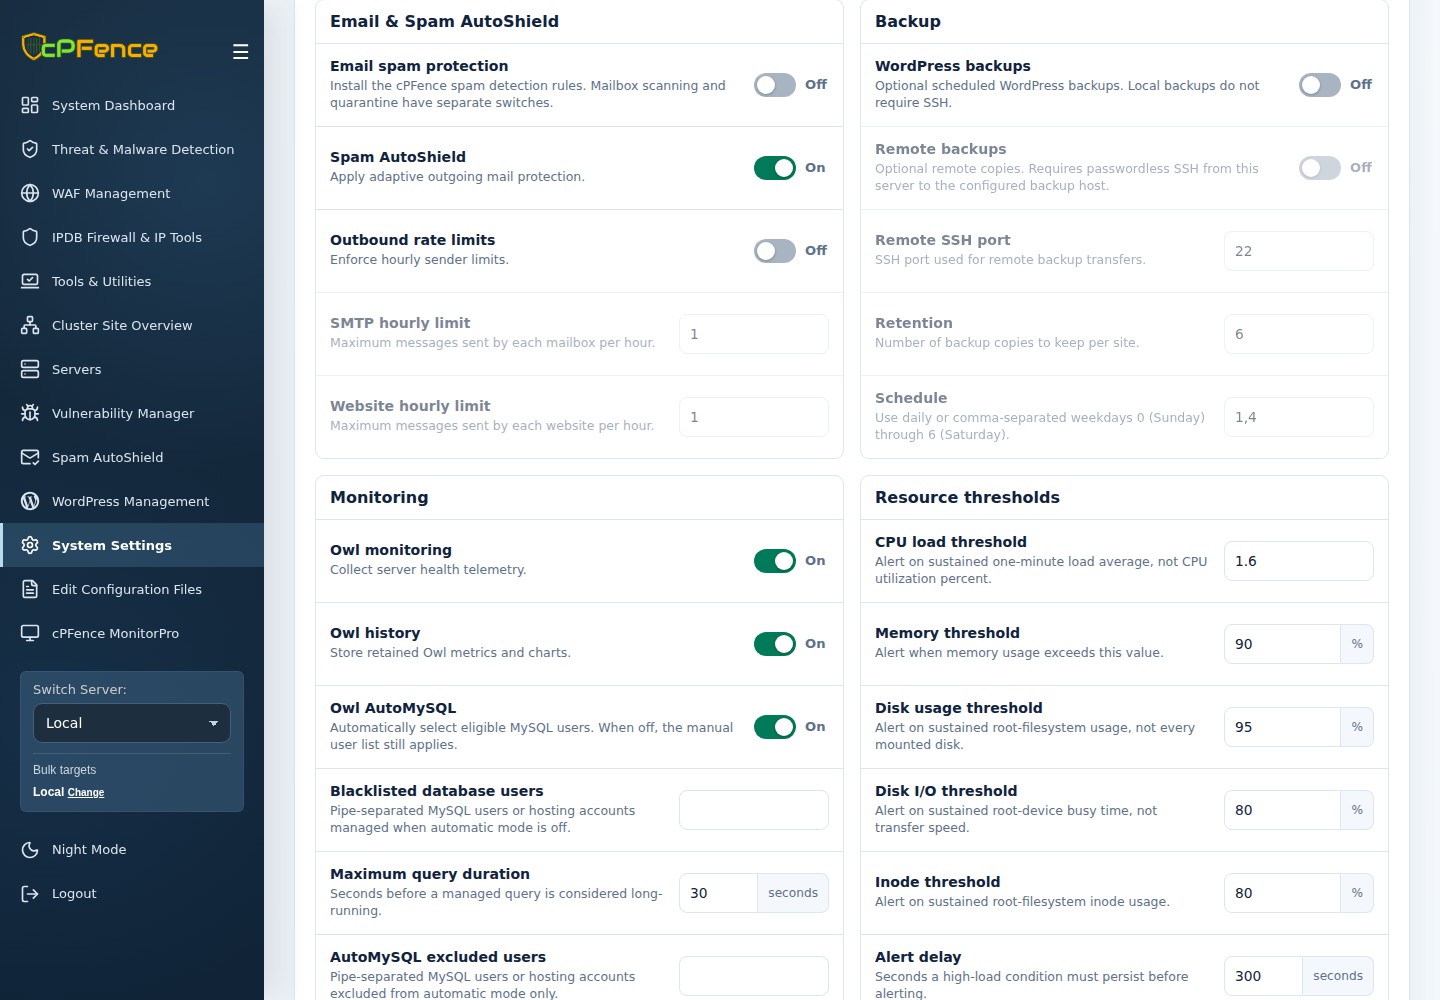
Keep these limits separate from mailbox malware scanning and quarantine: Spam AutoShield does not enable those protections automatically. See outbound spam protection for scope and recovery.
Reset Rspamd Training Data (Fresh Start)
In Spam AutoShield → Settings, review Apply actions to, then select Reset training data. Before confirming, check Redis ownership: this permanently deletes training data in Redis database 0. Inspect the final output for each intended server.
CLI alternative: cpfence --reset-rspamd-training-data
Use Case:
If your spam filter has been poorly trained or polluted with inconsistent data, sometimes a fresh start is the best way forward. Resetting clears all learned Bayesian data, allowing you to retrain with higher-quality samples, immediately boosting accuracy.
For compromised accounts sending unwanted mail, see Automatic Outbound Spam Lockdown for detection, blocking, and recovery.
Real-Life Tips & Recommendations
- Start Broad, Refine Later:
Initially, use broad rules like spammy TLD blocking, then gradually refine your spam filter as you identify new threats. - Spot Trends Quickly:
Regularly review blocked subjects and TLDs to proactively address emerging spam campaigns. - Server-wide Protection:
Especially useful for hosting providers or large mail clusters, where spam rapidly multiplies—protecting hundreds of users in one stroke.
Ready to experience spam-free email management?
Try cPFence for free today. Activate Spam AutoShield alongside other powerful modules, including MonitorPro, ApiMachine, AutoMySQL, and WP AutoShield, and elevate your server’s protection to the next level. Get started now, and make spam a distant memory.
Start free trial