Bare Metal Snapshot Backup Made Simple

We often recommend installing your Enhance main control panel server on a cloud VPS with snapshots enabled. It’s simple, fast, and gives you peace of mind. But sometimes things go differently. Maybe you’ve already set up your main control panel server on bare metal, or you’re looking to back up your root system on your backup server. This guide is for you.
Pro Tip: Never use snapshots for Enhance servers handling databases, DNS, or email. Doing so can lead to a cascade of inconsistencies that’ll have you knee-deep in manual SQL queries. Stick to Enhance’s built-in backup and restore system for these roles—it’ll save you a lot of headaches.
Let’s get started on creating a reliable bare-metal snapshot backup using the Veeam Agent for Linux Free.
Why Use Veeam for Bare Metal Backups?
Veeam Agent for Linux is an excellent choice for bare metal backups, and here’s why: First, it’s free, making it a budget-friendly option without compromising on features. Second, it allows you to take reliable hot snapshots while your operating system is running—no need to take the server offline or interrupt your services. Lastly, once you set it up, it runs on autopilot, automatically managing backups on a schedule you define. It’s the perfect combination of convenience, reliability, and cost-effectiveness for your Enhance server.
Now, grab your coffee, buckle up, and let’s dive in.
Know Your Players
- Server 1 (Source): Your Enhance main control panel server or backup server (Ubuntu 22.04 or 24.04).
- Server 2 (Destination): The safehouse where your backups will be stored.
Use root or sudo access on both servers. The Veeam screenshots below preserve the original walkthrough; package and recovery-media filenames vary by release. Use a private network or VPN between the servers: the basic NFS export below does not encrypt traffic.
Step 1: Prepare Server 2 (Destination)
- Install NFS Server:
sudo apt update

sudo apt install nfs-kernel-server
NFS is what keeps everything running smoothly between the two servers. - Create a Backup Directory:
sudo mkdir -p /backup/veeam

sudo chown nobody:nogroup /backup/veeam

sudo chmod 700 /backup/veeam

sudo touch /backup/veeam/testfile.txt
Yes, the testfile.txt is a simple test. It’s like sending a text message to see if the line is open. On a dedicated Ubuntu destination, this owner allows the default NFS root-squashed account to write without making the directory writable by everyone. See NFS user ID mapping if your export uses a different anonymous account. - Set Up NFS Sharing:
Edit the exports file:
sudo nano /etc/exports
Add:
/backup/veeam SERVER_1_IP(rw,sync,no_subtree_check)
ReplaceSERVER_1_IPwith the private-network or VPN IP address of Server 1. - Apply Changes and Configure the Firewall:
sudo exportfs -a

sudo systemctl restart nfs-kernel-server
Allow NFS only from Server 1 in the destination’s existing firewall and, separately, its hosting-provider firewall. If this standalone destination already uses UFW, the rule is:
sudo ufw allow from SERVER_1_IP to any port nfs
Do not enable a second firewall manager over an existing cPFence-managed firewall. The original blanketufw enablestep is omitted because enabling UFW can interrupt SSH; see UFW remote management. Preserve access to SSH and the server’s other services.
Step 2: Prepare Server 1 (Source)
- Install NFS Client:
sudo apt update

sudo apt install nfs-common - Mount the NFS Share:
sudo mkdir -p /mnt/veeam_backup

sudo mount SERVER_2_IP:/backup/veeam /mnt/veeam_backup
ReplaceSERVER_2_IPwith the private-network or VPN IP of Server 2. - Verify the Connection:
ls /mnt/veeam_backup/
If you see testfile.txt, the share is readable. Also check writes withsudo touch /mnt/veeam_backup/write-test.txt, then remove that test file. Resolve any permission or firewall errors before creating the backup job.
Step 3: Install Veeam Agent on Server 1
- Create a Free Veeam Account:
Sign up here: https://login.veeam.com. - Download Veeam Agent for Linux:
Get it from: https://www.veeam.com/products/free/linux-download.html.
Choose Ubuntu, click “Get Link,” and download. - Upload the Package to Server 1:
scp veeam-release* root@server1_ip:/root/ - Install the Veeam Repository:
dpkg -i ./veeam-release*

sudo apt-get update - Install Veeam Agent:
Follow the Veeam installation instructions for your Ubuntu release. The original package steps are:
sudo apt-get install dkms cifs-utils squashfs-tools xorriso linux-headers-$(uname -r)

sudo apt-get install blksnap veeam
Tip: If you need to upgrade later, just run:
sudo apt-get update

sudo apt-get install blksnap veeam
Step 4: Initial Veeam Setup
- Open Veeam:
veeam
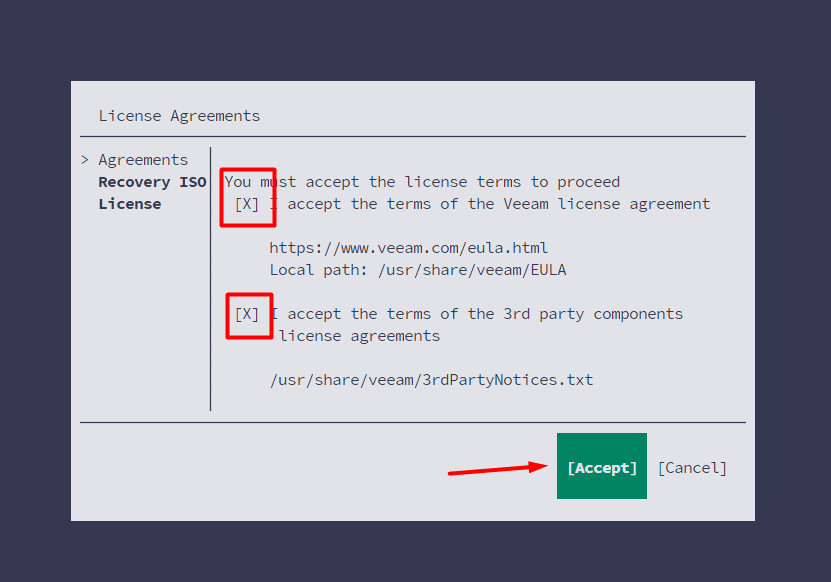
Agree to the terms—because what choice do we ever have?
On the license screen, simply skip this step as we are using the free version. Use your Tab key to navigate to “Finish” and then press Enter.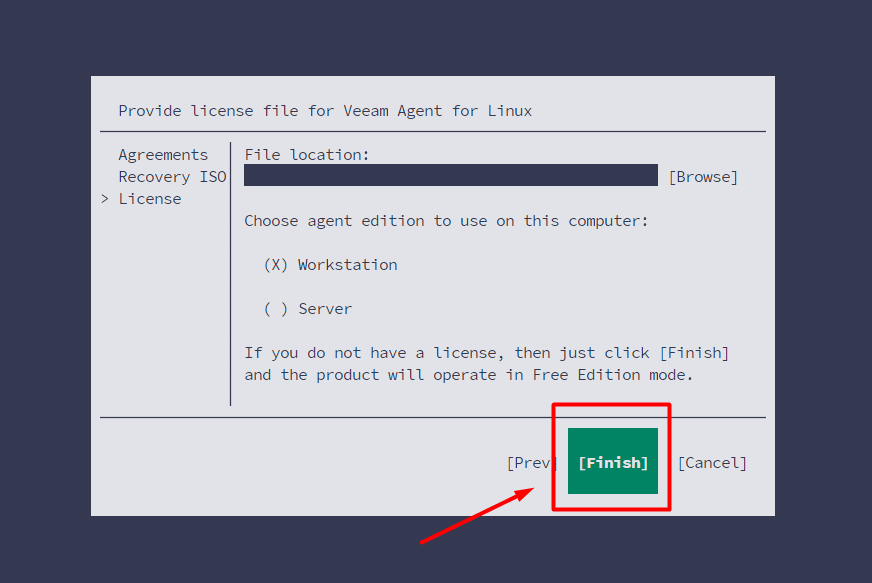
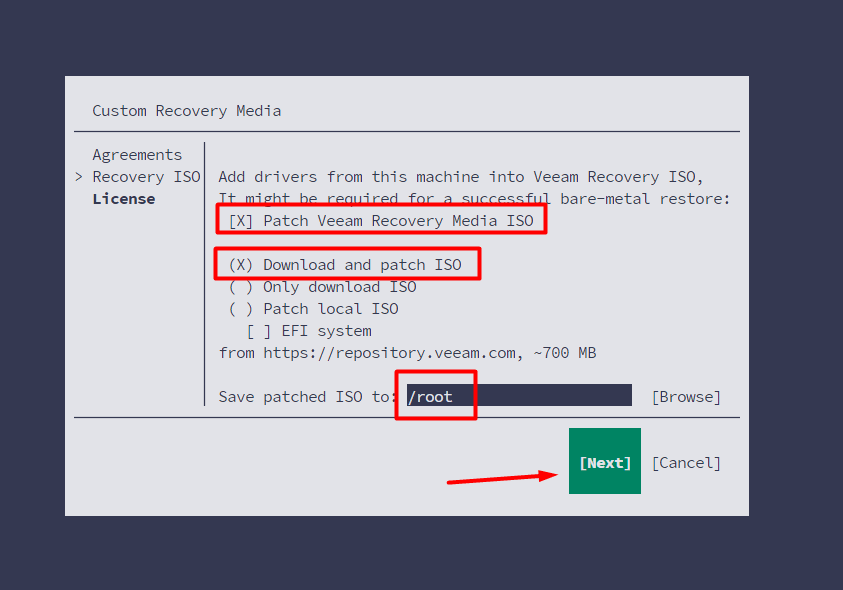
- Patch and Save Recovery Media:
- Select “Patch Veeam Recovery Media ISO” and “Download and Patch ISO.”
- Set the save location to
/rootand wait for the process to complete.
- Verify the Recovery ISO:
Use the filename actually created on your server; this is the original example:
ls /root

veeam-recovery-amd64-6.0.0.iso - Copy the ISO to Server 2:
Replace the example filename below if yours differs, then keep a copy accessible independently of Server 1:
cp /root/veeam-recovery-amd64-6.0.0.iso /mnt/veeam_backup/
Step 5: Create a Backup Job
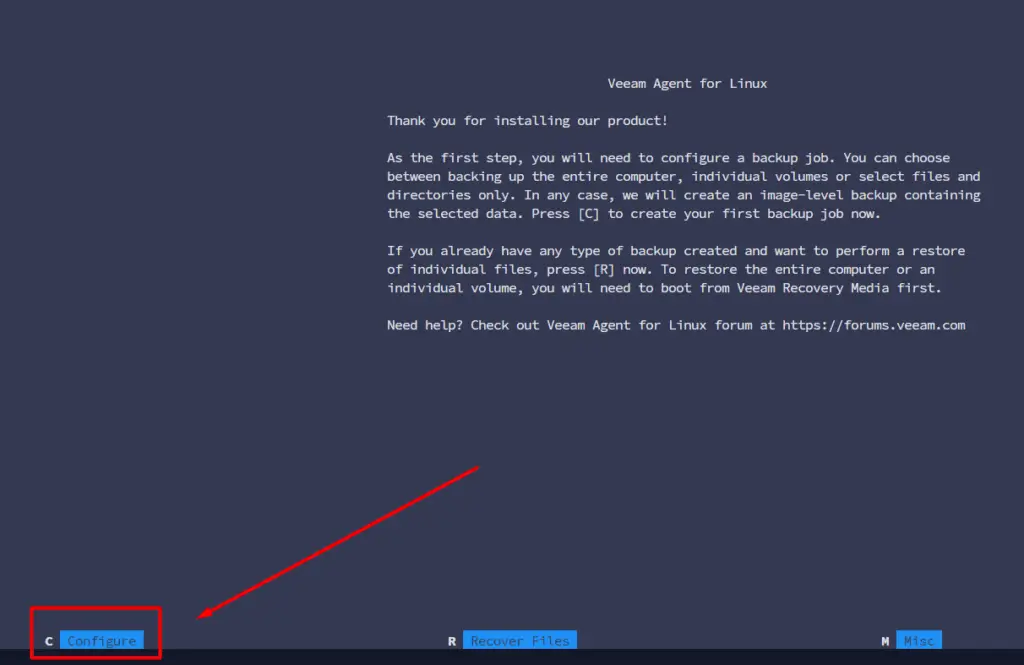
- Open Veeam by running
veeamand hitCto configure a new backup job.
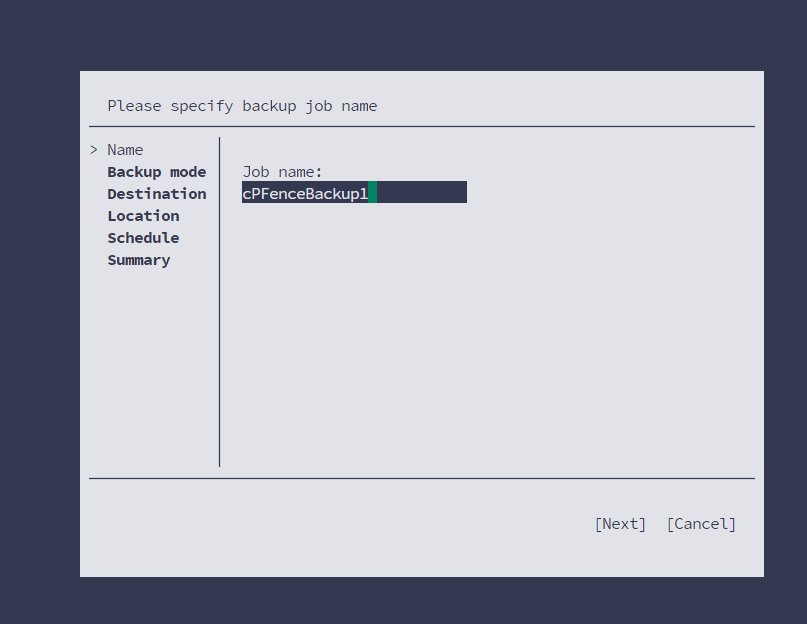
- Configure Your Backup Job:
- Name: Something meaningful, like
cPFenceBackup1.
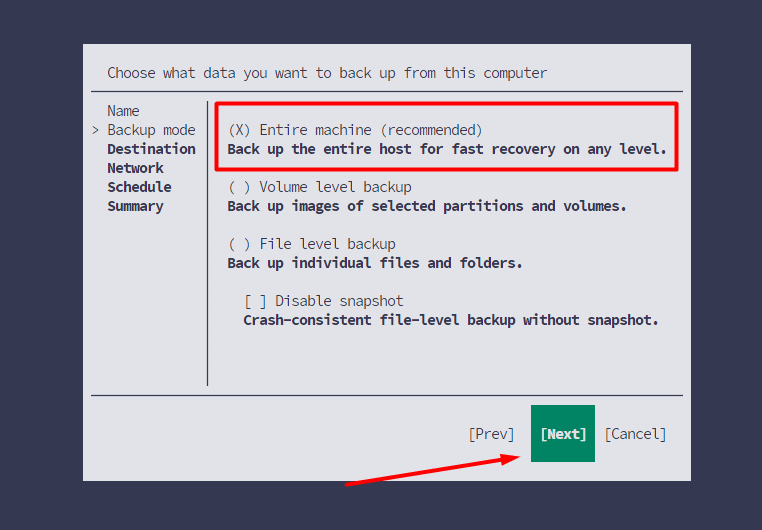
- Backup Mode: Entire Machine.
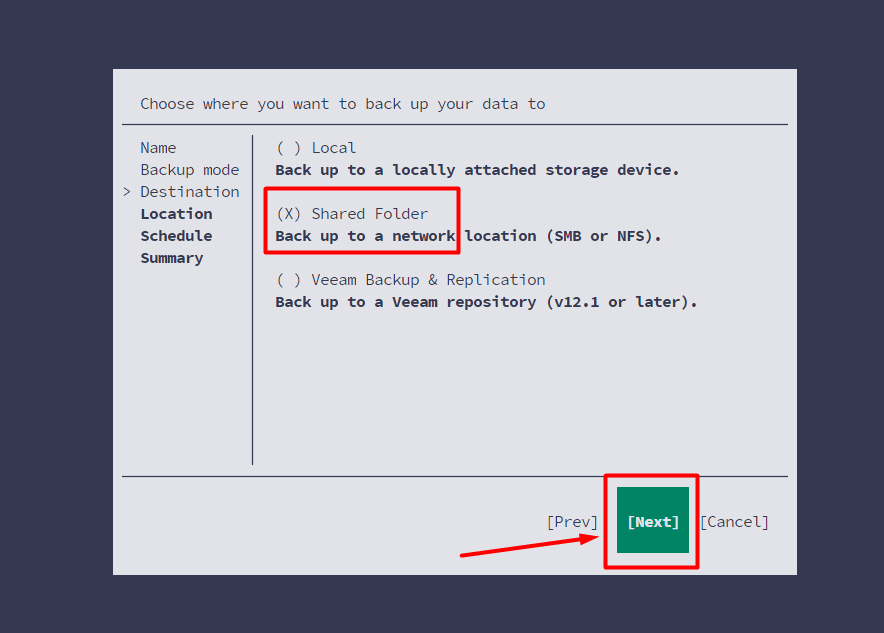
- Destination: Shared Folder → NFS.
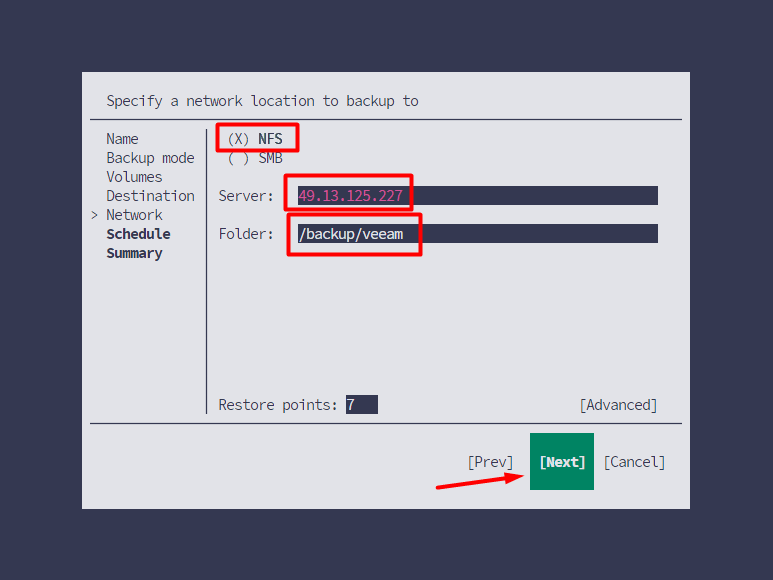
- Server: Server 2’s IP.
- Folder:
/backup/veeam. - Restore Points: 7 (or your preferred number).
- Name: Something meaningful, like
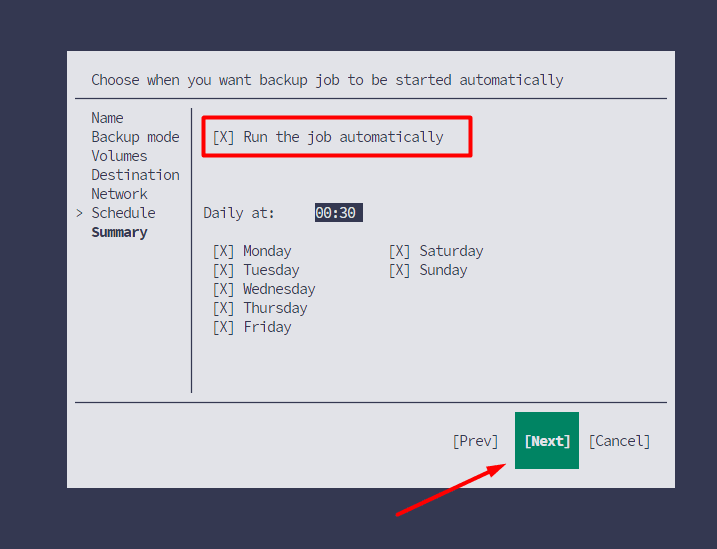
- Schedule the Backup: Set it to run automatically.
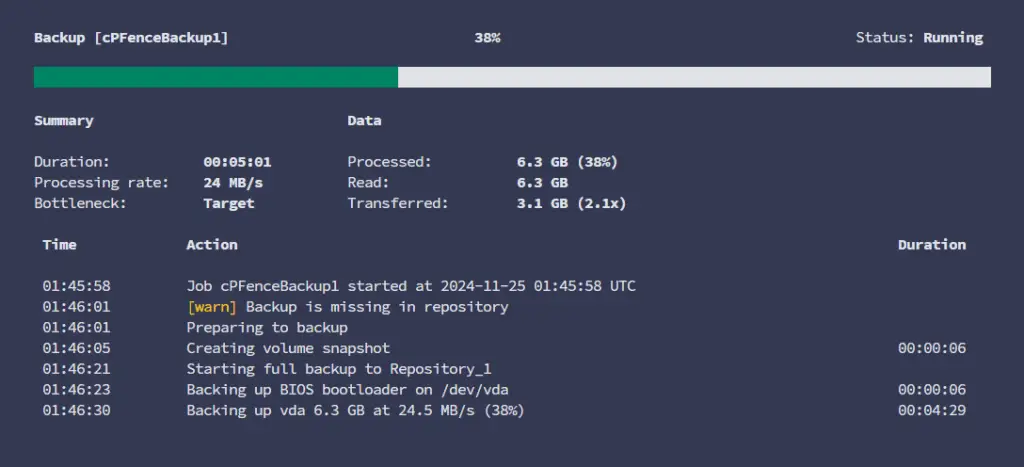
- Run the Job: Watch the progress to ensure everything works as expected.
Wait for success message:
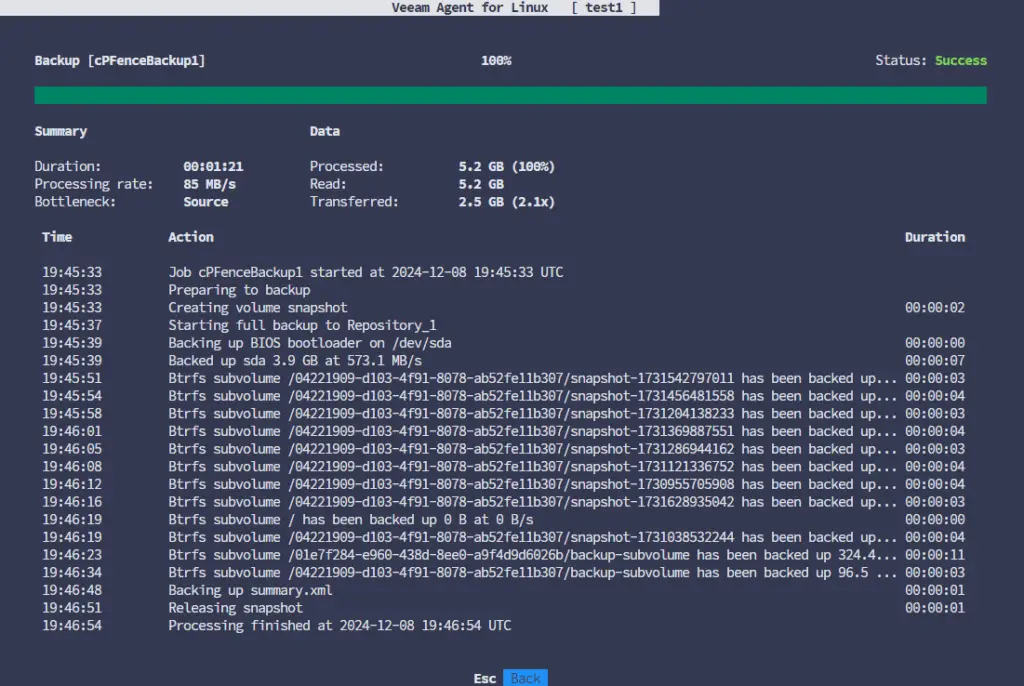
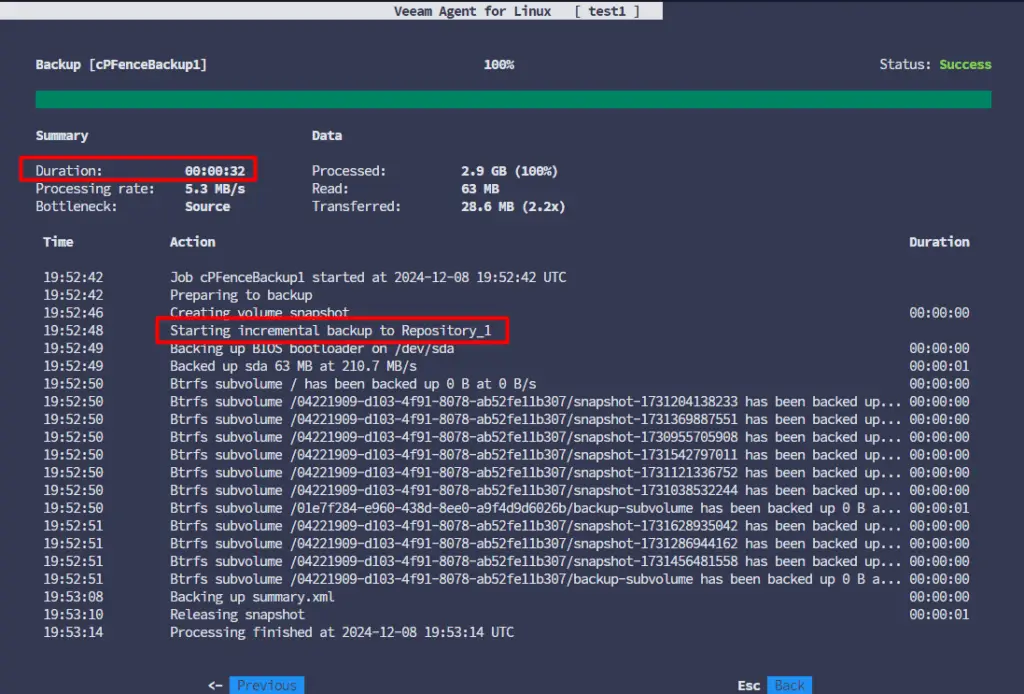
These original screenshots show a completed full backup and a later incremental run; your duration will depend on the data and servers.
Restoring Files or Systems
- File Recovery:
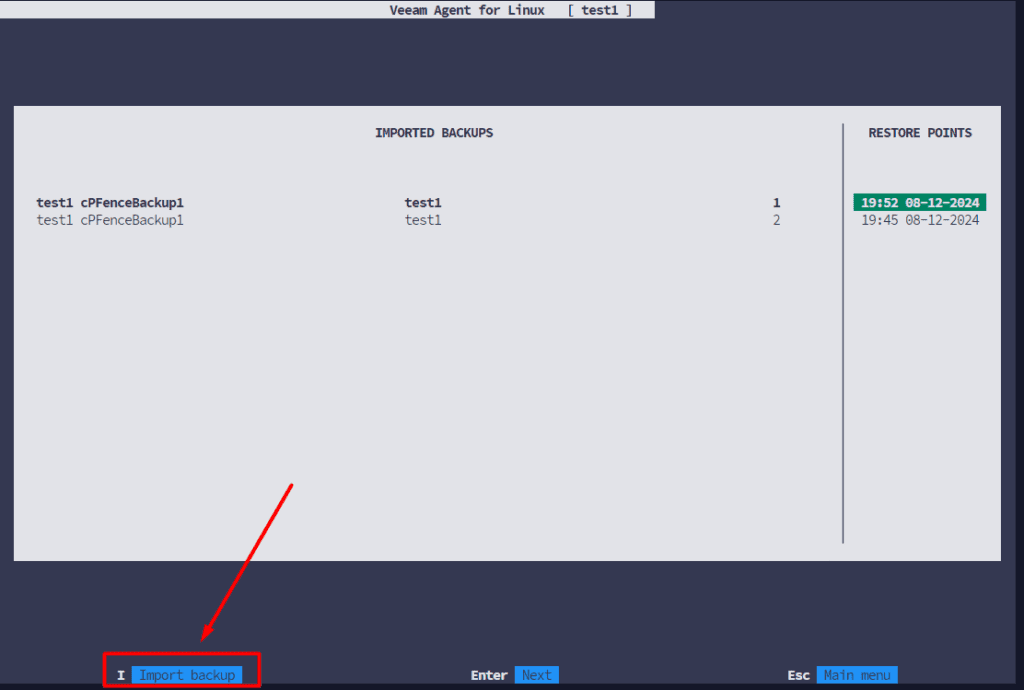
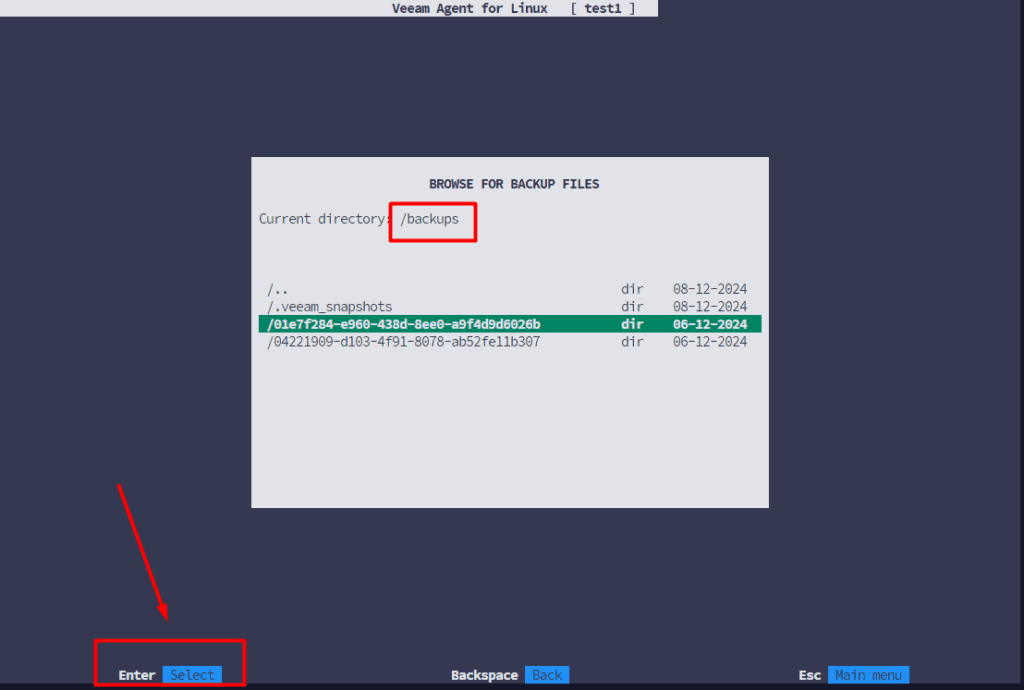
Open Veeam, select the snapshot you want, browse in files and pressRfor recovery.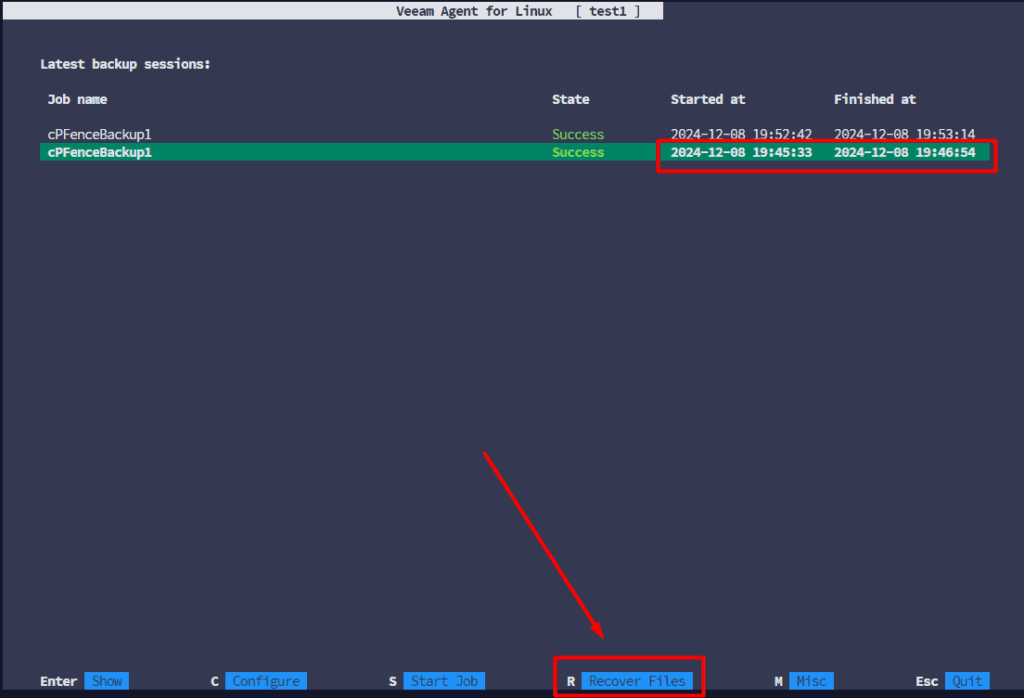
- Full System Recovery:
- If Server 1 goes kaput, Just start the KVM console on your dedicated server. If you are using Hetzner, as we always recommend, you can order a KVM console for 3 hours for free. For more information, visit: Hetzner KVM Console Documentation
- Mount your custom Veeam recovery ISO, connect to your backup server and restore your system. Check the target disks before confirming: a full-system restore overwrites the selected destination. Rehearse this on a disposable server, then verify boot and services. Hetzner’s KVM models have different virtual-media requirements, so check the linked instructions before an emergency.
Final Thoughts
Now you’ve set up a robust backup system for your bare metal server. Keep the backup jobs monitored and the recovery media within reach. Plus, now you’ve got the skills to restore your system like a pro if disaster strikes. Just don’t forget to check on those backups now and then.
Protect the server you are backing up
Pair your Veeam recovery plan with cPFence v4+ protection for Enhance.
Start free trial