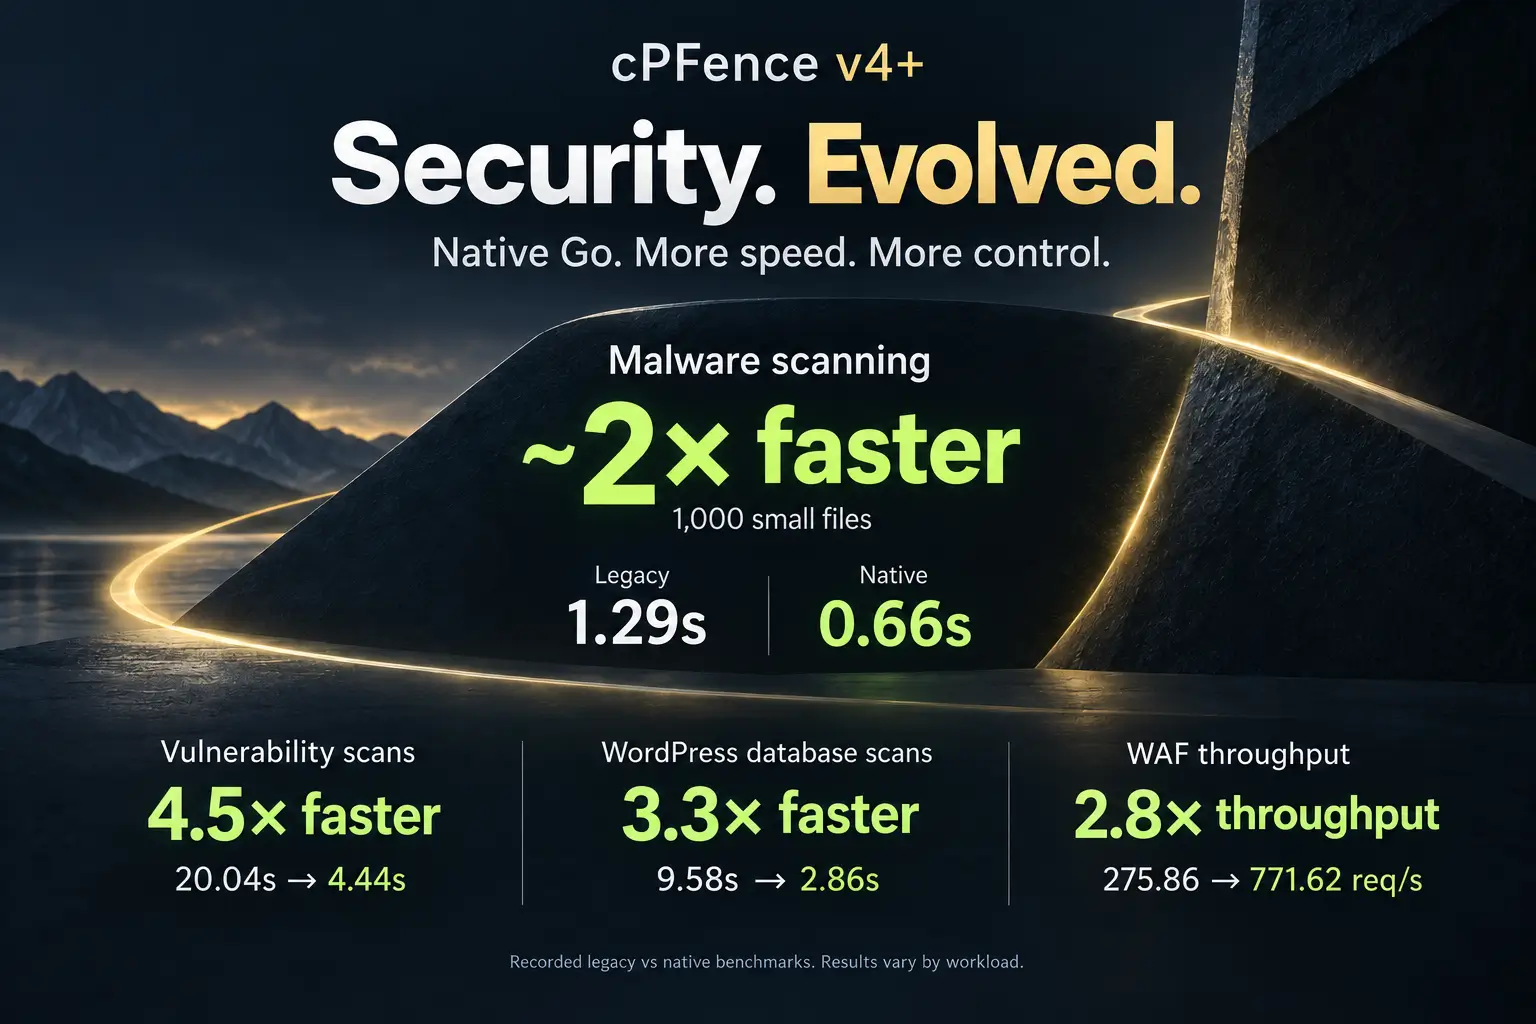
Server-Wide Security Headers Now Available in WP-AutoShield

We’re excited to announce automatic HTTP security headers as a new built-in feature in cPFence’s WP-AutoShield module. In cPFence v4+, WP-AutoShield can apply security headers across your WordPress sites through its managed WordPress protection. These headers affect WordPress responses; static files and other web-server responses are separate.
WP-AutoShield continues to simplify intelligent WordPress security, offering a comprehensive set of tools designed specifically for hosting providers and VPS owners. This latest feature runs seamlessly alongside existing protections such as:
- Automatic detection of all WordPress installations
- One-click hardening of core WordPress files and directories
- Daily malware scans of all WordPress databases
- Automatic plugin vulnerability detection with email alerts
- Secure file and folder permission enforcement
- Automatic disabling of XML-RPC and pingbacks
- Disabling of file editing from WordPress admin
- Initialization of missing secure authentication keys
- Optional CAPTCHA and idle logout protections
- Limit login attempts with ban and cooldown logic
- Disabling risky post content (iframes, embeds, raw JavaScript)
- Renaming default admin usernames
- Optional automatic blacklisted plugin removal
- Optional deployment of custom MU plugins
- Optional removal of caching plugins (except LiteSpeed Cache)
- Optional auto-updates for WordPress core, plugins, and themes
- Automatic database optimization
- Disabling WordPress default cron for improved performance
With the addition of automatic security headers, your sites gain powerful browser-level protection against common web attacks.
Why HTTP Security Headers Matter
HTTP security headers instruct browsers on securely interacting with websites, acting as a critical layer of defense at runtime. Appropriate header policies help browsers reduce risks such as clickjacking, MIME-type confusion and insecure connections. They complement updates and application protections.
Security headers are strongly recommended by OWASP and other leading security experts. Hosting providers and VPS owners especially benefit, as client websites are protected automatically, without relying on user awareness or manual intervention.
Security Headers Applied by WP-AutoShield:
Access-Control-Allow-Methods: limits allowed HTTP methods (GET, POST).Access-Control-Allow-Headers: defines allowed request headers (Content-Type, Authorization).Cross-Origin-Embedder-Policy: describes the cross-origin embedding policy; the supplied policy permits embedding.Cross-Origin-Opener-Policy: sets the cross-origin opener policy; the supplied policy is permissive.Cross-Origin-Resource-Policy: specifies allowed origins for loading site resources.Permissions-Policy: restricts sensitive browser features (camera, geolocation, etc.).Referrer-Policy: controls referrer information sent to external sites.X-Content-Type-Options: prevents MIME-type sniffing attacks.X-Frame-Options: restricts framing to the same origin (clickjacking protection).X-Permitted-Cross-Domain-Policies: disables legacy Flash policies.
Additionally, for HTTPS sites, WP-AutoShield enforces:
Content-Security-Policy: upgrades all requests to HTTPS.Strict-Transport-Security (HSTS): enforces HTTPS connections long-term.X-Content-Security-Policy: legacy header for older browsers.
These headers require no manual coding or separate plugin installation—the managed cPFence WordPress protection applies them to WordPress responses.
Test Your Security Headers Instantly
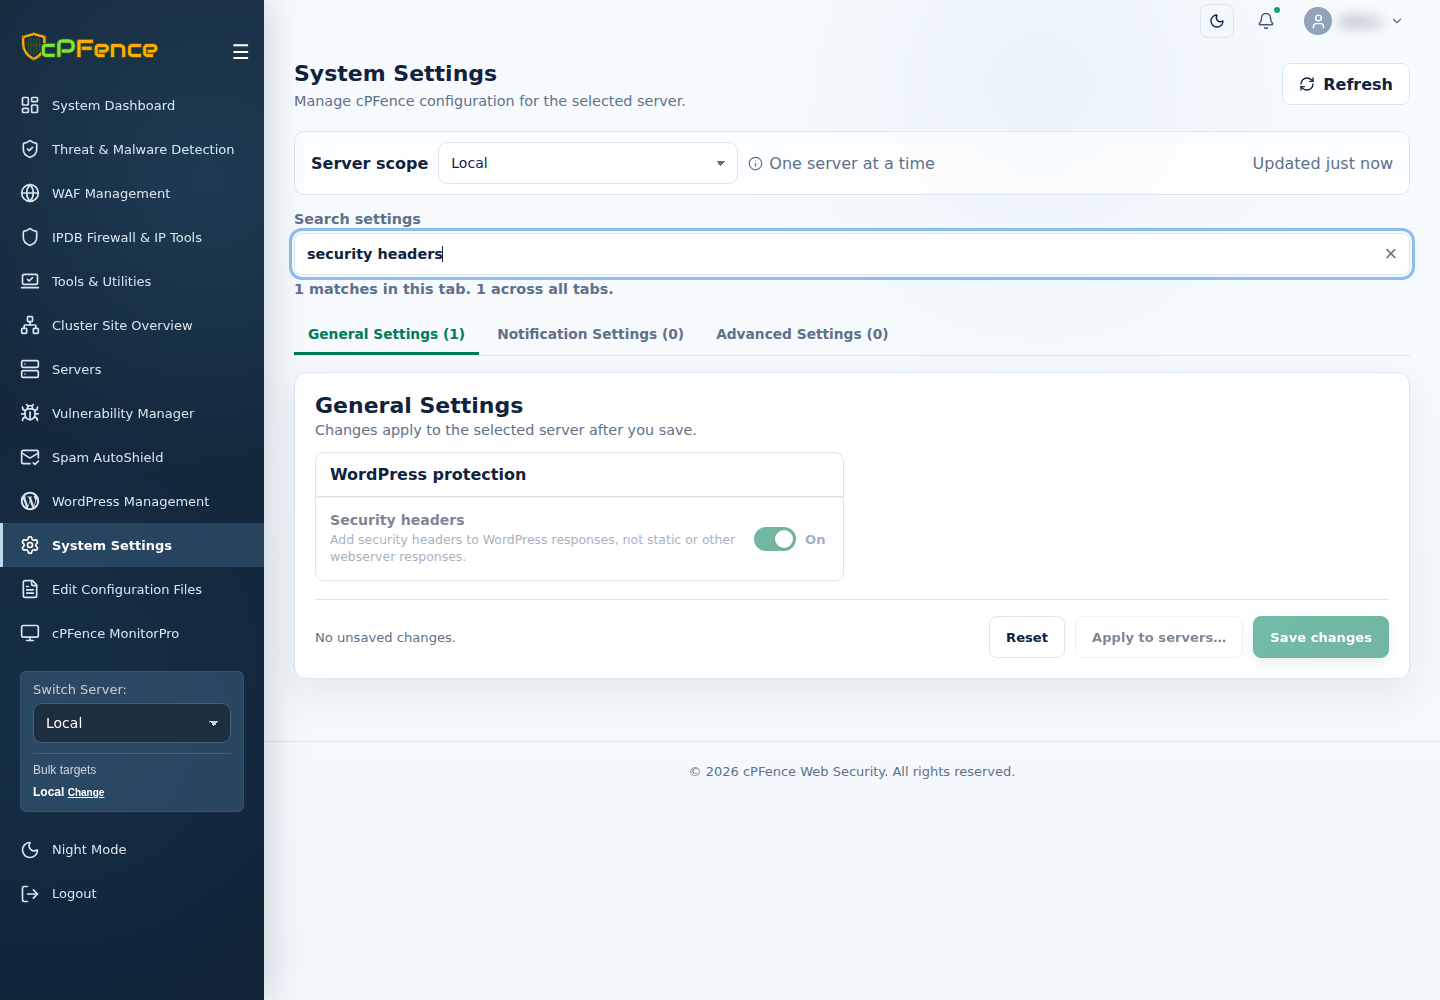
This feature first arrived in version 3.3.60 and remains available in cPFence v4+. For recurring enforcement, select the intended server in System Settings → General Settings, keep WP-AutoShield enabled and turn Security headers on, then Save changes and check the result. The selected policy applies during the daily 6:10 AM WP-AutoShield run, using server time. To run the configured sequence now, execute as root on the intended server:
cpfence --run-wp-autoshield
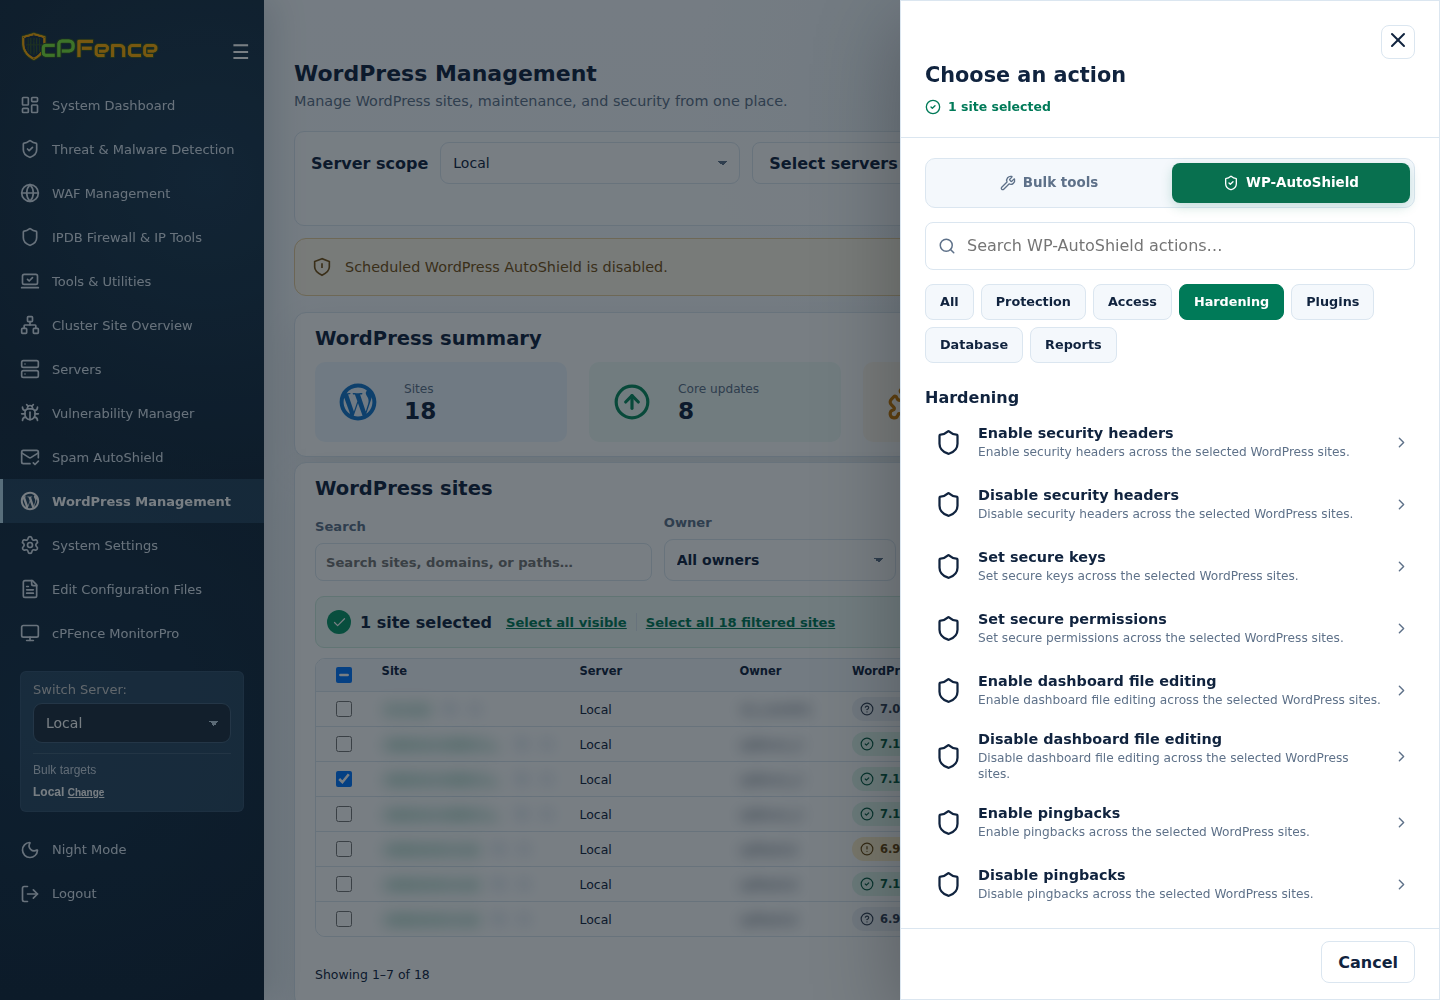
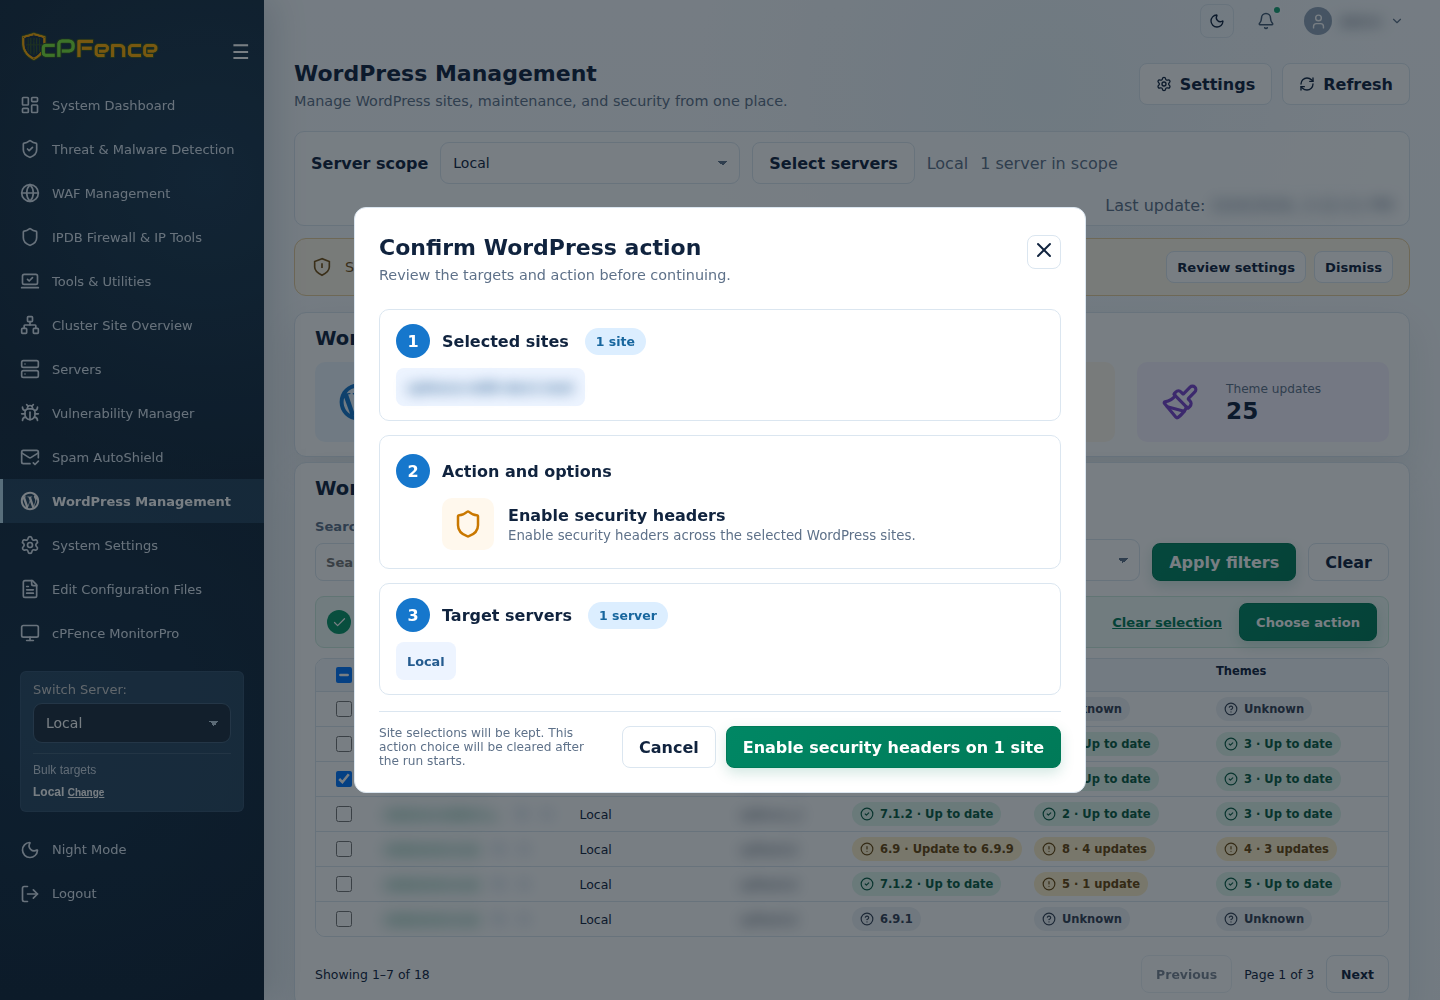
Want to apply headers only to selected sites? Open WordPress Management, select the intended server and sites, then Choose action → WP-AutoShield → Hardening → Enable security headers. Review the confirmation before starting and inspect every site’s final result. Support users need the matching hardening permission.
The CLI also offers cpfence --bulk-enable-sec-headers and cpfence --bulk-disable-sec-headers. Check the prompts and scope. For an enduring reversal, also review the recurring policy so the next daily run does not reapply it. See header controls and recovery.
No passwordless SSH needed for normal cPFence v4+ operation. Only remote WordPress backups and MultiRun need it. If you do not use those two features, you can disable passwordless SSH access and the rest of v4+ will keep working. See secure SSH access.
Once activated, use securityheaders.com to verify your headers instantly. This free tool scans your website, clearly grading your site’s security headers from F to A+. Remember to clear cache plugins or append ?nocache=1 to your URL for accurate results.
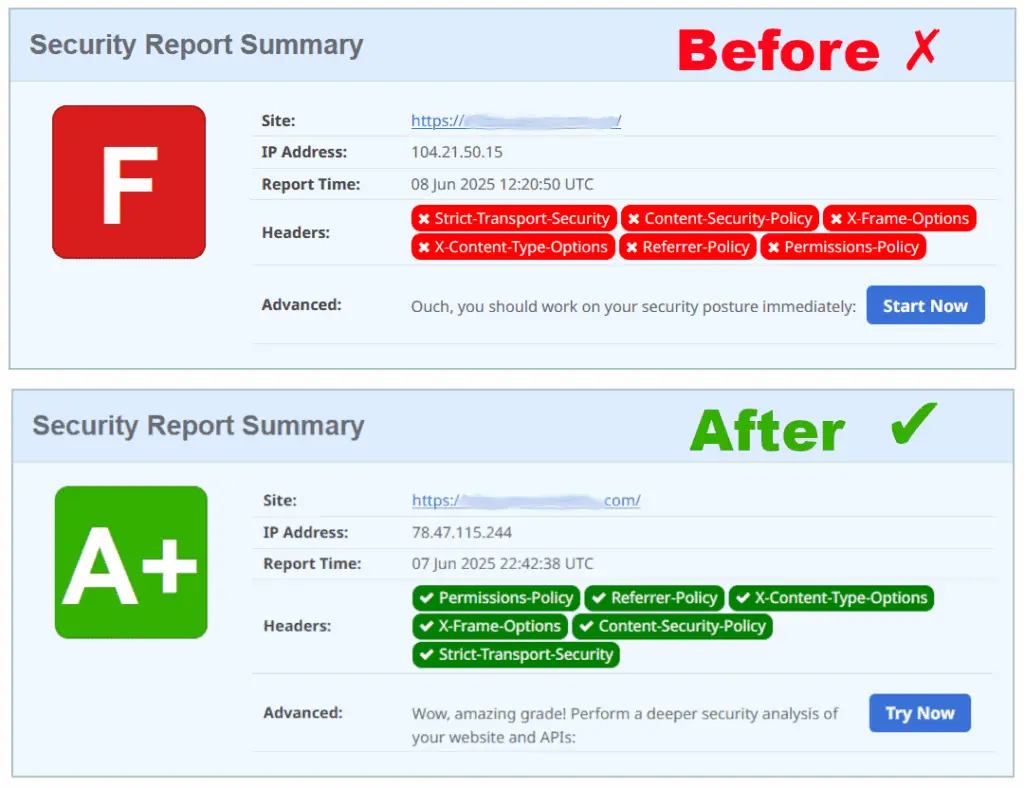
Demonstrate to your clients how your hosting stands apart with secure-by-design solutions. Show them the actual response headers and current test result; the grade depends on the site, its other policies and the URL tested.
Why Hosting Providers and VPS Owners Benefit
WP-AutoShield requires no client action or complex configuration. With security headers applied automatically, hosting providers and VPS owners experience reduced support burdens, strengthened client trust, and improved overall platform security.
Additional New Features in Version 3.3.60
Forced Plugin Installation Across All Sites
You can now automatically install specific plugins across all client WordPress sites. Simply add the desired plugin slugs into /var/log/cpfenceav/wp-plugin-bundle.txt, and WP-AutoShield takes care of the rest. A practical example: instantly prevent comment spam server-wide by enforcing the installation of the recommended Forget Spam Comment plugin—one click and you’re done! (This feature is off by default; enable Required plugin bundle in System Settings → General Settings, then save and check the result. Its config key remains autoshield_force_plugin_bundle.)
Automatic LiteSpeed Cache Clearing
Ever woke up to find your site CSS corrupted and the layout broken—only to realize a simple cache clear resolves everything? We’ve experienced that too! WP-AutoShield now offers automatic daily LiteSpeed cache clearing across your entire server cluster, ensuring consistent CSS rendering and site stability.(This feature is off by default; set autoshield_clear_litespeed_cache in WebUI → System Settings to “on”.)
Try cPFence Free for One Month
Ready to see it in action? Get started today and manage WordPress protections from the cPFence v4+ WebUI.
Start free trial