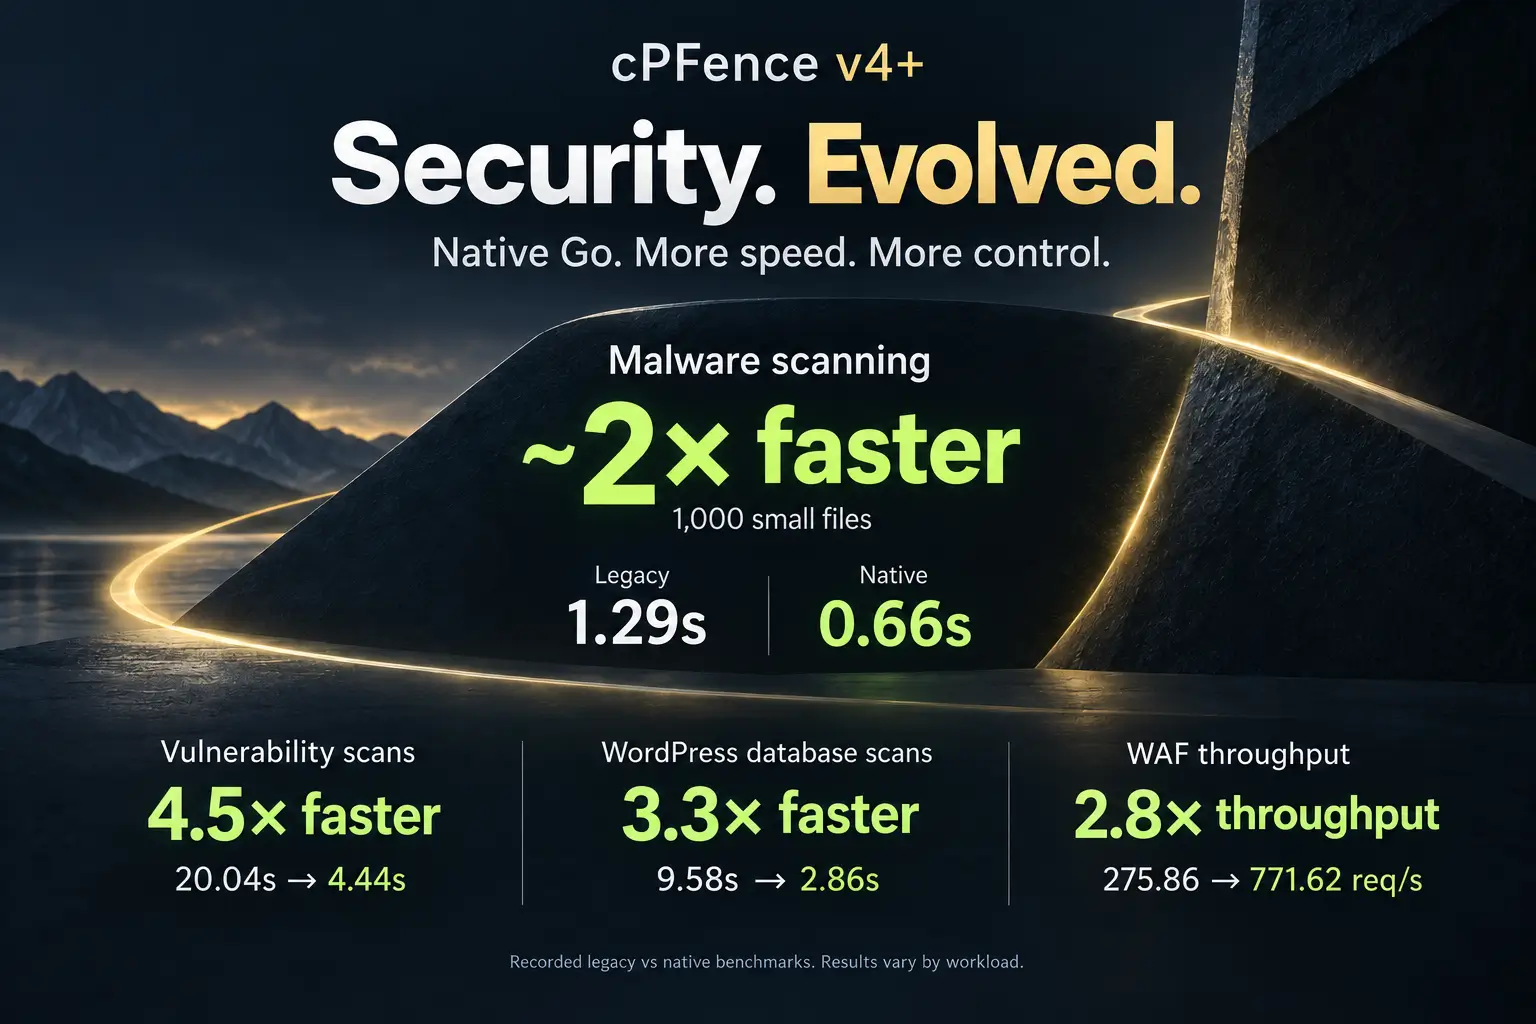
WordPress Security Made Easy with cPFence’s New Features

WordPress is the most popular and powerful CMS on the internet. Its flexibility, extensive features, and ease of use make it a top choice for websites of all kinds. But as amazing as WordPress is, it comes with a significant caveat: if it’s not secured correctly, it can become an open gateway for hackers.
Now, even if you’ve taken all the right steps to secure your WordPress installations, shared hosting environments bring their own set of challenges. Sometimes, users unknowingly leave vulnerabilities behind. Imagine this: a user sets up a WordPress installation to test a theme or plugin but doesn’t even complete the installation process. The site is left stuck on the “install” step, allowing a hacker to simply add their details and effectively “own” a site on your server. Scenarios like this aren’t just hypothetical—they happen all the time. And no matter how much you try to educate clients, mistakes like these are inevitable.
This is where file integrity checks become your best friend. By monitoring WordPress core files, file integrity checks help identify unauthorized changes, unexpected files, or incomplete setups before they lead to disaster.
At cPFence, we’ve introduced a WordPress Security Module designed specifically to address these challenges. Let’s take a closer look at its powerful features:
No passwordless SSH needed for normal cPFence v4+ operation. Only remote WordPress backups/restore and MultiRun need it. If you do not use those two features, you can disable passwordless SSH access and the rest of v4+ will keep working.
1. WordPress Integrity Check
This feature scans your WordPress installations to ensure all core files are intact and unaltered. It catches unauthorized changes, missing files, or any files that shouldn’t be there. If something is amiss, you’ll know about it immediately. This proactive approach adds a critical layer of protection against hackers exploiting overlooked vulnerabilities.
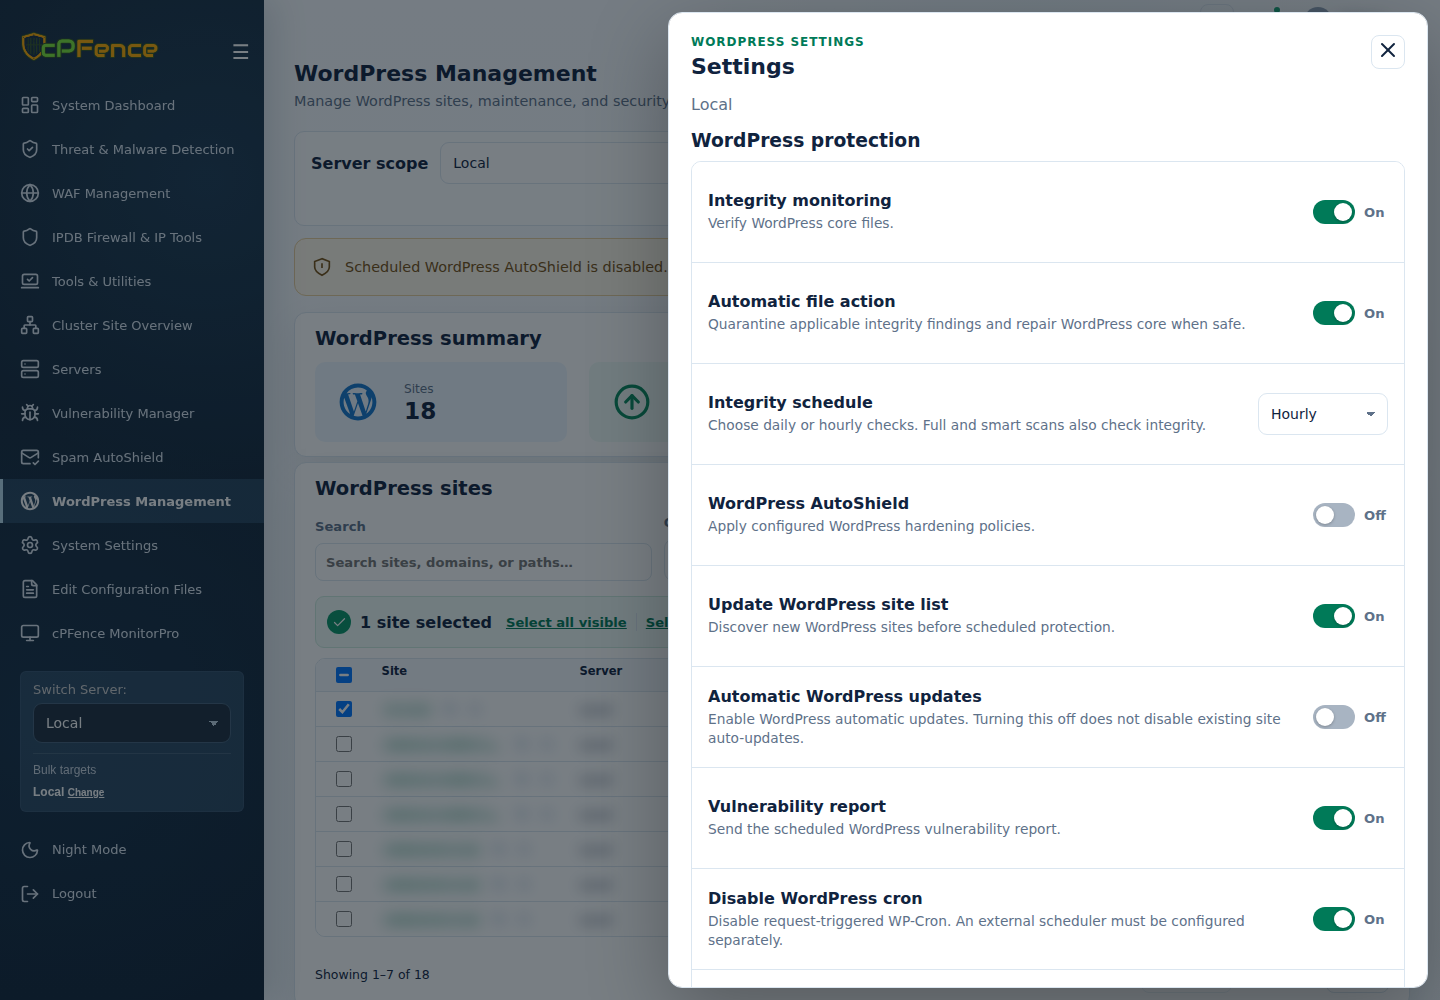
In cPFence v4+, choose one server in WordPress Management and open Settings → Integrity monitoring. For a focused check and recorded findings, use Threat & Malware Detection → WordPress Integrity. Read each finding and its actual action; a submitted check is not a clean result. CLI policy controls are cpfence --enable-integrity-check and cpfence --disable-integrity-check, run as root on the intended server.
2. Auto File Action
Unexpected files found during an integrity check can either be logged for manual review or, when eligible, quarantined with automatic file action enabled. It can also repair eligible altered WordPress core files when safe. Review each finding’s recorded action rather than assuming every file was quarantined. This automation is a lifesaver when managing multiple sites on shared hosting servers.
Use Automatic file action in the same Settings drawer, review backups and exclusions first, then save and check the result. CLI alternatives are cpfence --enable-auto-file-action and cpfence --disable-auto-file-action. See quarantine and recovery before restoring or trusting a finding.
3. Flexible Frequency Settings
You control how often the integrity checks run. Choose between hourly for high-risk environments or daily for regular monitoring. This flexibility ensures that your WordPress sites are always under watch without overwhelming your server resources.
Choose Integrity schedule → Hourly or Daily and Save settings. CLI equivalents are cpfence --set-check-frequency hourly and cpfence --set-check-frequency daily. Changing frequency saves policy; it does not enable monitoring or run a scan immediately.
4. WordPress Site Listing
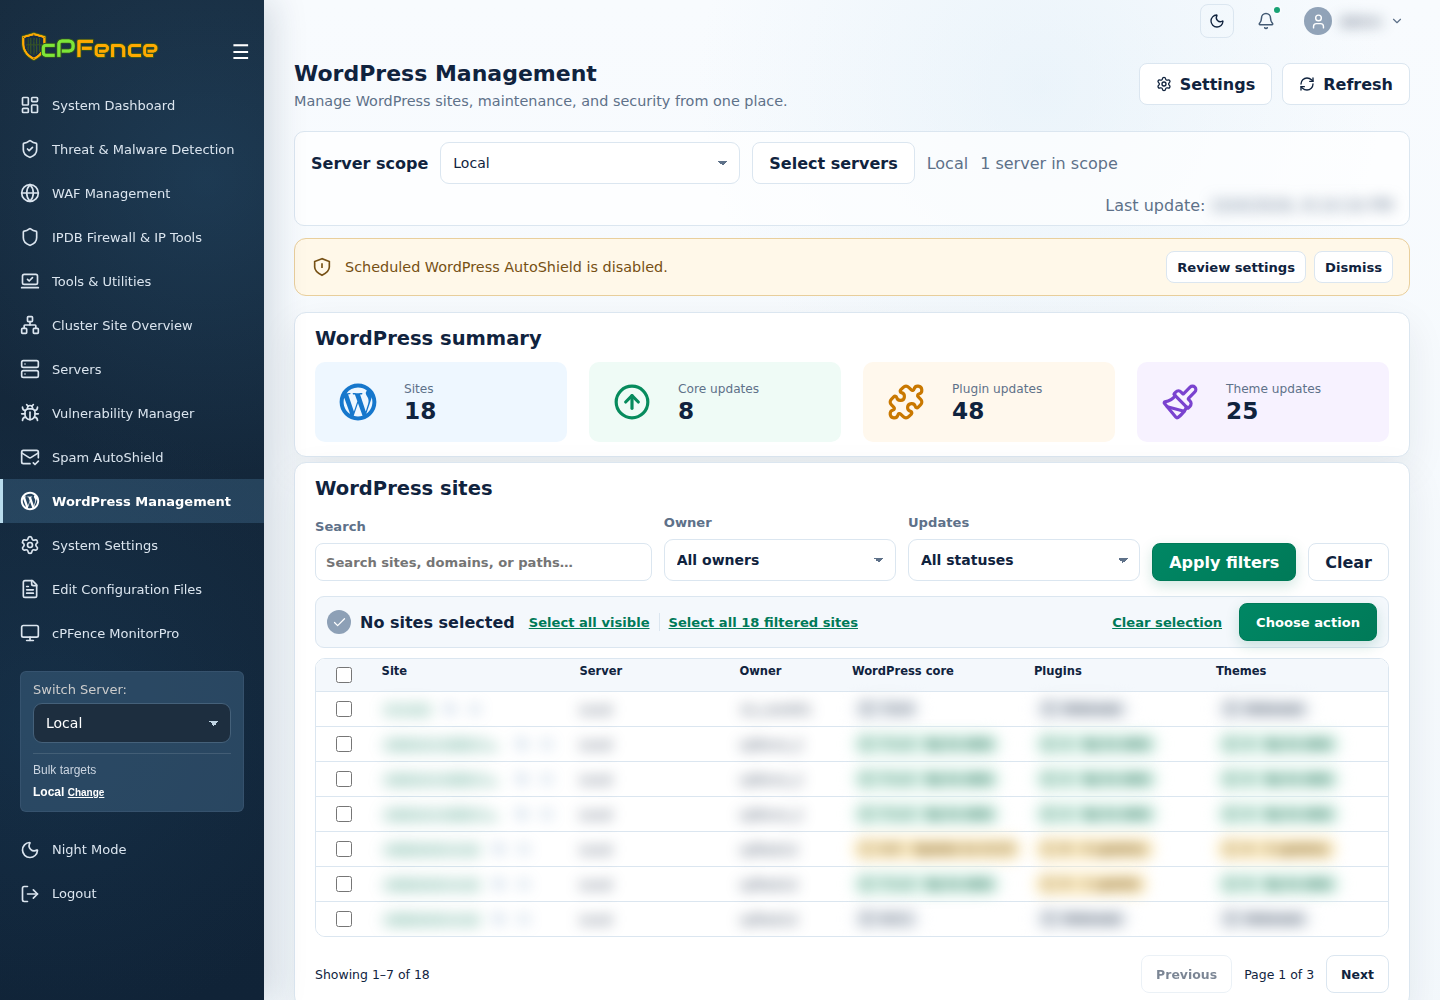
cPFence can now generate a detailed list of all WordPress installations on your server, complete with their paths and respective owners. This feature simplifies management, giving you a clear overview of what’s installed and who’s responsible for it. It’s a must-have tool for hosting providers and server admins alike.
Use cpfence --generate-wp-sites-list on the hosting server. The current WebUI lists sites in WordPress Management with server scope, search and owner filters. Explicitly select the intended sites before a bulk action.
Customizing Security: Exclusions for Trusted Sites and Files
A standout feature of the cPFence WordPress Security Module is its flexibility. You can exclude specific websites or files from the integrity check to avoid unnecessary alerts or actions on trusted paths and files. Simply add the paths of websites you want to exclude to:
/etc/cpfcli/wp-integrity/exclude-sites.txt.
Similarly, if there are specific files you don’t want flagged or quarantined, you can list their names in:
/etc/cpfcli/wp-integrity/exclude-files.txt.
In the WebUI, open Threat & Malware Detection → Advanced Tools → Integrity exclusions and review its separate server targets. Use the full Site path for a whole-site exception, or an exact basename under File Name. Filename exceptions can apply across sites on the targeted server, so keep them narrow. The matching Unexclude control removes an exception.
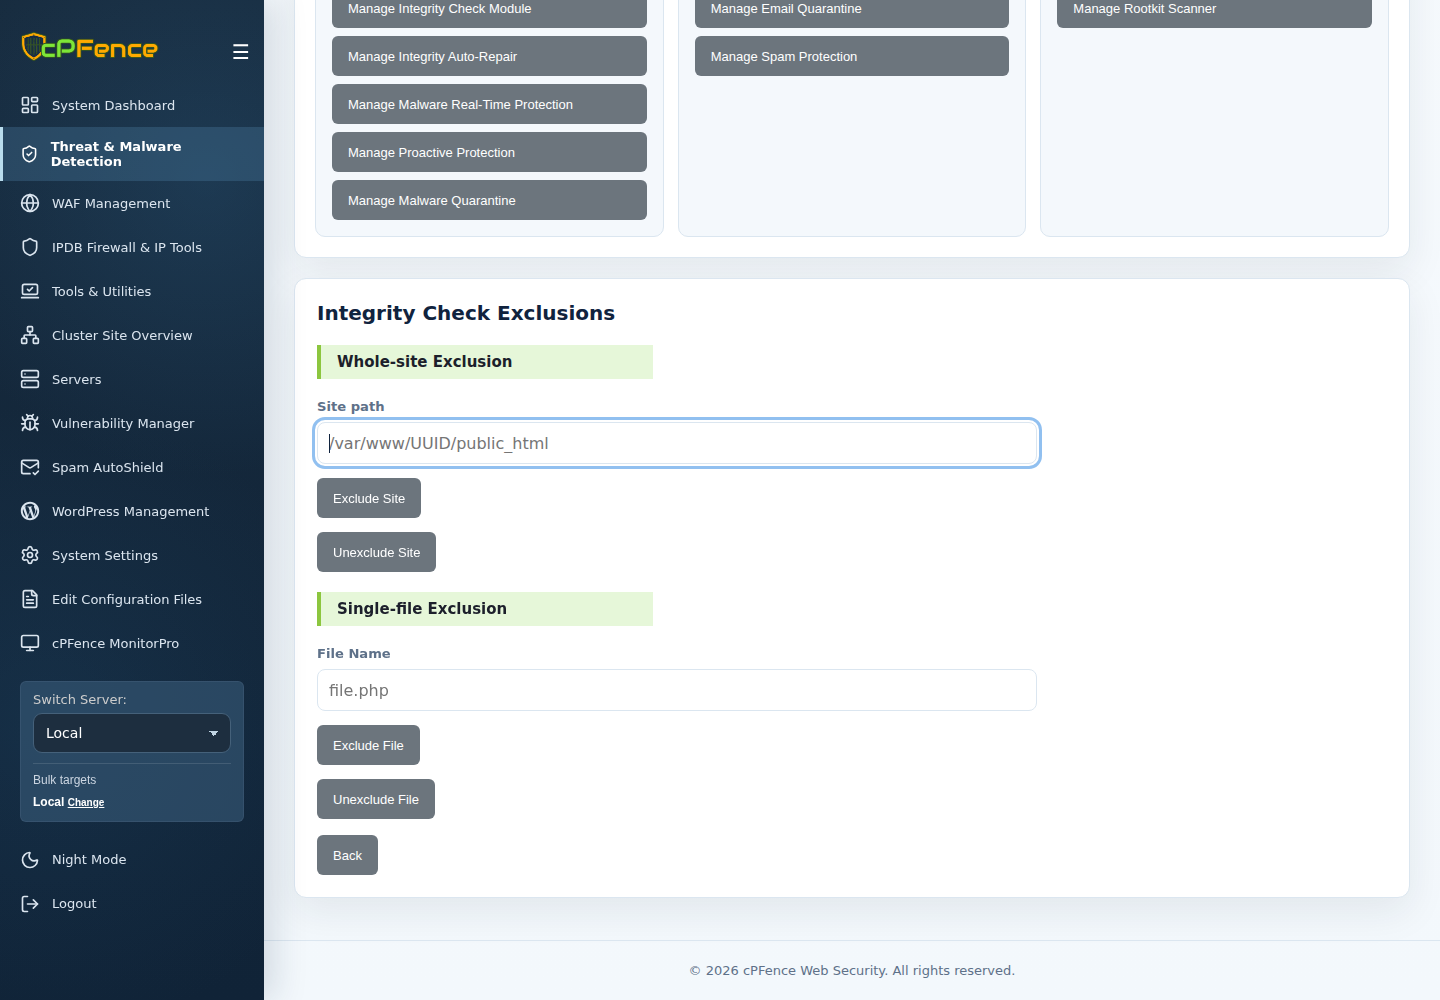
CLI alternatives are cpfence --exclude-integrity-site /var/www/SITE_USER/public_html and cpfence --exclude-integrity-file trusted-file.php; replace the placeholders with the intended target. Remove the same entry with --del-exclude-integrity-site or --del-exclude-integrity-file. These are separate from daily AutoShield exclusions in /var/log/cpfenceav/wp-exclude-list.txt, and removing an exception does not restore a file already changed or quarantined.
This customization ensures that the module works seamlessly with your setup, focusing only on genuine risks without interfering with trusted configurations.
Why These Features Matter
Whether it’s catching unauthorized file changes, preventing overlooked installations from becoming vulnerabilities, or automating responses to threats, cPFence’s WordPress Security Module provides the tools you need to stay ahead of potential problems. These features are particularly valuable on shared hosting servers, where multiple users and varying levels of expertise can lead to security gaps.
With cPFence, you’re not just securing WordPress—you’re ensuring peace of mind. The WordPress Security Module works quietly in the background, leaving you free to focus on growing your business, not worrying about hacked sites or server vulnerabilities.
For more detailed guidance on securing and managing WordPress with cPFence, check out these helpful resources:
- Clean an infected WordPress site
- Configure WordPress security and integrity
- Export WordPress vulnerability findings
These resources offer step-by-step instructions and tips to make the most of cPFence’s powerful tools.
Ready to make your WordPress hosting bulletproof? Explore the new features of cPFence today and experience the difference proactive security makes.
Your server’s security isn’t optional—it’s essential.
Keep WordPress Security Simple
Your server’s security isn’t optional—it’s essential. Try cPFence v4+ and manage integrity monitoring and site protection from one place.
Start free trial