
Clean an infected WordPress site
Has cPFence reported an infection on your WordPress site? Start with its findings and logs, then work through the steps below. Preserve the current files and database before changing them. You need administrator access to the hosting account and permission to act on the affected site.
Step 1: Check file permissions and ownership
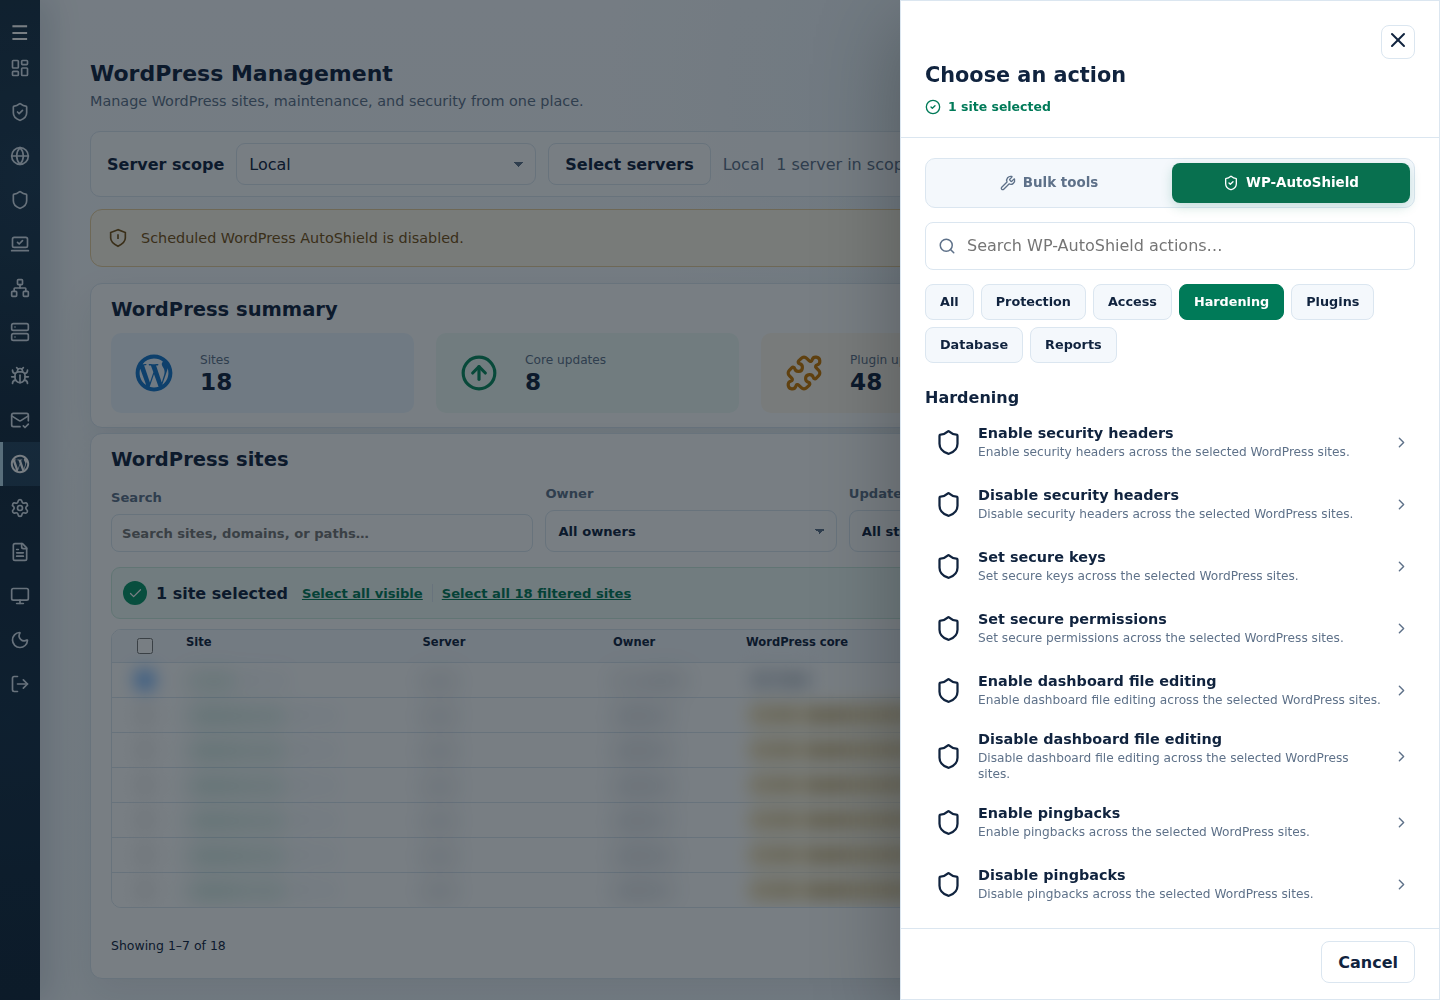
Section titled “Step 1: Check file permissions and ownership”Review ownership and permissions first. Start with Preview Changes before a server-wide fix; use Set secure permissions for selected WordPress sites.
From a root terminal on the affected server, the ownership preview is also available with:
cpfence --fix-permissions-dryAfter reviewing its proposed changes, cpfence --fix-permissions applies the ownership fix. cpfence --bulk-set-wp-permissions applies WordPress permissions across the server’s listed sites. These terminal commands do not inherit your WebUI site selection; use the selected-site WebUI action when recovering just one installation.
Step 2: Check cron jobs and shell startup files, then repair core
Section titled “Step 2: Check cron jobs and shell startup files, then repair core”Malicious cron jobs can recreate an infection after you delete its files. Inspect the affected owner’s scheduled jobs in the correct Enhance account/container, rather than another account or the host’s root crontab. From a trusted terminal running as that site owner:
crontab -lcrontab -eSave a recovery copy of the existing crontab. Remove only entries you have confirmed are malicious; keep legitimate scheduled tasks. Check again after five minutes. If the unwanted entries return, continue investigating persistence or contact support before repeating cleanup.
Also inspect the owner’s shell startup files for injected downloaders or commands, including .bashrc, .profile and .bash_profile when present. Typical account-home examples are:
/var/www/ACCOUNT_ID/.bashrc/var/www/ACCOUNT_ID/.profileReplace ACCOUNT_ID with the affected account’s actual directory. Do not execute suspicious entries while inspecting them or remove normal shell settings indiscriminately.
Next, select the affected site, open Choose action → Bulk tools, and choose Restore WordPress core files. Review the targets before confirming; read the final result for that site.
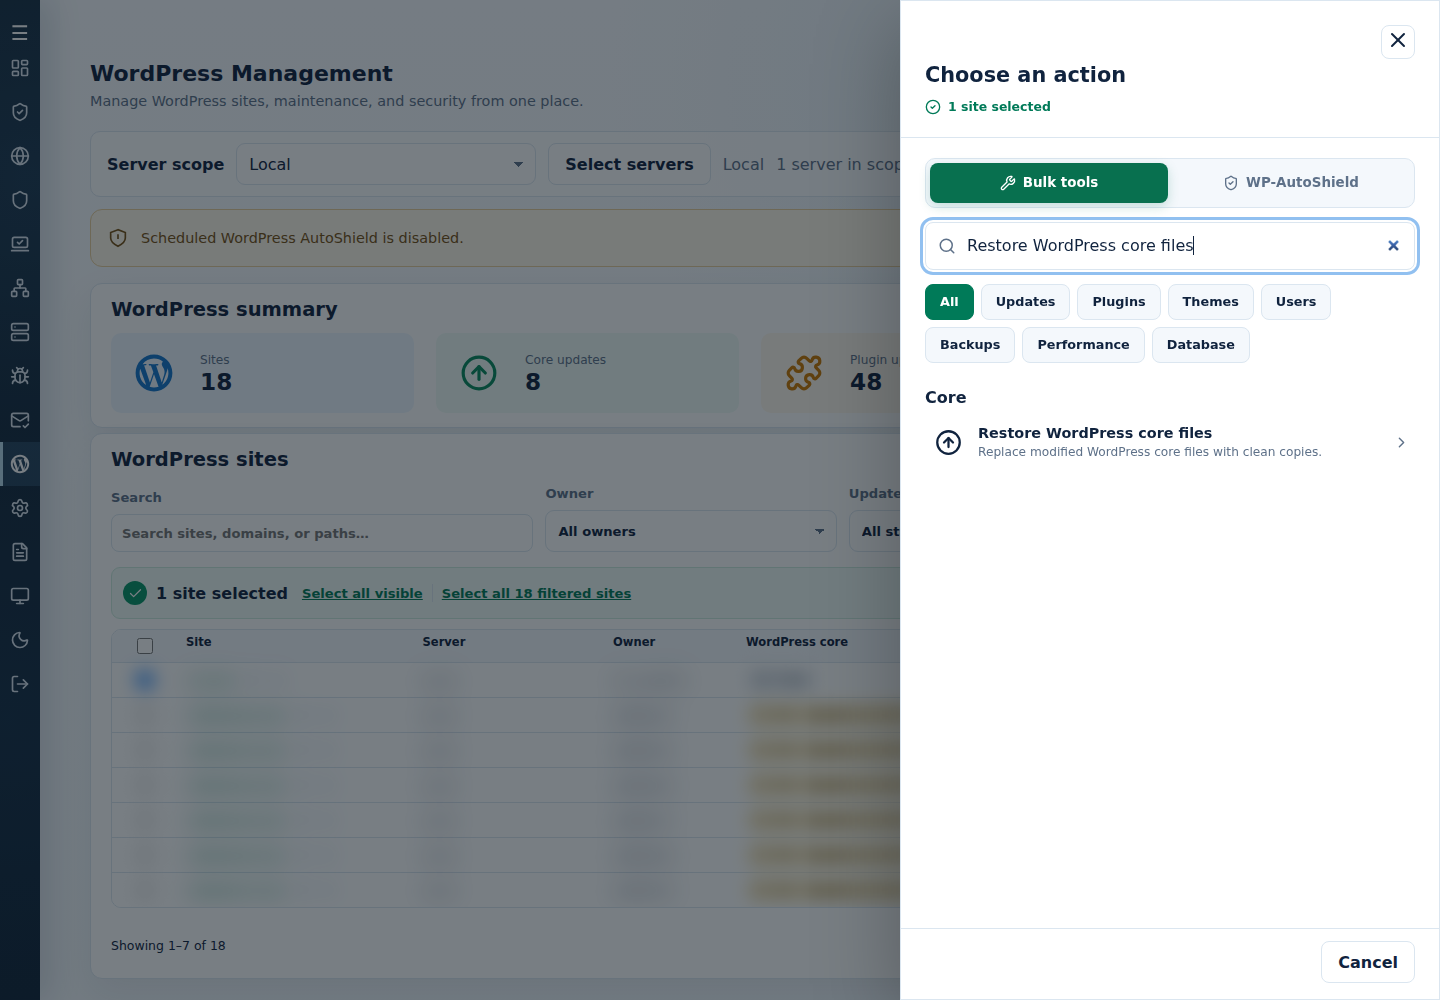
Core repair replaces core files while preserving WordPress content. It does not establish that plugins, themes or the database are clean. If you use WP-CLI for an additional core check, run it as the site owner in the correct account/container, with the exact installation path:
wp core verify-checksums --path=/var/www/ACCOUNT_ID/public_html --skip-plugins --skip-themesReplace the example path if WordPress is installed in a subdirectory. Check the output for checksum failures and unexpected files; a successful core check is only one part of recovery. The core-download --skip-content option preserves wp-content; it does not clean it. See core recovery before manually overwriting any files.
For an experienced administrator repairing the server’s listed WordPress sites, the terminal alternative is cpfence --bulk-force-wp-core-files. Preserve backups and review its server-wide confirmation; this does not target only the site you selected in the WebUI.
Step 3: Scan and review the infected site
Section titled “Step 3: Scan and review the infected site”Run a Custom scan for the installation. Review findings and actual quarantine actions; also inspect its database scan results. A submitted scan is not a completed clean result.
The root-terminal alternative on the affected server is:
cpfence --custom-scan /var/www/ACCOUNT_ID/public_htmlUse the installation’s actual path. Quarantine depends on its configured policy; read the completed report rather than assuming every finding was removed.
Step 4: Reset compromised passwords
Section titled “Step 4: Reset compromised passwords”Reset legitimate WordPress administrators’ passwords using the selected-site password controls. Change compromised database-user passwords through your hosting control panel and update wp-config.php to match; check that the site can still connect to its database.
Step 5: Remove confirmed unauthorized accounts
Section titled “Step 5: Remove confirmed unauthorized accounts”Review Users → All Users in WordPress and the affected site’s database users in the hosting control panel. Remove confirmed unauthorized accounts, rather than deleting every unfamiliar name. Review content reassignment before deleting a WordPress user.
Step 6: Review protection and check the site
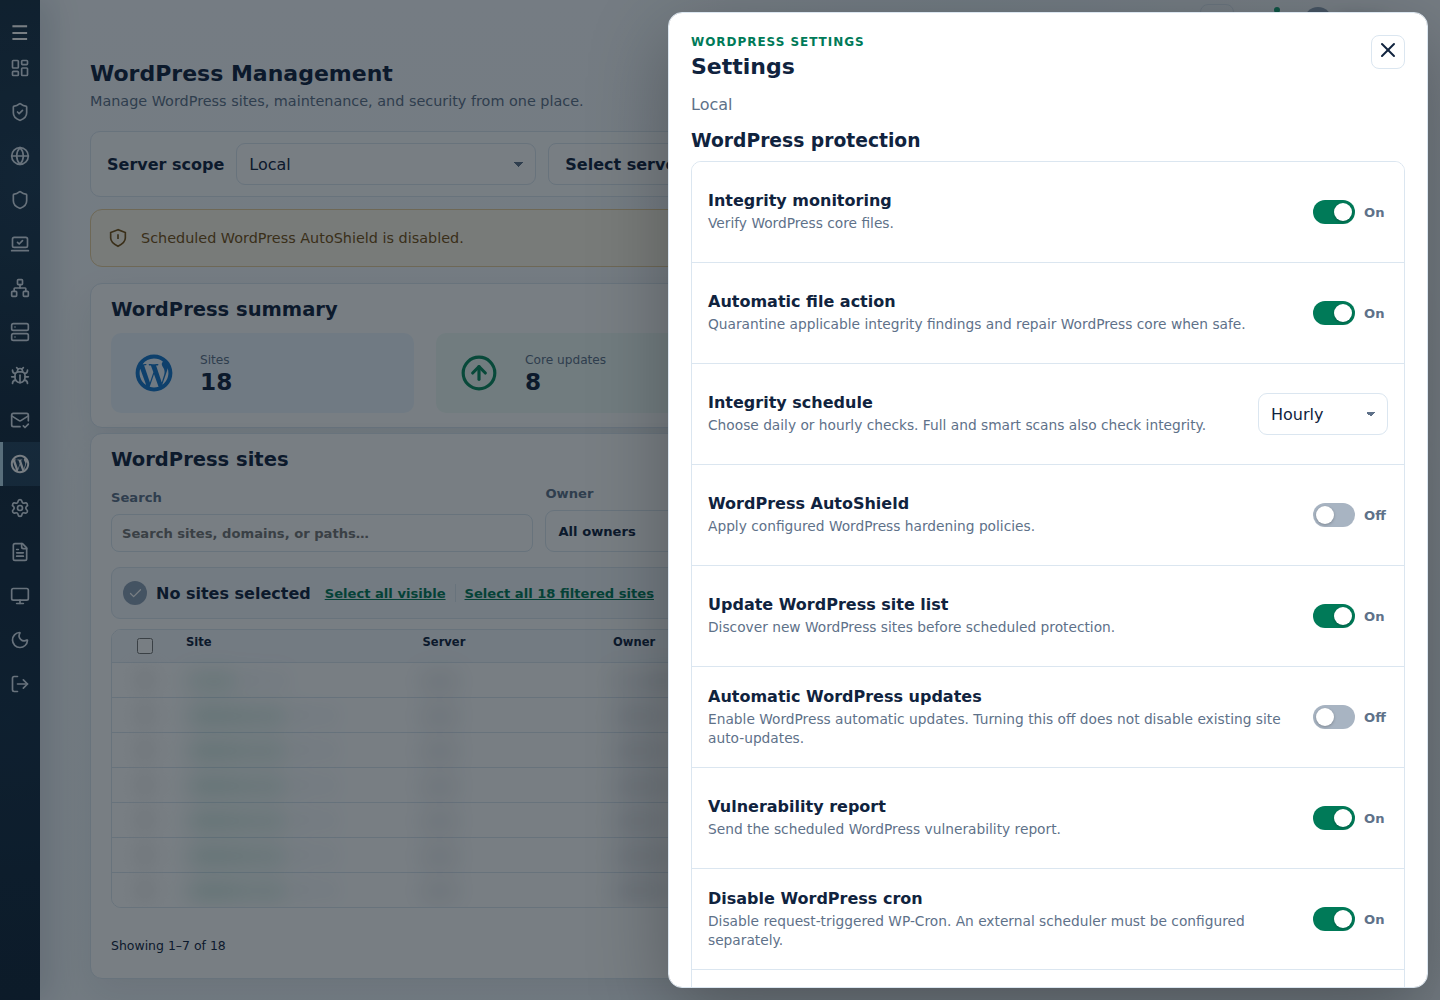
Section titled “Step 6: Review protection and check the site”Update trusted plugins and themes, remove unused ones, and check public pages and sign-in. Review AutoShield and integrity policy, including automatic file action, quarantine and check frequency where applicable. Read each setting’s consequences before changing it; an enabled switch is not proof that the site is clean.
The corresponding root-terminal controls are below. They change the affected server’s protection policy, so review them before running them:
cpfence --enable-quarantinecpfence --enable-integrity-checkcpfence --enable-auto-file-actioncpfence --set-check-frequency hourlyAutomatic file action can quarantine unexpected files during an integrity check. Preserve recovery copies and review exclusions before enabling it. To restore the daily check schedule, use cpfence --set-check-frequency daily.
Keep verified backups and arrange WordPress MFA where supported.
If the infection or cron entries return, contact support through your client area with the relevant findings and recovery results.