
Run a scan and review results
In cPFence v4+, open Threat & Malware Detection to scan a server or website path. Administrators can run scans; support users need target-server access and scan/history/finding permissions. Stop, restore, quarantine, and delete have separate permissions. The target needs an eligible license and connection.
Scan Summary covers malware scans. Use the separate WordPress Integrity, Suspicious Plugins and Rootkit Scans tabs for their checks and retained records.
Choose the server
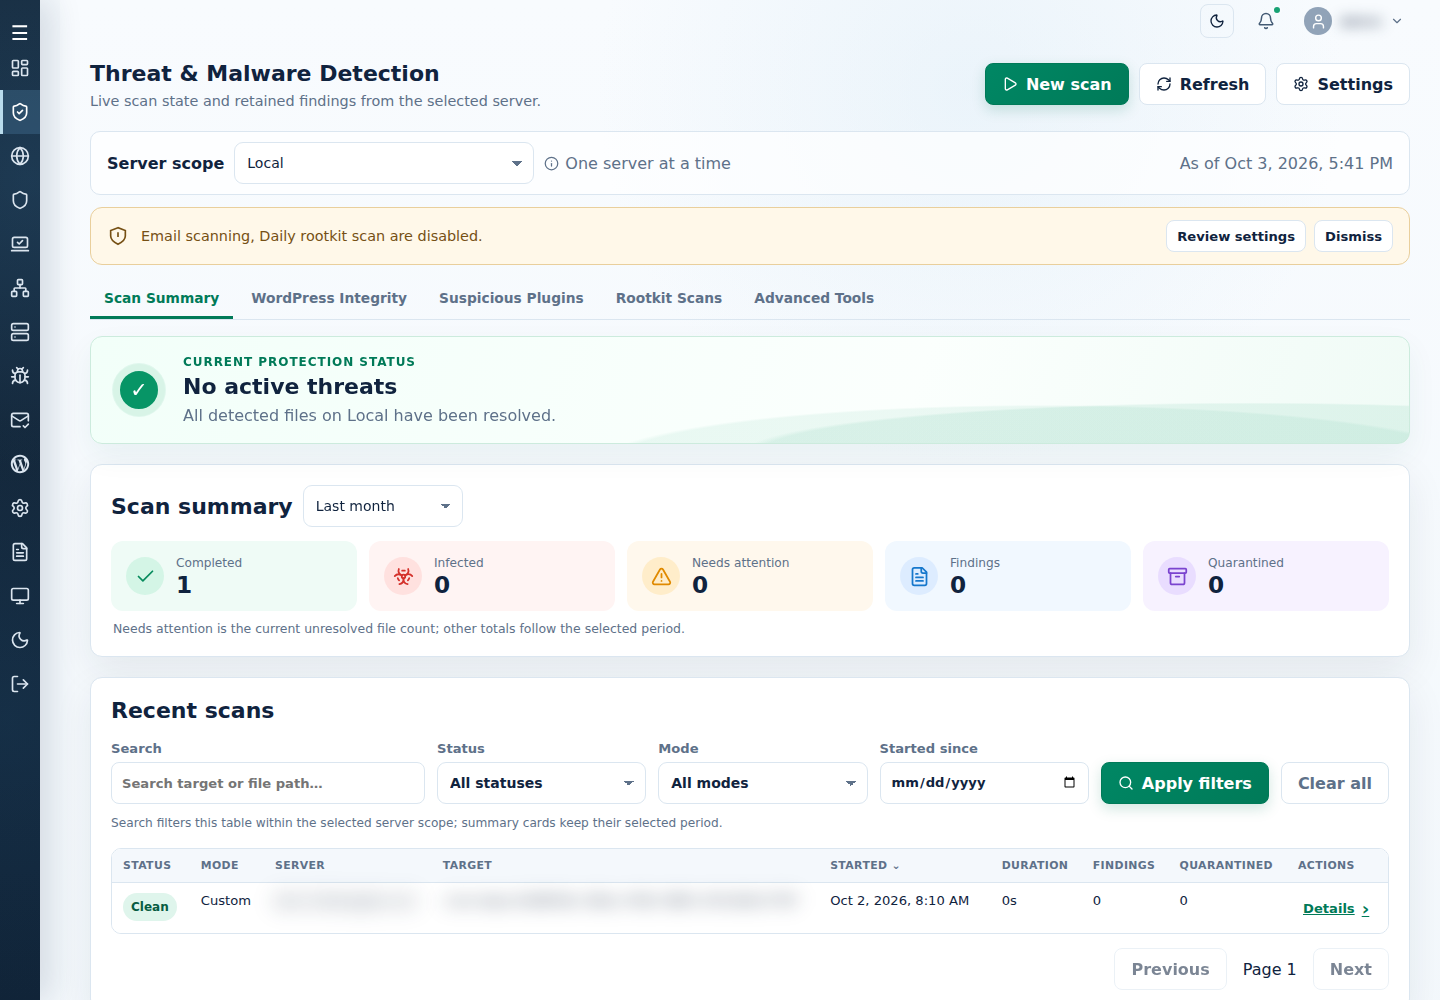
Section titled “Choose the server”Select Scan Summary and choose Local or one secondary server in Server scope. This selection controls New scan, history, details, and quarantine.
The sidebar’s server selection is separate bulk scope for Advanced Tools. New scan scans one server.
Start a scan
Section titled “Start a scan”- Click New scan and check the server in Start a new scan.
- Choose Smart scan for selected file types, Full scan for eligible files under
/var/www, or Custom path for one path beneath it. - For custom scanning, enter Path under /var/www or use Choose Account to Scan. Check the autofilled path; use an existing directory without symlinks.
- Check the quarantine setting: automatic quarantine can move detected files out of the website.
- Click Start scan, or Cancel to leave without starting.
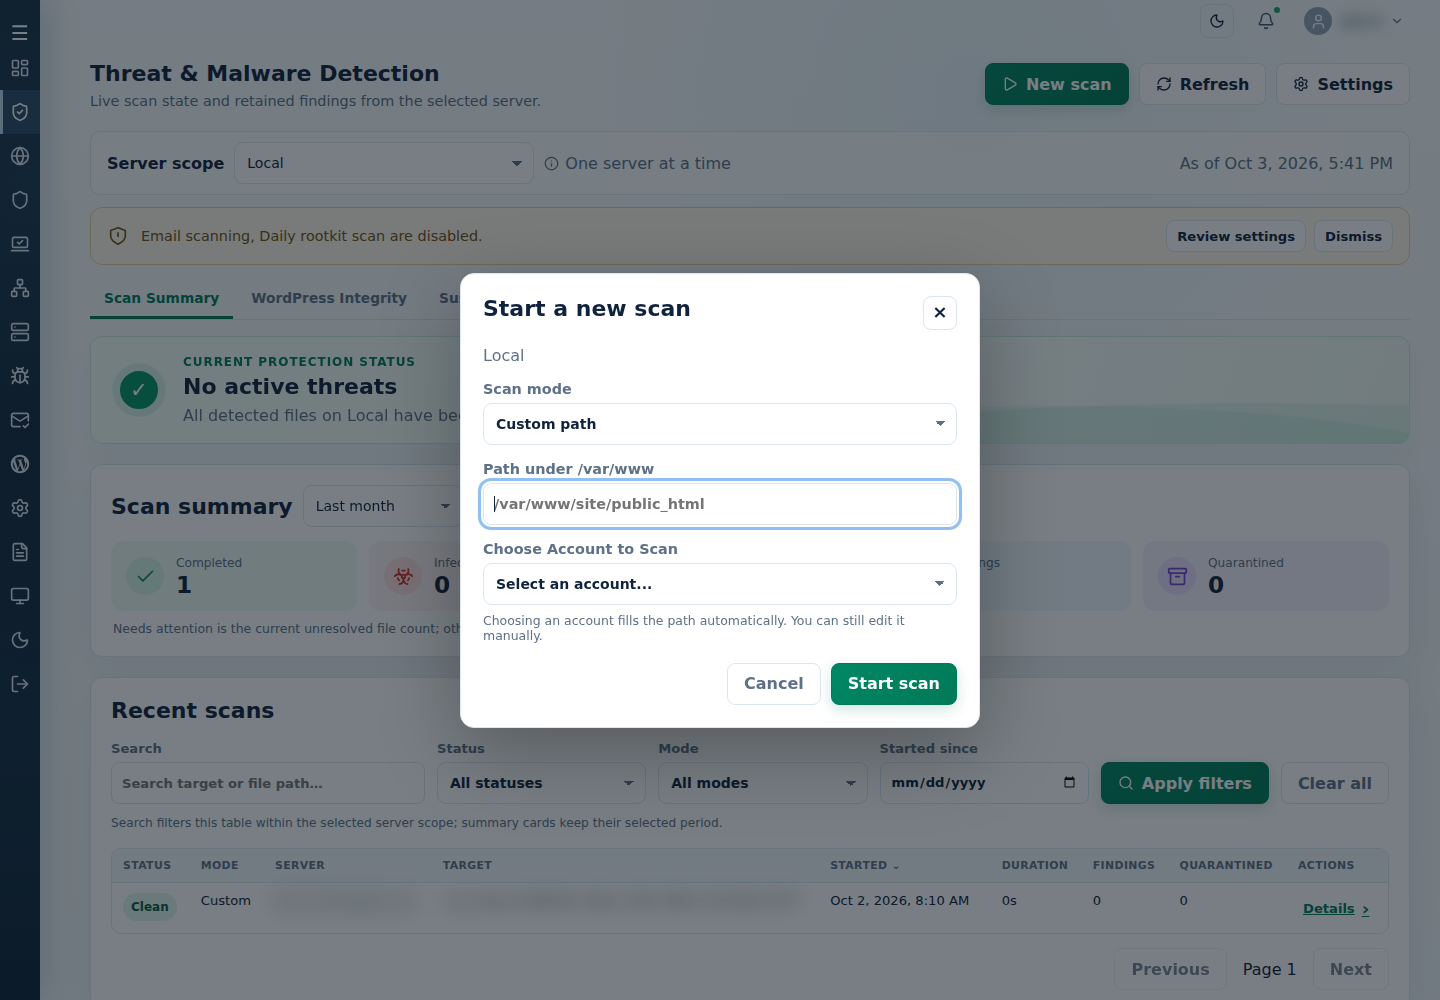
Accepted work runs in the background; another active scan prevents a duplicate. Full and Smart can include enabled mail/integrity checks. Starting does not prove completion.
Run a scan from the CLI
Section titled “Run a scan from the CLI”As root on the licensed target server, choose the command for your task:
| Task | Command |
|---|---|
| Full scan | cpfence --full-scan |
| Smart scan | cpfence --smart-scan |
| One path | cpfence --custom-scan /var/www/EXAMPLE/public_html |
| Progress and results | cpfence --scan-status |
| Stop active full/smart/custom work | cpfence --stop-scan |
Replace the custom path with your actual path. Follow the log path printed by the command; tail -n 25 -f LOG_PATH follows that file. Closing the terminal does not stop accepted background work. Scan time depends on files and available resources; no fixed completion time is promised. The compatibility detection history is /var/log/cpfenceav/infections.history; use the current scan record to confirm actions.
If a scan fails to start, follow scan startup troubleshooting.
Monitor the result
Section titled “Monitor the result”Watch the activity card and Recent scans. Refresh reloads records; navigating away does not cancel the scan.
| Status | Meaning |
|---|---|
| Running | Work is active; wait or use Stop scan. |
| Clean | Completed with no recorded malware findings within its scope. |
| Infected | Completed with findings; inspect each action. |
| Failed | Review failure stage and diagnostics; findings can be partial. |
| Stopped | Cancelled; earlier file actions remain. |
| Interrupted | Did not finish normally; inspect diagnostics before retrying. |
Stop scan confirms and stops this server’s active scan. It does not undo quarantine.
Use Search, Status, Mode, or Started since, then Apply filters to find a record. Needs attention counts unresolved files; other totals follow their selected period.
No active threats is not proof that every protection check completed. Review this server’s latest successful protection check. Protection reminders → Review settings opens settings for the named server; dismissing a reminder does not enable protection or resolve a finding.
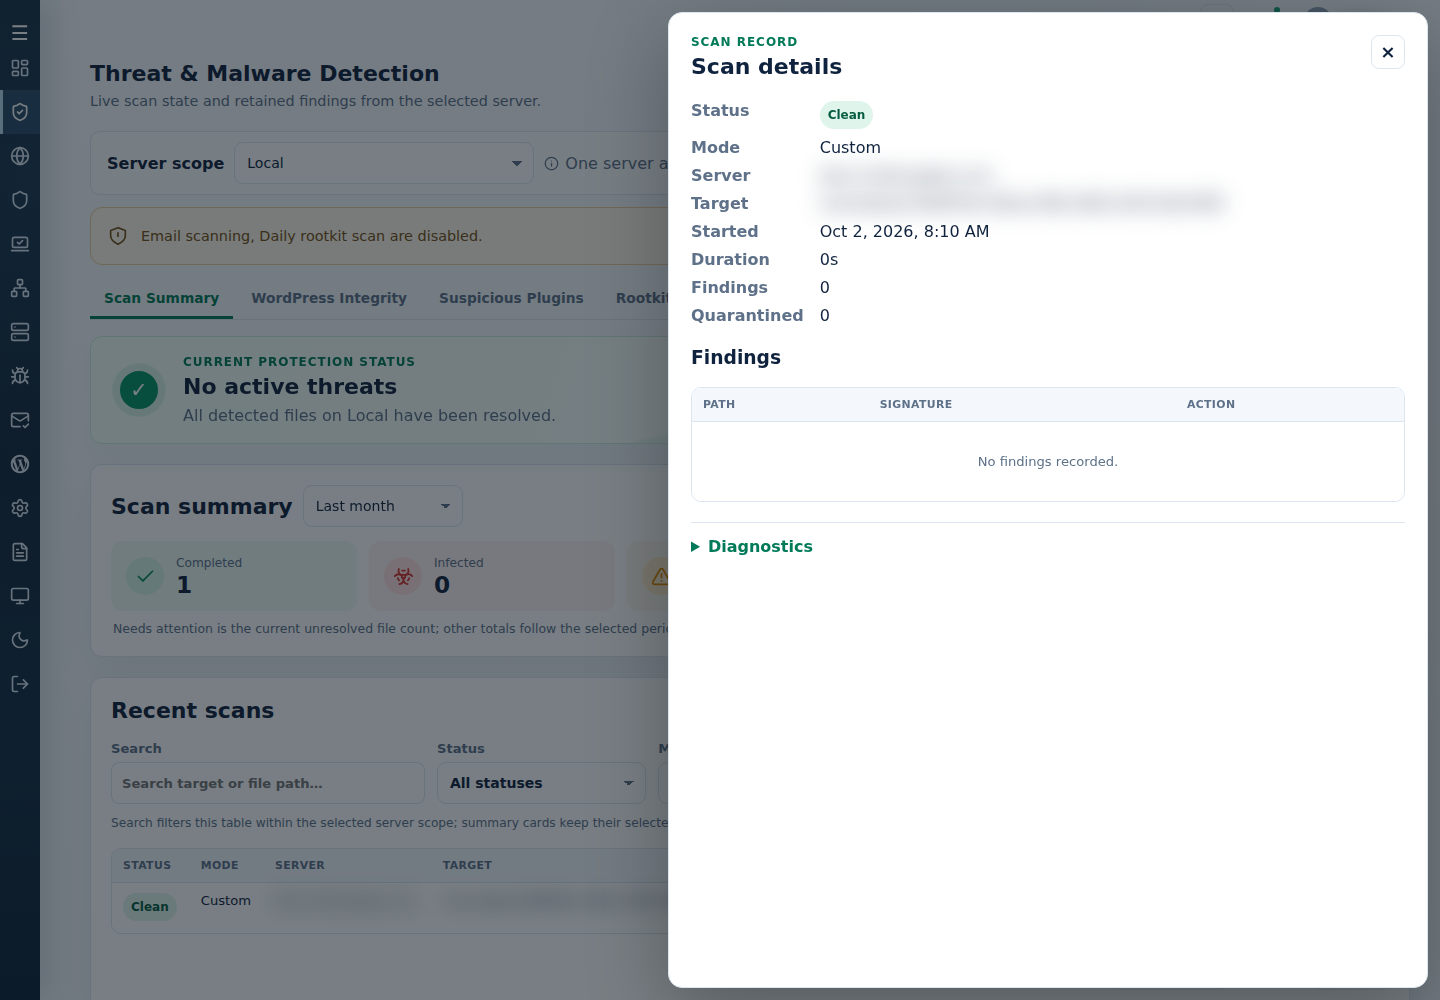
Open Details to compare Findings, Quarantined, and each file’s Action. A finding does not prove quarantine succeeded. For errors, expand Diagnostics → Load bounded raw log. Details show at most the first 100 findings.
For row actions, interrupted results, or a file already removed during external remediation, follow resolve a malware finding.
Review files before recovery
Section titled “Review files before recovery”Use Advanced Tools → Restore Quarantined Files for the selected single server. Search and Preview stored content before selecting files and clicking Restore. Check the server/count in confirmation; Cancel keeps files quarantined.
Restore returns stored bytes to the original path. Existing destinations and missing payloads prevent recovery. Trust this exact file suppresses future detections at that path; restore without trust can leave Restored — action required. Returning malware can expose the site again. Delete permanently removes a detected file without quarantine recovery.
Follow exclusions and quarantine for the complete recovery steps.
Scan several servers
Section titled “Scan several servers”Use Advanced Tools → Run Full Scan Across Servers, Run Smart Scan Across Servers, or Run Custom Scan Across Servers. Check sidebar bulk targets and confirmation, then read every server’s output.
Submission is not completion; unavailable or rejected servers leave partial coverage. Check each server’s final Scan Summary record. Stop All Running Scans acts on bulk targets and is broader than Stop scan.