
20 Tips to Set Up Your Enhance Server Like a Pro
Setting up your Enhance server can feel like an overwhelming task, but with the right approach, you can master it like a pro. Whether you’re a seasoned admin or just getting your feet wet, these tips will make your life easier and your server run smoother. Let’s dive in.
1. Choose Your Server Provider Wisely
It might seem like common sense, but you’d be surprised how many people opt for the cheapest VPS they can find during a Black Friday sale. Don’t fall into that trap. While the low price might seem appealing, compromising on quality can lead to reliability issues and poor performance. Instead, consider Hetzner—a trusted provider known for its exceptional service, robust infrastructure, and value-packed pricing that delivers long-term peace of mind.
2. Use a VPS for Your Main Enhance Control Panel
Always deploy your main Enhance Control Panel on a VPS rather than a dedicated server. A VPS provides critical features like snapshot backups, which can save you from potential disasters. Since your main control panel server is mission-critical, uptime and scalability are essential. With a VPS, you can easily adjust resources as your needs grow, ensuring optimal performance and reliability.
Pro Tip: Never use Veeam or snapshots for Enhance servers handling apps, databases, DNS, or email. They can create a cascade of inconsistencies, leaving you stuck with manual SQL fixes. If you opt for dedis for your main control panel server, the only real benefit is complicating your workflow and making life harder. Learn more here.
If you restore a snapshot backup for a busy Enhance server, you’ll end up with the main control panel server having no record of missing changes, new users added, removed, or canceled ..etc, leading to a complete mess that’s very hard to fix.
The best approach is to use a VM for your main control panel server and add as many dedicated servers to your cluster as you wish. For the main control panel server, rely on snapshot backups, and for other servers, if one goes down, simply deploy a new one and restore your websites from backups. Recovery time depends on the backup size, network and server readiness; test your restore plan before relying on it.
3. Database Role Optimization
For optimal performance, it’s best to keep the database role on the same app server. This minimizes latency and simplifies configuration. If you prefer to separate the database role onto a dedicated server, ensure it’s located in the same data center and connected via a private network. This setup allows for fast, secure communication between servers without compromising performance.
4. Set Up SSH Keys and Disable Password Login
Securing your server starts with SSH keys. Set these up for your administrator login, keeping a provider console or another recovery route available. cPFence v4+ does not need passwordless inter-server SSH for ordinary feature operation; only MultiRun and remote WordPress backup/restore need it. Here’s how to set up your administrator key and disable password login:
- Generate an SSH key pair:
ssh-keygen -t ed25519
(Ed25519 is recommended for its security and performance.) - Copy the public key to your server:
ssh-copy-id root@<server-ip>
If password login is disabled, manually copy your public key (e.g.,~/.ssh/id_ed25519.pub) to the~/.ssh/authorized_keysfile on the server. - Test your connection:
ssh root@<server-ip> - Disable password login:
Edit your SSH configuration carefully, preserving existing rules. For root key-only login, usePermitRootLogin prohibit-passwordandPubkeyAuthentication yes. Validate withsudo sshd -t, check the effective rules, then reload withsudo systemctl reload ssh. Keep this session open and test a second key login. Follow the complete SSH hardening and recovery steps.
Pro Tip: Always verify that your key works before disabling password login to avoid locking yourself out!
Read More : How to Secure SSH While Allowing cPFence WebUI Access?
5. Set Your Server’s Timezone and Hostname
Setting the correct timezone and hostname for your server isn’t just about personalization—it’s essential for proper logging, scheduling, and system identification. Having the right timezone ensures that timestamps in logs and scheduled tasks align with your region, making troubleshooting and maintenance much easier. A clear hostname helps you quickly identify servers in your infrastructure, reducing confusion in multi-server setups.
Here’s how to set them:
- Set the timezone:
sudo timedatectl set-timezone America/New_York
Adjust the timezone to your region. Find Your Timezone Here. - Set the hostname:
sudo hostname server1.yourdomain.com
These simple steps help keep your server organized and running smoothly while avoiding potential issues with logs or task management.
6. Review SWAP When Using Owl AutoMySQL
If you’re using cPFence Owl AutoMySQL in cPFence v4+, SWAP does not need to be disabled. Review actual RAM, swap use and workload with your server administrator. Query control does not replace enough memory or suitable account limits. For the current guidance, read:
Does Owl require removing swap?
Important: Disabling swap on a memory-constrained server can cause allocation failures or crashes. Keep a recovery margin and resolve sustained memory pressure first.
7. Prevent MySQL Abuse
Help your server stay cool by limiting the maximum simultaneous user connections. Edit my.cnf by going to Enhance Main CP >> Server >> Database >> Edit my.cnf and add the following:
max_user_connections=25
Restart MariaDB to apply the changes:
systemctl restart mysql.service
Most hosting providers stick to 20-30 connections per user. Don’t go beyond 45 unless you’re feeling adventurous.
8. Automate Updates and Log Maintenance
Keeping your Linux server updated is crucial for maintaining security and performance. Enhance Server logs do need some improvements. We have even seen Enhance servers run out of space overnight due to logs growing out of control. Not fun. Save yourself the hassle of manual updates and log cleanup. Use this script: Automating Updates and Logs.
9. Embrace OpenLiteSpeed
OpenLiteSpeed (OLS) and Enhance are a match made in server heaven. OLS offers professional-grade performance, leaving competitors in the dust. One standout feature of Enhance is its seamless integration with OpenLiteSpeed (OLS). This powerful web server combines high performance and stability, making it an excellent choice for hosting environments. While other control panels, like DirectAdmin and CyberPanel, also support OLS, they often fall short: DirectAdmin’s OLS integration can be overly complex, and CyberPanel ,despite being free, struggles with Security issues and limited community support.
Enhance, in contrast, offers a polished and user-friendly experience, making OLS implementation straightforward and hassle-free. If you want to push your OLS performance further, especially on larger servers, and ensure settings persist across updates, explore our optimization guides:
cPFence OLS Freeze: 100% OLS Settings Persistence for Enhance Servers
How to Optimize OpenLiteSpeed for Large Shared Hosting Servers.
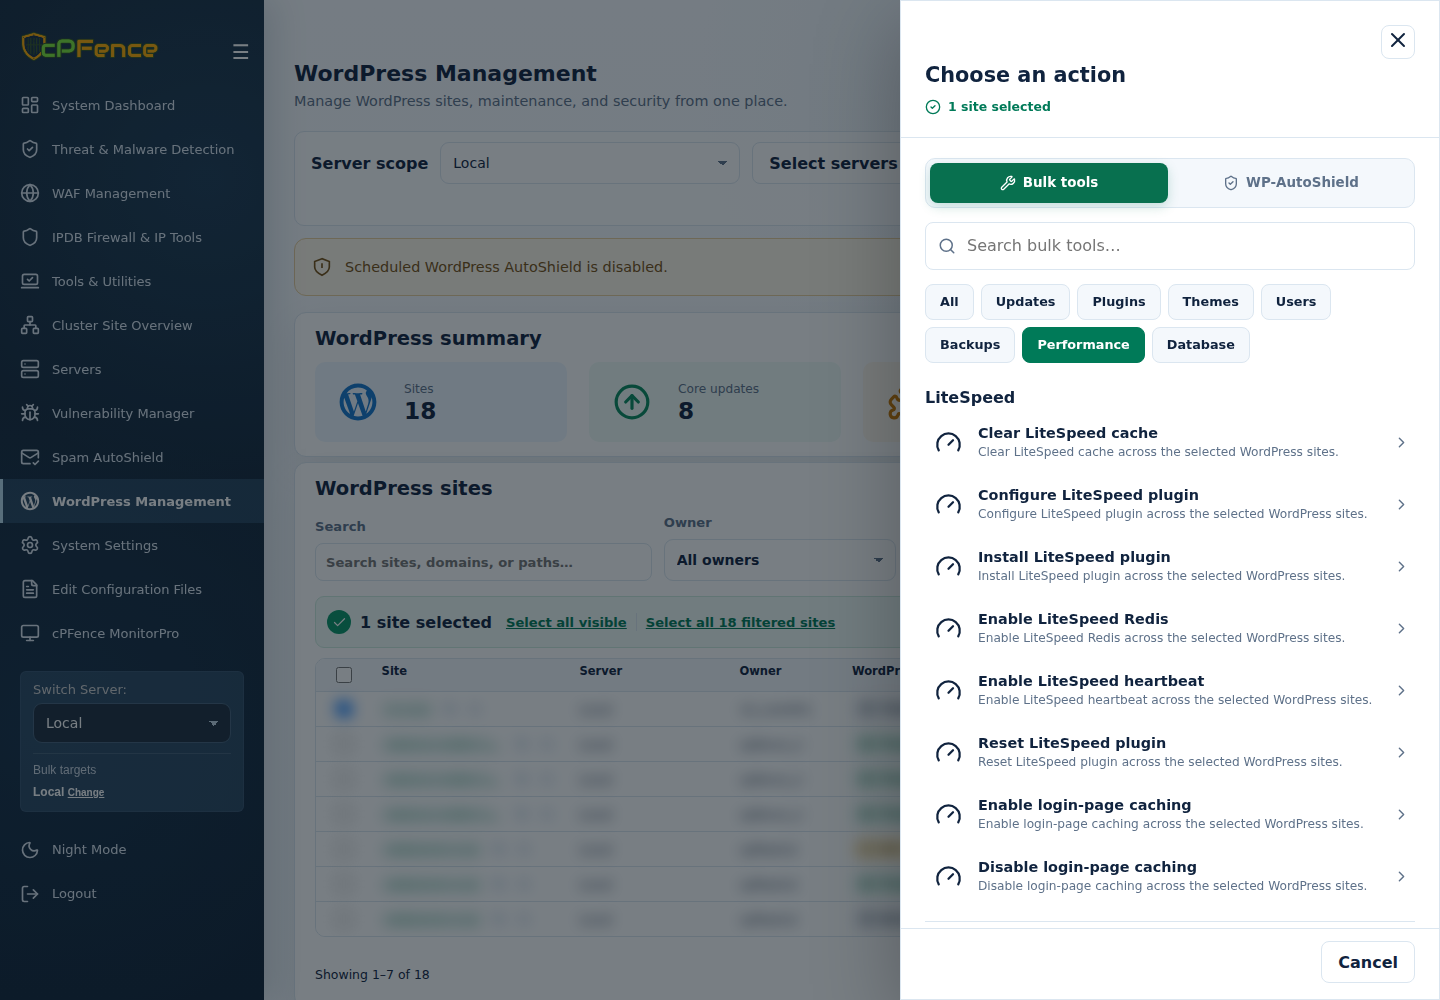
With cPFence v4+ you can apply supported changes to selected websites, servers, or your cluster, giving you the power to solve big headaches in minutes instead of hours. Here are a few ways hosting companies and VPS owners can put our bulk tools to work:
Supercharge Cluster Performance With cPFence Bulk Tools
-
Uninstall Cache Plugins
-
Install LiteSpeed Plugin
-
Configure LiteSpeed Plugin
-
Bulk Enable LiteSpeed Heartbeat
- Optimize All WordPress Databases
- Bulk Enable Redis Caching in Enhance Settings (found in ApiMachine Bulk Tools)
Run these powerful bulk tools in sequence on a small reviewed selection first: remove conflicting cache plugins, install LiteSpeed Cache, apply its preset, and configure heartbeat and Redis. Keep backups and custom settings before removal or preset changes; check site behavior and measured performance afterwards.
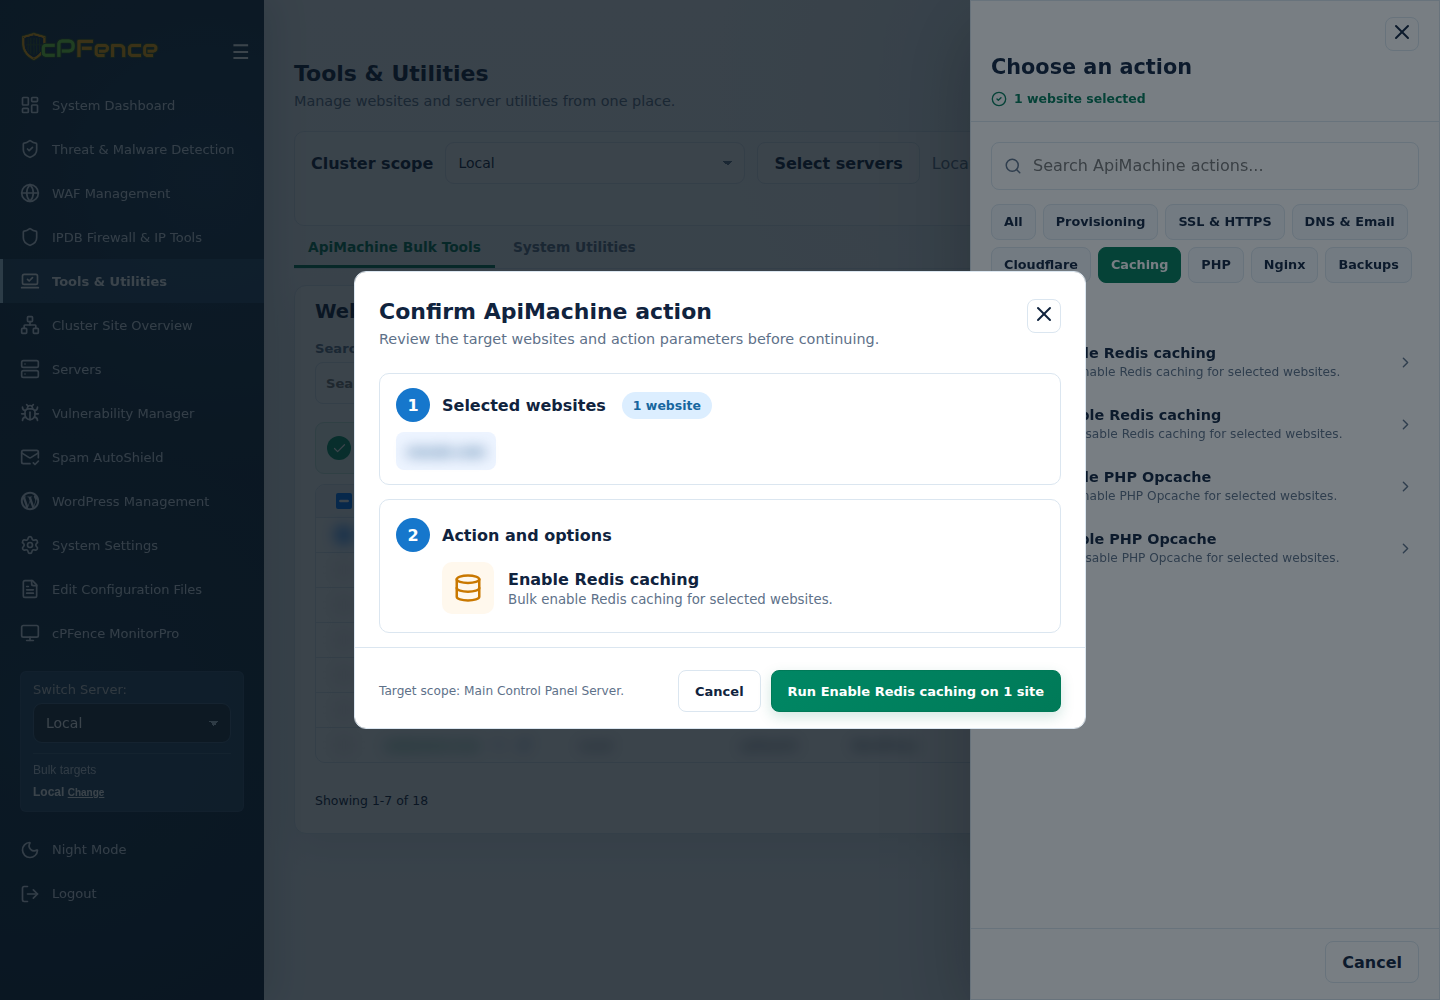
In cPFence v4+, open WordPress Management, select the intended servers and sites, then Choose action > Bulk tools > Performance. Review the sites and target servers in the confirmation before running each action, then read every site’s final result. Use Tools & Utilities > ApiMachine Bulk Tools > Caching > Enable Redis caching for the Enhance Redis setting; it needs a configured Enhance API key and its own website selection.
10. Optimize Your Application Settings for Security and Performance
To get the most out of your Enhance server, fine-tune your application settings for a balance of security and performance. Here’s how:
- Access the Settings: Go to your main Enhance CP > Settings > Application.
- Add or Update the Following Values:
- date.timezone: America/New_York (Adjust this to your region. Refer to the List of Timezones).
- default_socket_timeout: 60
- disable_functions:
exec,system,passthru,shell_exec,dl,popen,show_source,posix_kill,posix_mkfifo,posix_getpwuid,posix_setpgid,posix_setsid,posix_setuid,posix_setgid,posix_seteuid,posix_setegid,posix_uname,pcntl_exec,expect_popen - max_execution_time: 30
- max_input_time: 60
- max_input_vars: 1000
- memory_limit: 256M
- post_max_size: 128M
- upload_max_filesize: 128M
These settings are optimized for general shared hosting environments, but feel free to adjust them based on your specific needs.
11. Set Up Your Package Resources Wisely
When configuring your hosting packages, it’s important to strike the right balance between resource allocation and server performance. Here’s our recommendation:
- Base Limits on Measured Load: Follow Respond to high server load to review package limits and use per-website overrides for repeat offenders.
Some hosting admins fall into the trap of providing excessive resources, thinking it will improve customer satisfaction. However, even top-performing hosting companies don’t go overboard , and for good reason. Over-allocating resources often leads to inefficient usage and unnecessary strain on your servers.
If you choose the right server specifications and properly optimize your setup, you’ll be amazed at how much traffic these limits can handle. Whether it’s a high-traffic production environment or a stress test using tools like loader.io, the results can be impressive. Just be sure to implement the caching optimizations mentioned in this guide to maximize efficiency.
12. Use Enhance Incremental Backups
If you’re not using Enhance’s backup system, you’re missing out on a lot. This backup system is incredibly efficient, utilizing rsync technology to provide seamless, high-performance backups.
What makes it so great?
- Flexibility: Many Enhance users schedule daily backups, but some push the envelope by running backups every 4–6 hours.
- Efficiency: Thanks to its incremental backup method, only changes are backed up after the initial full backup, saving time and resources.
- Reliability: Rsync ensures consistency and data integrity, making it a dependable choice for your backup needs.
If you’re looking for a robust and efficient backup solution, this is it, right in your Enhance CP, so make use of it and ditch those old-fashioned backups!
13. Utilize Redis and Install LiteSpeed Cache Plugin
Caching is a game-changer for server performance, yet most clients don’t have a clue what a caching plugin even does. That’s where you step in! By enabling Redis and installing the LiteSpeed Cache plugin, you can significantly improve your server’s performance, reduce resource consumption, and deliver faster page load speeds—resulting in happy users.
If you’re using cPFence v4+, this process is even simpler. You can bulk install, configure, and manage the LiteSpeed Cache plugin across all WordPress sites server-wide with just a few commands:
cpfence --bulk-install-ls-plugin       # Install the LiteSpeed plugin on all WordPress sites server-wide.

cpfence --bulk-configure-ls-plugin     # Configure the LiteSpeed plugin with advanced presets and Redis enabled server-wide.

cpfence --bulk-enable-ls-heartbeat     # Bulk enable and configure heartbeat options (disabled on frontend, minimal on backend).

cpfence --bulk-clear-litespeed-cache   # Clear the LiteSpeed cache on all WordPress sites server-wide.
Before running these commands: Use root on the server hosting the sites and review /var/log/cpfenceav/wp-sites-list.txt. The commands use that server’s list, separately from checked WebUI rows. Install LiteSpeed Cache before applying the preset, keep existing custom settings, and check Redis connectivity and each site’s result. The heartbeat preset disables frontend heartbeat and sets administration/editor intervals to 120 seconds; test autosave and dependent plugins.
Why LiteSpeed Cache?
- All-in-One Optimization: It combines caching, Redis integration, and heartbeat optimization in one plugin—no need for separate solutions.
- OLS Customization: It’s highly optimized for OpenLiteSpeed servers, ensuring excellent performance.
- Efficiency: Clearing Redis and file caches becomes fast and seamless, saving you time and reducing server load with a single command.
By using LiteSpeed Cache, you’re not just optimizing performance—you’re also streamlining management for both you and your clients. It’s a massive time saver and a performance boost, all rolled into one efficient tool!
You can use cPFence v4+ ApiMachine Bulk Tools to enable Redis caching for the Enhance websites you select, after reviewing and confirming the targets.
14. Manage MySQL Load Spikes
If you’re still dealing with load spikes, chances are they’re caused by long MySQL queries. Enhance currently doesn’t offer built-in limits for MySQL resource usage, so you’ll need to take a proactive approach.
Troubleshooting Steps:
- Identify the users causing the issues.
- Ask them to optimize their code—most of the time, it’s a poorly written plugin or theme in WordPress that’s to blame.
One-Click Solution with Owl AutoMySQL
For a faster and stress-free fix, use cPFence Owl AutoMySQL. This module controls eligible long-running and sleeping MySQL connections; review account resource limits separately in Enhance. To enable automatic selection on the intended server with Owl monitoring enabled, run:
cpfence --owl-automysql-on
Keep Maximum query duration at the recommended 30 seconds, review legitimate long jobs and needed exclusions, and inspect activity with cpfence --monitor-killed-queries. For more details on how Owl AutoMySQL can simplify your life, check out the full guide:
Owl AutoMySQL: One-Click MySQL Resource Limits.
15. Optimize and Secure Your WordPress Sites
WordPress is an amazing CMS, but if you leave it at its default settings, you’re setting yourself up for trouble. Security vulnerabilities and performance issues can creep up fast. Here’s how to secure and optimize your WordPress installations like a pro:
Security Measures:
- Disable file editing in WP Admin: Prevent unauthorized changes to core files.
- Disable pingbacks: Stops a common method used in DDoS attacks.
- Disable XML-RPC: Protects against brute-force attacks and resource abuse.
- Use secure keys: Don’t skip adding secure keys to your
wp-config.phpfile. - Disable WP Cron: First confirm the installation has a working Enhance scheduler; turning request-triggered cron off does not create a replacement.
- Implement brute-force protections: Add CAPTCHA and rate-limiting to your login page.
- Ensure correct file permissions: Avoid overly permissive settings that hackers exploit.
- Harden your WordPress installation: Follow WordPress Security Practices to secure
wp-includes, uploads, andwp-config.php. - Change the default admin username: Use a unique admin name to make brute-force attacks harder.
- Disable risky code: Block XSS and risky content like iframes, embeds, or scripts in posts.
- Enable integrity checks: Monitor changes to core files to detect hacking attempts.
- Use a powerful antivirus: Ensure it offers automatic detection and alerting.
- Optimize heartbeat settings: Use a plugin like LiteSpeed Cache or a heartbeat control plugin to stop load spikes caused by frequent AJAX calls.
One-Click Solution with WP AutoShield
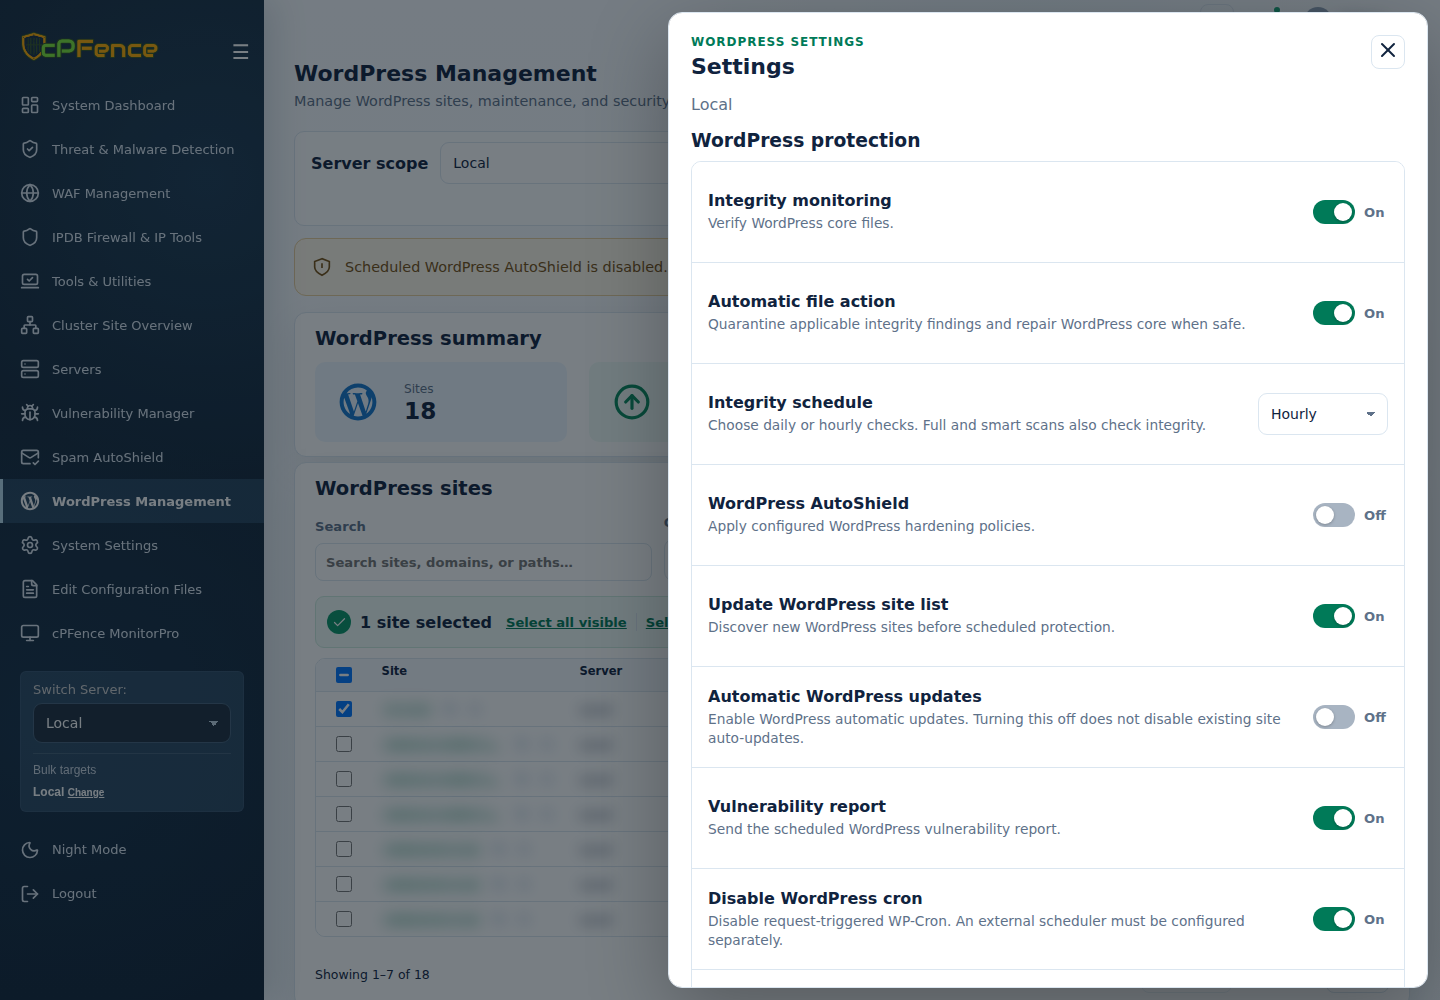
If you’d rather skip the manual work, cPFence v4+ WP-AutoShield can apply its selected daily security and maintenance policies for you. Enable the master on the intended hosting server with:
cpfence --wp-autoshield-on
Then open WordPress Management > Settings for that server, review the child policies and Save settings. Enabled policies run daily; turning the master off leaves earlier site changes in place. Integrity monitoring and LiteSpeed heartbeat have separate controls. For more details, check out:
WP-AutoShield: One-Click Security for High-Performance Hosting.
16. Set Up Your Monitoring Solution
If you’re serious about your hosting business, a 24/7 uptime monitoring solution is a must-have. It ensures you’re always aware of your website’s availability and performance. Many hosting businesses use Uptime Kuma, a self-hosted monitoring tool:
- Uptime Kuma on GitHub: It offers a sleek UI and detailed stats for all your monitored sites.
- Pro Tip: Always update your monitoring list when acquiring new clients or when a client leaves. Staying organized ensures accurate monitoring.
Want an Autopilot Solution?
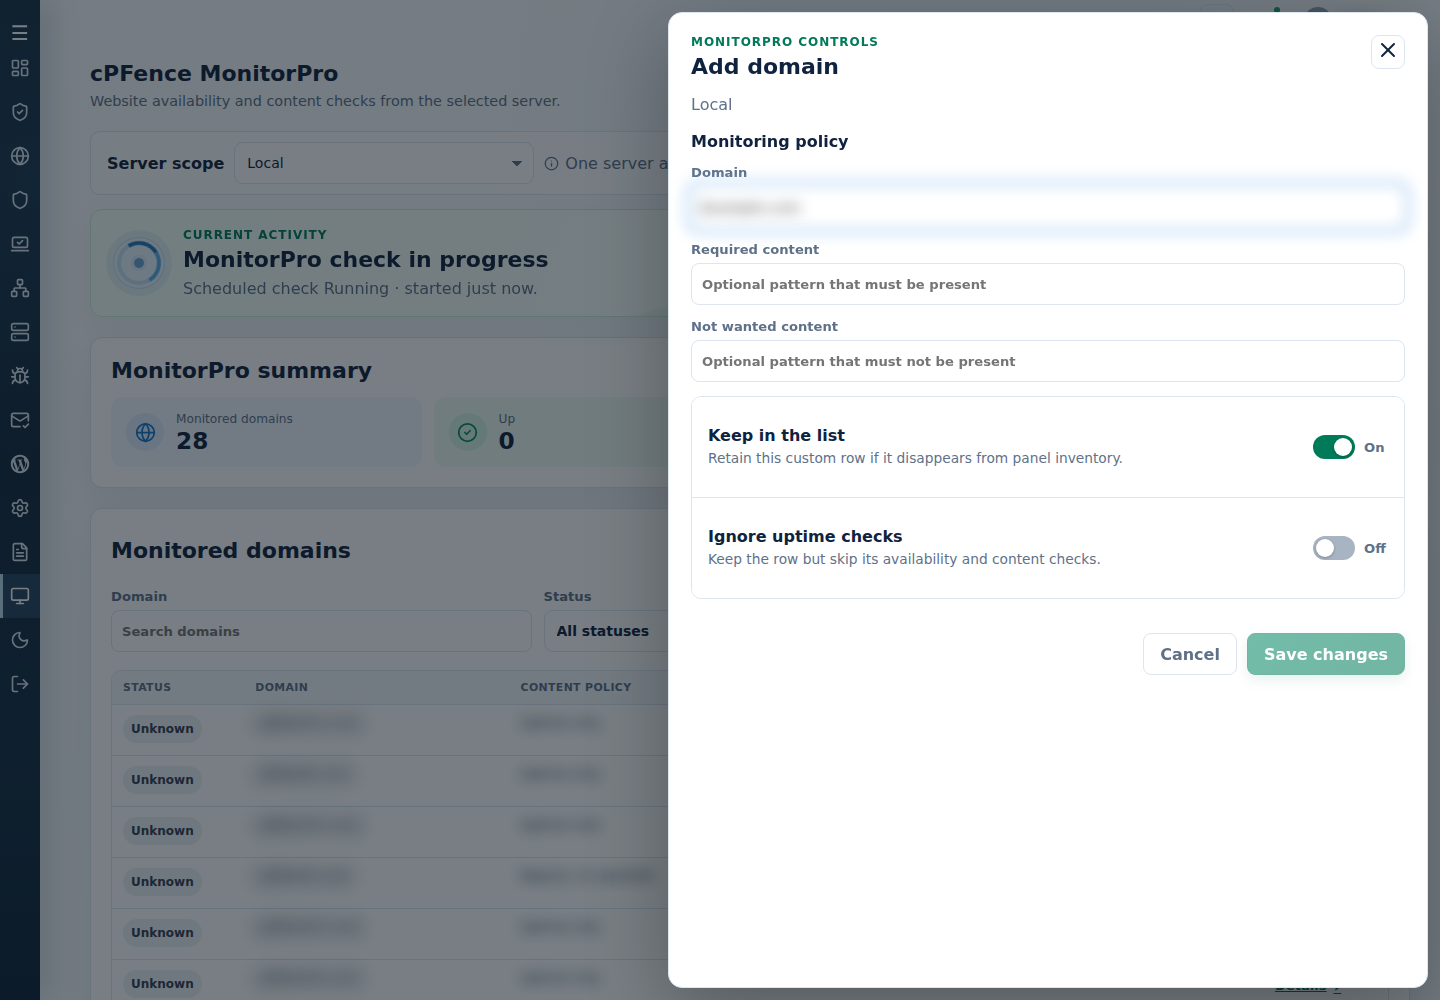
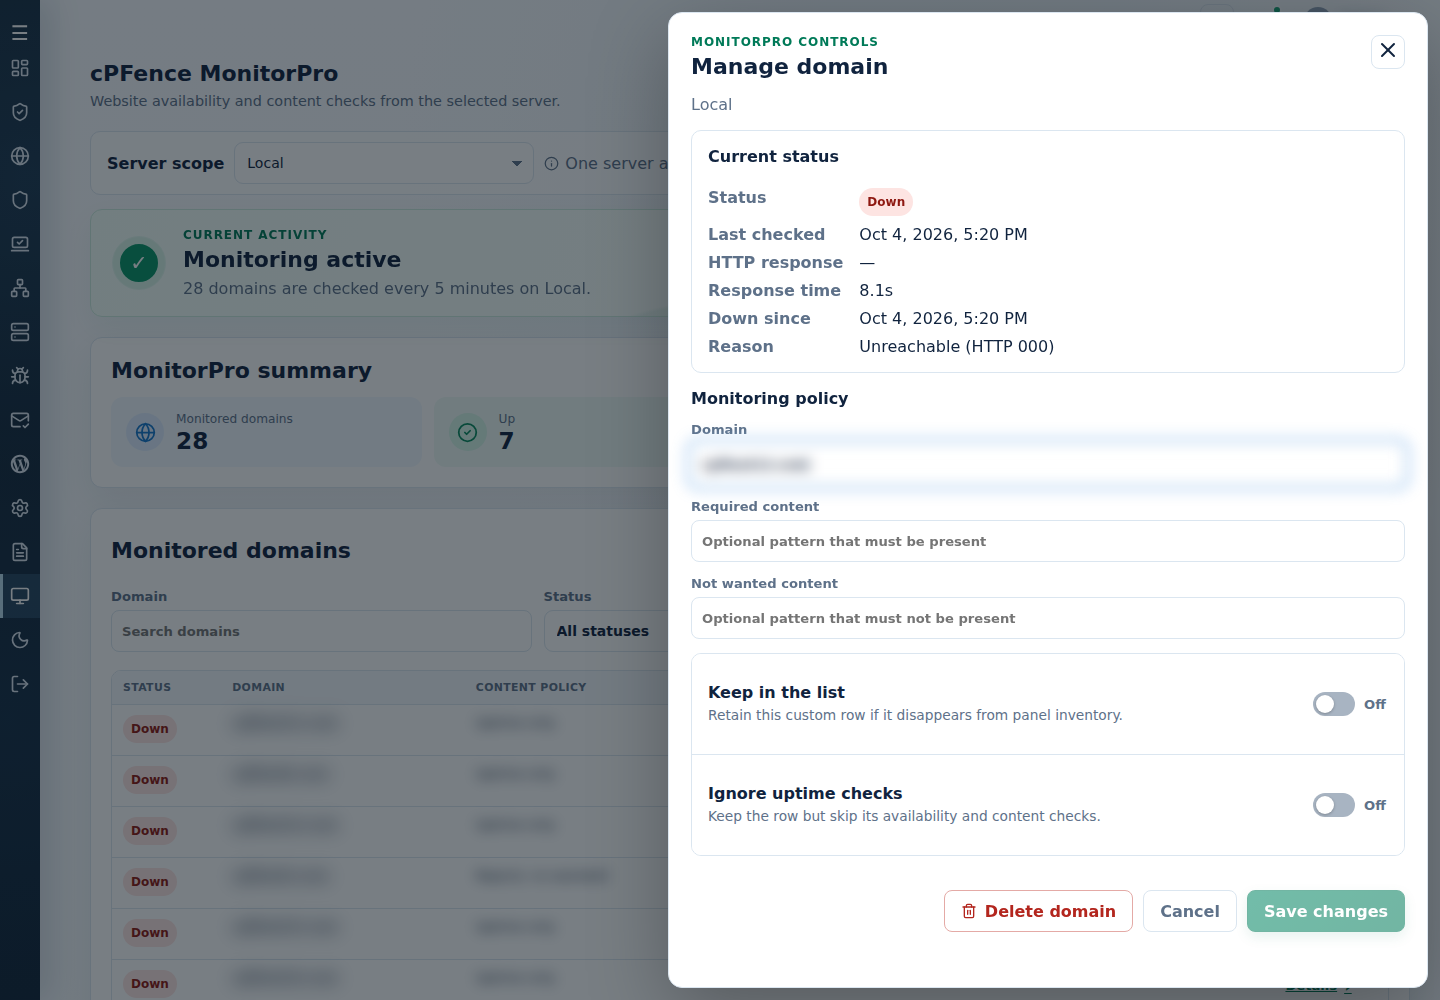
For those who’d rather avoid the manual work, cPFence MonitorPro is the perfect alternative. Getting started is incredibly simple—just flip the switch with this command:
cpfence --monitorpro-on
From there, MonitorPro handles everything for you, automatically:
- Refreshes the cluster’s domain list from Enhance on the main control panel server, retaining domains deliberately marked to stay in the list.
- Checks enabled monitoring every five minutes; review the latest results and configure notification channels separately.
MonitorPro keeps your hosting business running smoothly, so you can focus on growing your services instead of managing uptime manually. It’s monitoring made effortless!
17. Utilize cPFence Bulk Tools to Save Time
Managing multiple WordPress sites doesn’t have to be a headache. cPFence bulk tools let you handle everyday tasks from the WebUI, leaving you more time for what really matters.
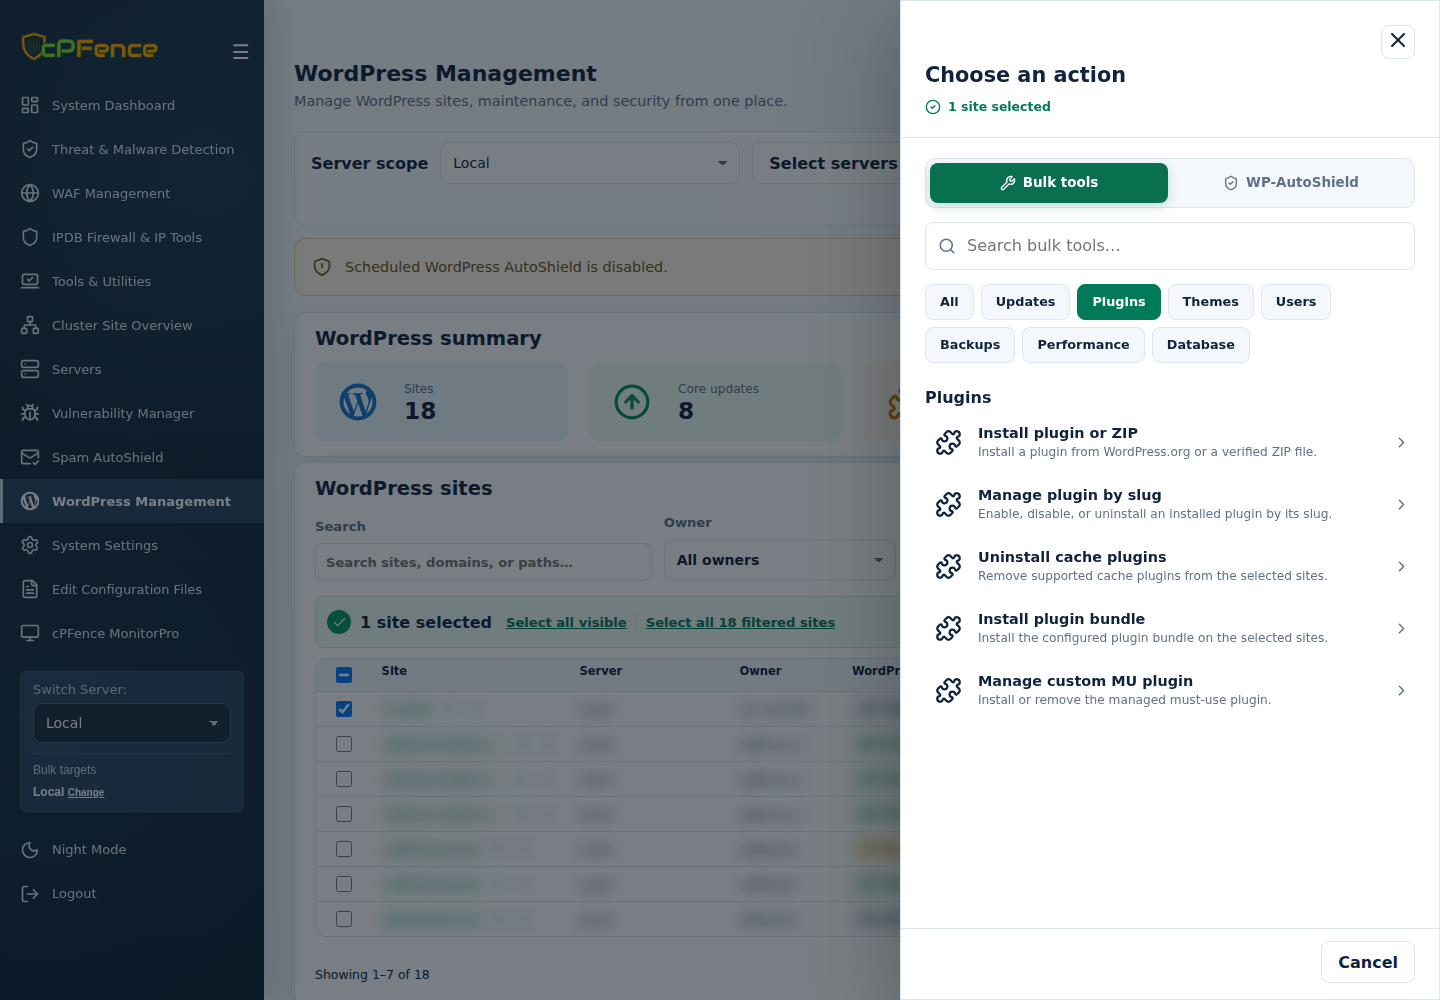
In cPFence v4+, open WordPress Management and choose your Server scope. Filter the list, select the sites you want to change, then click Choose action → Bulk tools. Filters alone do not select sites; Select all … filtered sites includes matching sites beyond the current page.
Use an account with access to the chosen servers, sites and action. Start with one site and keep usable backups before updates, removals or resets. If a form appears, fill its options and click Review action; otherwise the confirmation opens directly. Check the sites, action and target servers before confirming, then read each site’s final result—starting an action is not the same as finishing it.
Here’s what you can do without switching to the terminal. For more ideas, see our full bulk tools post.
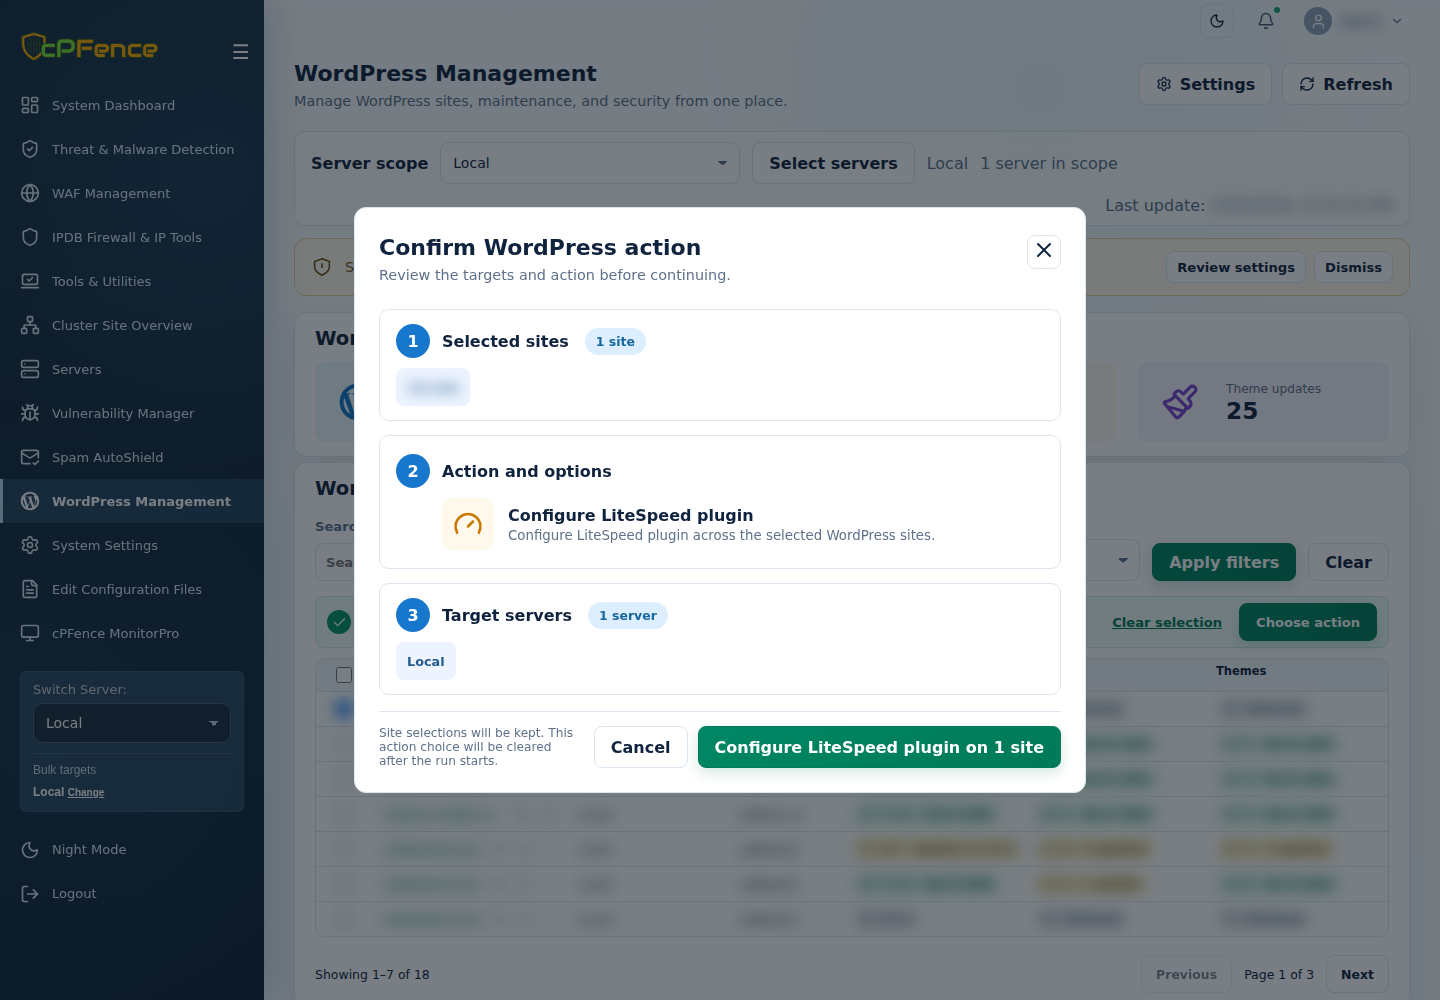
LiteSpeed Cache Plugin Management:
Choose Performance to Install LiteSpeed plugin, then Configure LiteSpeed plugin. The same group lets you Enable LiteSpeed Redis, Enable LiteSpeed heartbeat, or Clear LiteSpeed cache on the selected sites. Redis needs a working connection; check your sites after applying the preset. Reset LiteSpeed plugin resets its configuration, so save custom settings first—it does more than clear the cache.
WordPress Plugin Management:
Choose Plugins → Install plugin or ZIP. Pick a repository slug, trusted ZIP URL, server path or uploaded ZIP, then review the targets. Installation can replace existing files; check the package and enable the plugin separately. To enable, disable or uninstall an installed plugin, use Manage plugin by slug and choose its Operation. Uninstall removes the plugin and may run its cleanup, so keep a backup.
WordPress Core, Updates, and Automation:
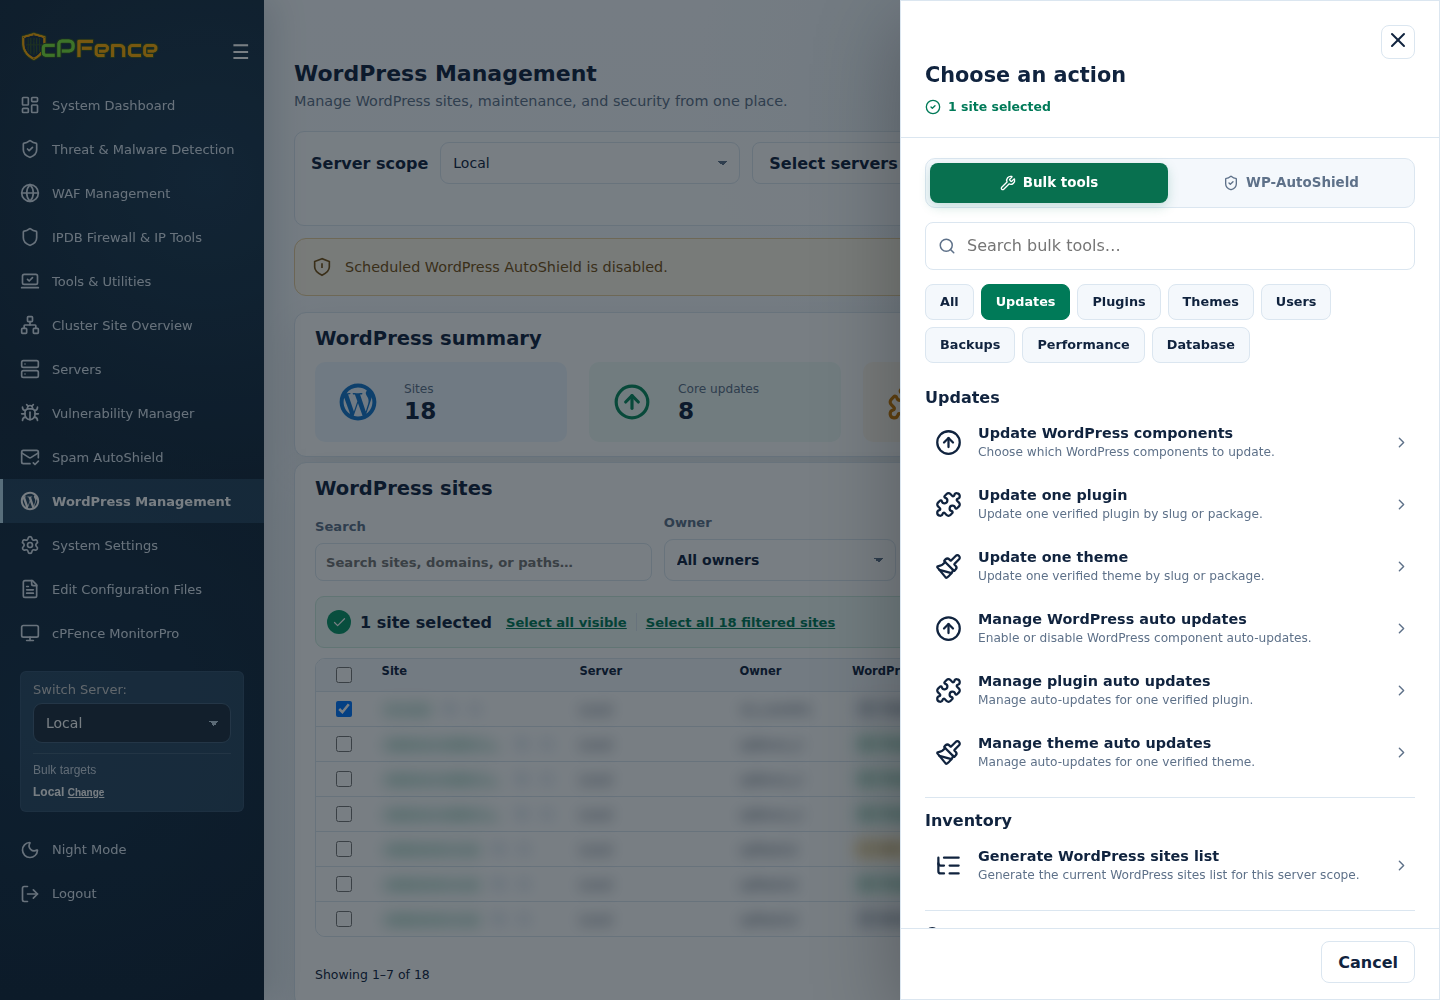
Choose Updates → Update WordPress components for an update now, selecting Core, Plugins, Themes, Translations or All components. Update one plugin and Update one theme let you make a smaller change. For future updates, choose Manage WordPress auto updates and its Enable or Disable operation; plugin and theme policies also have their own entries. Check compatibility, backups and each site’s result before rolling out to more sites.
WordPress Cron Events and Core Management:
Choose Performance → Run due WordPress Cron to run overdue events on your selection. To replace modified core files with clean copies, choose All and search for Restore WordPress core files. This can replace core customizations and does not restore the database; keep a backup and check the public site afterwards.
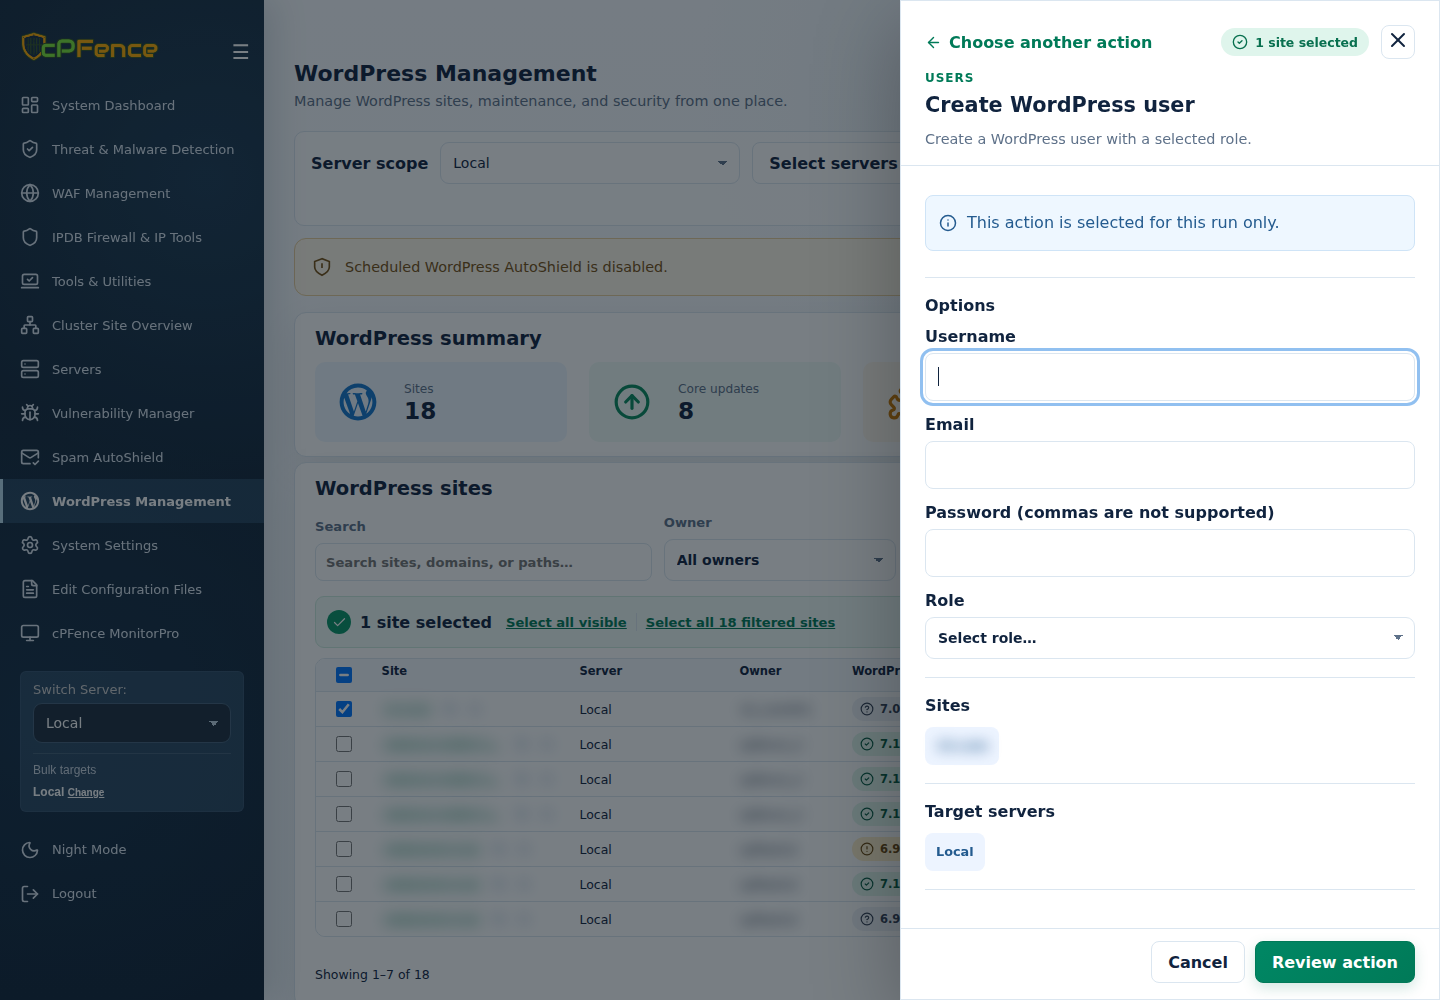
Need the same user on several sites? Choose Users → Create WordPress user, enter the username, email and private password, then select the intended Role. Check that this account and role are appropriate for every selected site before clicking Review action. The password field does not accept commas.
Site Listings and Backups:
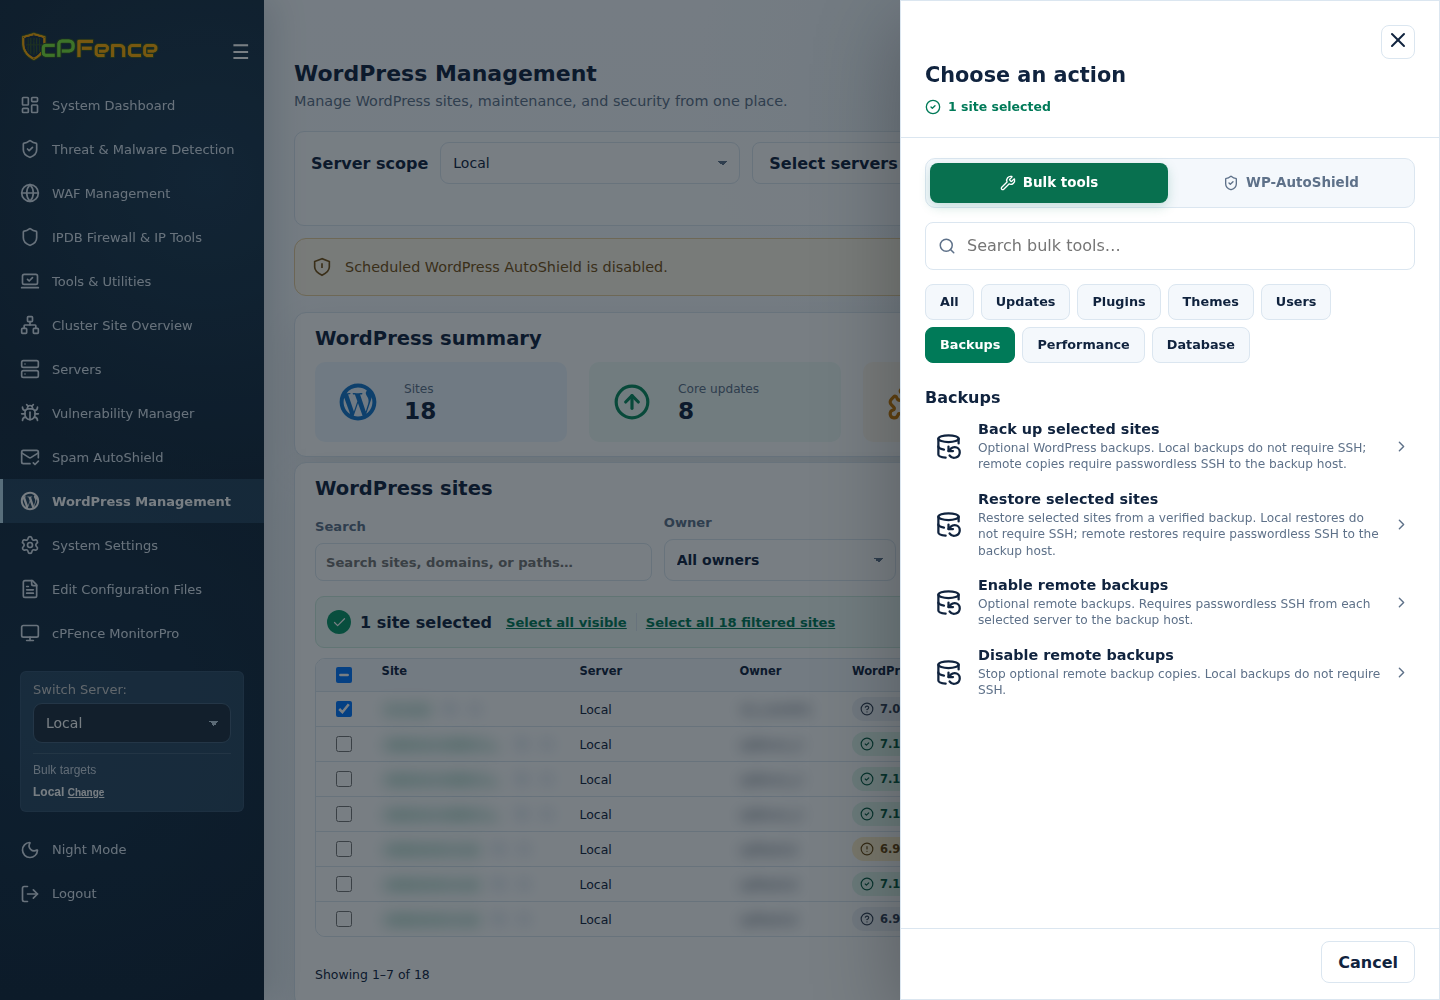
Choose Updates → Generate WordPress sites list when you need to rebuild the inventory. This uses the server scope, rather than just the checked site rows. For a website backup, choose Backups → Back up selected sites; Restore selected sites lets you recover from a verified backup, replacing current site data. Follow the backup and restore guide before confirming.
No passwordless inter-server SSH needed for ordinary v4+ tools or local backups. Only remote WordPress backup/restore and MultiRun require it. Keep remote backups off if you do not need them; the other v4+ features work normally.
With these tools, you can manage your chosen WordPress sites effortlessly, from installing and updating plugins to enabling auto-updates and generating site lists. Whether you’re optimizing performance, automating updates, or securing your WordPress sites, cPFence bulk tools are a must-have for any server admin looking to save time and simplify their workflow.
18. Backup Your Backups
Ever wondered what would happen if your backup server decides to take a vacation (or worse, fails entirely)? It’s a nightmare scenario, but one you can avoid with a simple solution: backup your backups.
This tip is especially crucial for hosting companies that handle mission-critical websites. By creating secondary backups, you ensure redundancy and protect your data from unexpected disasters. While VPS owners running non-critical sites might skip this, hosting companies can’t afford to take the risk.
Learn how to set up secondary backups effectively:
How to Backup Your Enhance v12 Backups (Full System Restore)
Taking the extra step to safeguard your backups will give you peace of mind and keep your operations running smoothly, even in the face of the unexpected.
19. Use Knowledge Bases Before Tickets!
If you’re running a smaller setup with fewer than 50 sites, you’re likely paying just about $5 a month for your Enhance license—and the same for your cPFence license. That’s an incredible value for the features and support you get. However, to keep this model sustainable, it’s important to use resources wisely.
Why Knowledge Bases Matter:
Enhance and cPFence both offer extensive, easy-to-search knowledge bases filled with solutions to common issues:
Before submitting a ticket, take a moment to search these resources. Many inquiries can be resolved quickly on your own, saving both your time and the support team’s.
Use Common Sense:
While both Enhance and cPFence teams strive to deliver top-notch support, they’re designed to handle critical issues—not daily troubleshooting for every minor question. A $5/month license doesn’t cover unlimited ticketing, so let’s keep things fair and reasonable! By using the knowledge bases effectively, you help ensure support remains available when you really need it.
20. Okay, We Lied—This Isn’t a Tip!
Actually, it’s a polite cPFence-related note that we’d like everyone to read carefully. We don’t currently offer server management services. Our team is fully dedicated to a select group of enterprise clients, and unfortunately, we’re unable to take on additional clients for server administration at this time.
While we deeply appreciate your interest and willingness to do business with us, we kindly ask that you refrain from submitting tickets requesting server management services. It’s simply not something we can provide right now, and we’d like to focus our efforts on delivering the best experience for our existing clients and working harder to continually improving cPFence to ensure it becomes the leading solution in the market. Thank you for understanding!
Follow these tips to turn your Enhance server into a high-performing, reliable powerhouse. Have additional tips or tricks? We’d love to hear from you—let’s keep improving together!
Put these tips to work with cPFence v4+
Manage protection, monitoring and WordPress tasks from one dashboard on Enhance. Only MultiRun and remote WordPress backup/restore need passwordless inter-server SSH; ordinary v4+ features work without it.
Try cPFence for free

TIP: Some admins prefer the UTC timezone, which is definitely a great choice to avoid the daylight saving chaos!
As long as both the server and PHP are set to UTC, that’s usually enough to prevent issues with client software like WHMCS and others. We’ve had occasional warnings in the past when this wasn’t configured properly, which is why it made it onto our list.