
Manage your license and updates
These instructions cover cPFence v4+. Use root for CLI commands. WebUI update tools require the relevant maintenance permission and access to the selected servers.
The installer normally adds your supplied key automatically. Use the task below if activation failed or you need a replacement key.
Check or install a license
Section titled “Check or install a license”-
Run
cpfence --statusand check the license status. -
Copy your key from the client area. Replace
cPFence-XXXXXXXXXXXXXXXXwith your key and run:Terminal window cpfence --install-license cPFence-XXXXXXXXXXXXXXXX -
Check
cpfence --statusagain. The license should be Active.
The key must cover the server’s registered IP. Installing it also applies the server’s configured protection settings. If activation fails, resolve the displayed error before continuing. Keep license keys out of screenshots and shared messages.
For pricing and account tasks, see Choose a billing model and per-website IP synchronization.
Move a per-server license
Section titled “Move a per-server license”- Sign in to the client area and open My Services.
- Choose the individual per-server license, then Reissue.
- On the new server, run
cpfence --install-license cPFence-XXXXXXXXXXXXXXXXwith your key in place of the placeholder, then checkcpfence --status.
The new server IP is registered on first use. Bulk licenses must not use Reissue; ask support to update their IP list. Per-website licenses synchronize cluster IPs instead.
If a license is rejected
Section titled “If a license is rejected”| Cause | What to do |
|---|---|
| Incorrect key | Copy the correct key from the client area and run cpfence --install-license cPFence-XXXXXXXXXXXXXXXX, replacing the placeholder with your key. |
| New or changed server IP | Use the process for your license type above. |
| Licensing endpoint rejects requests | Contact support with the error and response status; repeated invalid requests can trigger access restrictions. A 403/503 response needs investigation and does not by itself establish the cause. |
| IP reputation problem | Review the server IP at AbuseIPDB and contact support if it affects validation. |
| Per-website IP mismatch | The licensed public IP must match Enhance → Servers → Server IP Address. Private/floating IPs are not supported for per-website billing. If the Enhance address is wrong, correct it to the licensed public IP and sync again; otherwise ask support about a suitable per-server plan. |
To inspect the portal response from the affected server:
curl -s -D - -o /dev/null https://my.cpfence.appShare the status and exact error privately with support. A 403/503 can help investigation but does not prove the cause by itself.
If the problem continues, open a support ticket with the exact error. Keep keys and account details private.
Choose automatic updates
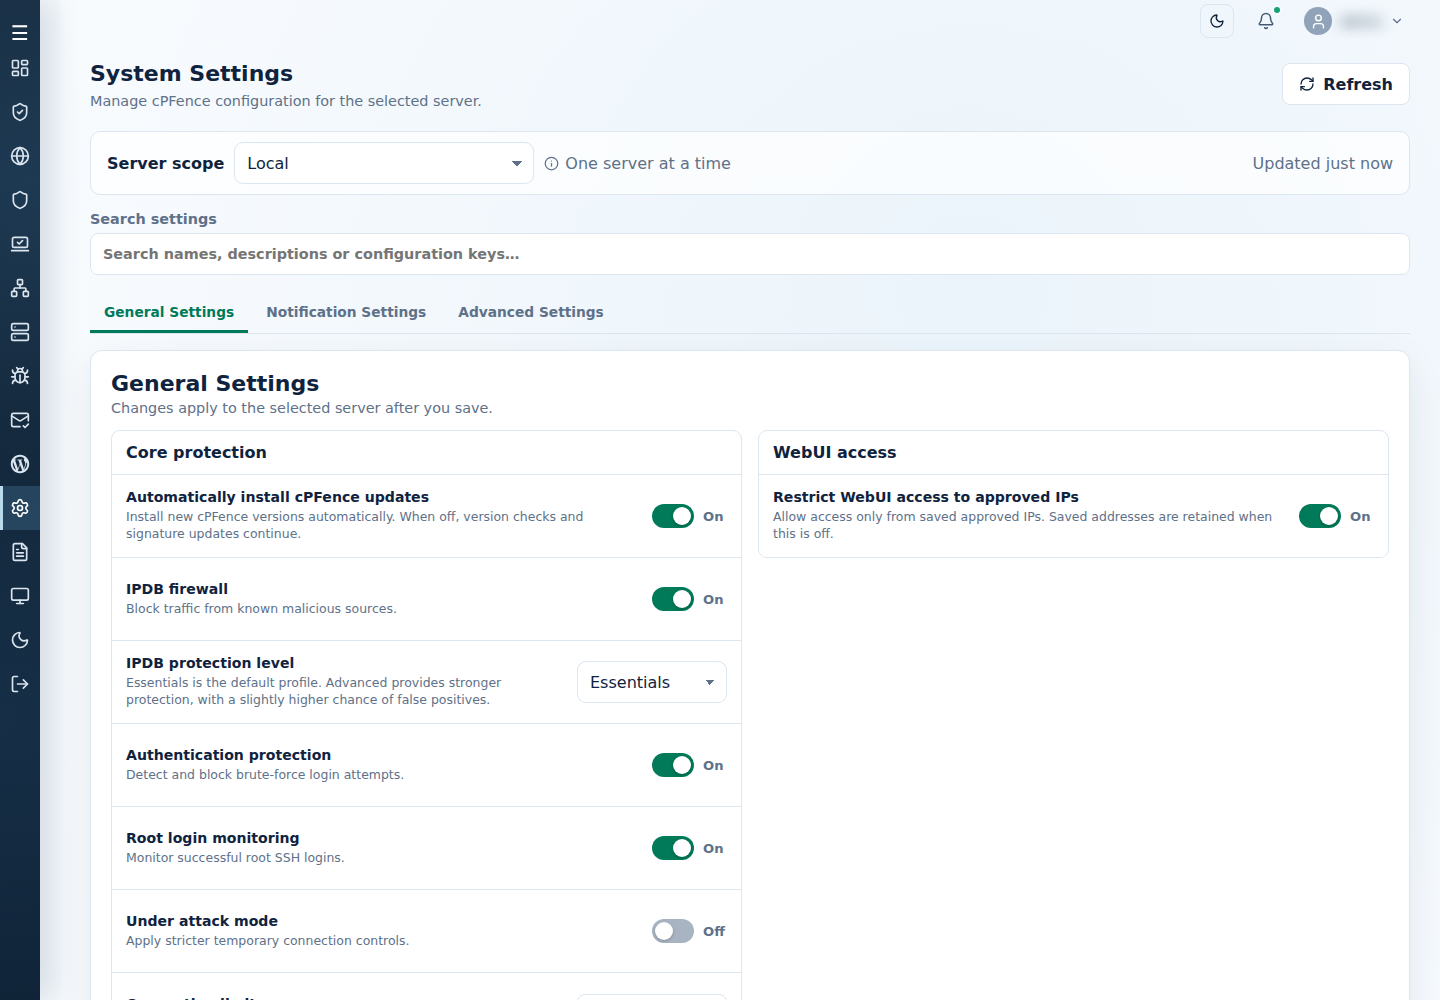
Section titled “Choose automatic updates”- Open System Settings → General Settings and choose the server.
- Change Automatically install cPFence updates, then Save changes.
- For multiple servers, use Apply to servers… and review the target list.
On automatically installs new cPFence versions. Off keeps version checks and malware signature refreshes running. Fresh installations default On; existing choices are retained during migration and reinstall.
CLI controls:
| Action | Command |
|---|---|
| Enable automatic installation | cpfence --enable-auto-updates |
| Disable automatic installation | cpfence --disable-auto-updates |
Run the command for your intended choice.
Update through the WebUI
Section titled “Update through the WebUI”- Open Tools & Utilities → System Utilities → Update cPFence.
- Choose the server or subset and select Check for Updates.
- Select Run cPFence Update for software, or Update Signatures Only for malware signatures.
- Confirm the displayed targets, including excluded secondary servers.
- If the result is Queued, use Refresh Update Status until the job finishes. Refresh status after a disconnect before submitting another update.
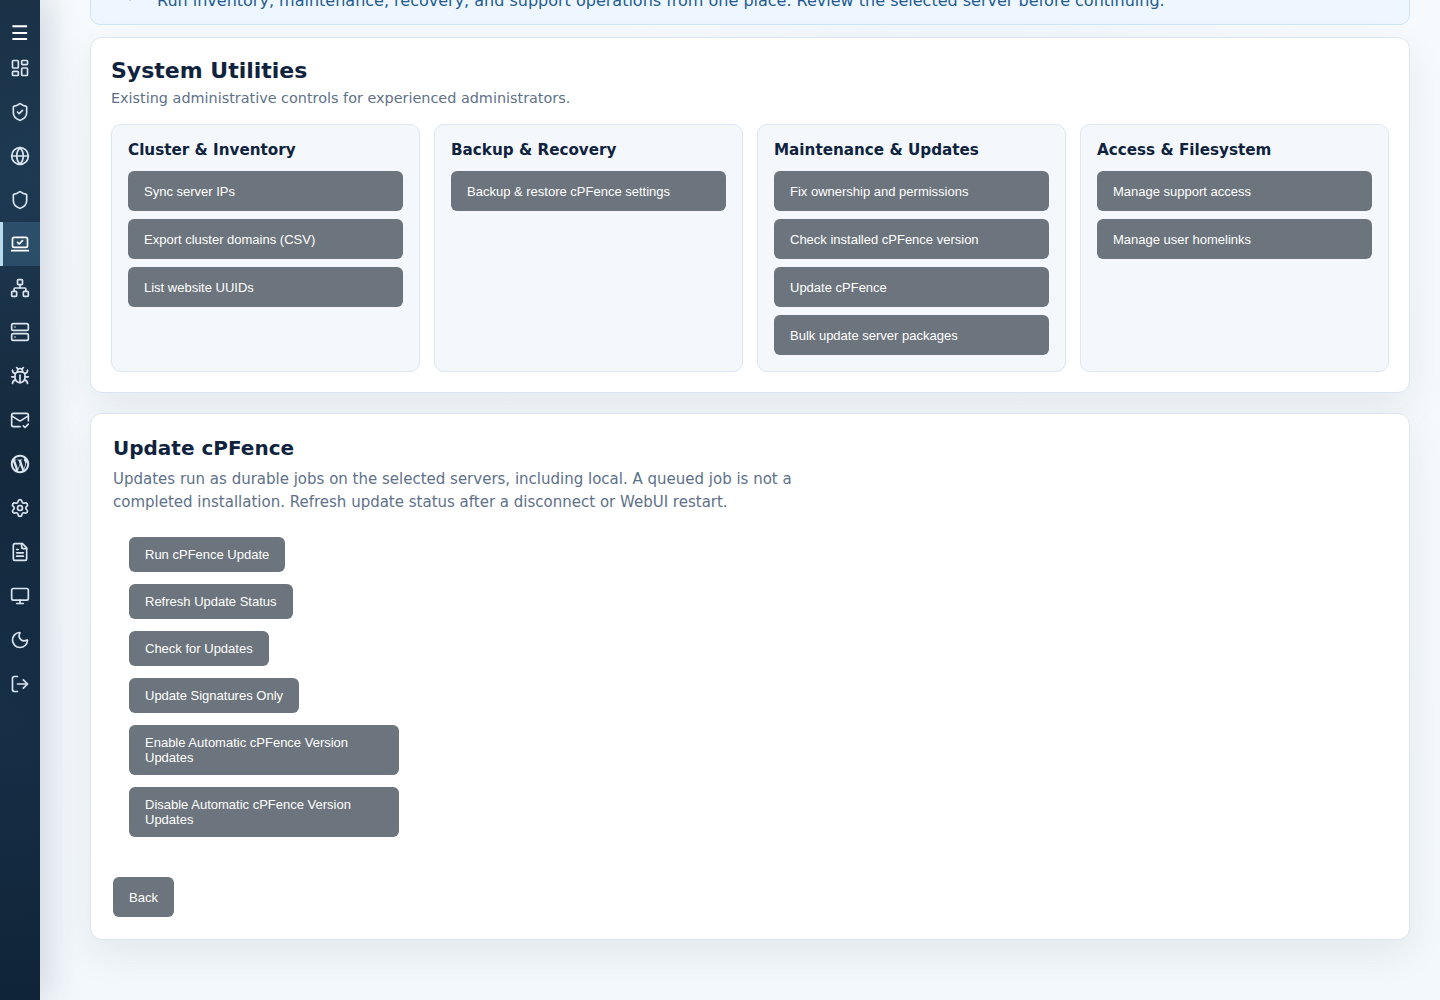
A queued job is not a completed installation. Read each server’s result and check its installed version afterward.
Update from the terminal
Section titled “Update from the terminal”cpfence --check-updatescpfence --updateWhen prompted, answer yes. The ten-second countdown allows cancellation. To refresh signatures only:
cpfence --update-signaturesCheck progress or the final result with:
cpfence --update-statusAlready-current messages are normal. Software updates may restart protection services and the WebUI.
If an update fails
Section titled “If an update fails”- License problem: check account status, registered IP, and network access; reinstall the key privately if needed.
- Busy or queued: follow the existing job’s status; do not remove locks or queue duplicates.
- Recovery package mismatch: contact support with the version and exact error. Do not replace recovery files manually.
- Secondary server excluded: update it locally if necessary, then check its connection.
See check the installed version to inspect individual or cluster versions.
An installer reinstall is a separate backup-and-repair operation. Normal v4 updates use cpfence --update.