
Exclude sites from WordPress AutoShield
Use an exclusion when a site needs different WordPress settings. AutoShield skips matching sites during scheduled protection and Run WP-AutoShield.
Add an exception
Section titled “Add an exception”- Open Edit Configuration Files on the server hosting the site.
- Choose WP-AutoShield exclusions.
- Add the site’s actual installation path, one entry per line. For example,
/var/www/WEBSITE_ID/public_html/blogexcludes that installation. An account root such as/var/www/WEBSITE_ID/also matches WordPress installations beneath it. - Save the change and check the result.
- In WordPress Management, select only the intended sites and use the appropriate action to reverse a previously applied setting.
Keep entries narrow: an account path affects more sites than an installation path. Preserve the rest of the exclusion list.
Use the Advanced Tools form
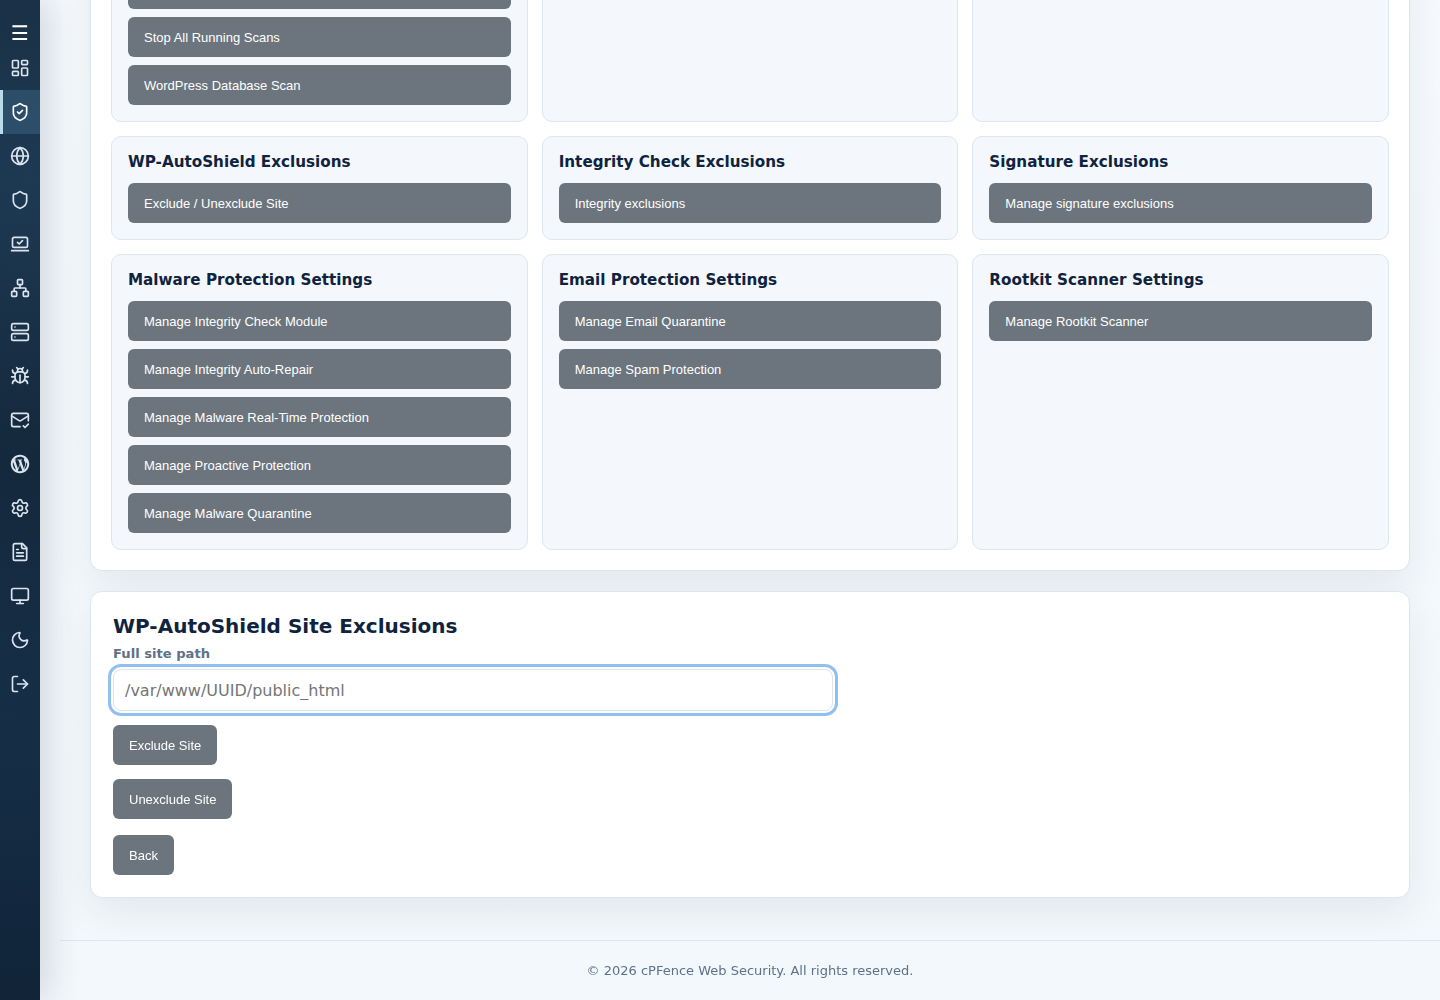
Section titled “Use the Advanced Tools form”Alternatively, open Threat & Malware Detection → Advanced Tools, set its server targets, then choose WP-AutoShield Exclusions → Exclude / Unexclude Site. Enter the installation’s Full site path, use Exclude Site, and check the result. Use Unexclude Site with the same path to remove that exception. These buttons change AutoShield policy; they do not undo earlier site changes.
Membership plugins and Multisite
Section titled “Membership plugins and Multisite”Exclude MemberPress, similar membership installations and WordPress Multisite from AutoShield to avoid conflicts with their authentication and site rules. Review any hardening already applied and reverse it only on those sites.
For server-wide child settings, use WordPress security and integrity. For one-off operations, use the action catalogue.
Command-line method
Section titled “Command-line method”You can also add or remove an exclusion from a root terminal on the server hosting the site:
cpfence --exclude-wp-site /var/www/WEBSITE_ID/public_html/blogReplace the example with the actual installation path. To exclude an entire account, use its account root, such as /var/www/WEBSITE_ID/. Check the reported list afterward. Remove the same entry when you want AutoShield to apply again:
cpfence --del-exclude-wp-site /var/www/WEBSITE_ID/public_html/blogUse these commands or the WebUI editor to update the managed exclusion policy, rather than changing its exported file by hand.
Undo earlier settings on the excluded site
Section titled “Undo earlier settings on the excluded site”Excluding still leaves earlier changes in place. The WebUI’s selected-site actions are the simplest way to undo only what that site needs. If you use terminal bulk commands instead:
- Save a copy of
/var/log/cpfenceav/wp-sites-list.txt. - Edit the site list so it contains only the intended installations and their existing owners. Manual bulk commands do not apply the AutoShield exclusion list.
- Choose the required reversal below, inspect the inventory prompt and confirm the action.
- Check each site’s final result and behavior, then restore your saved site list. Inventory regeneration can repopulate it later; do not assume the small list remains permanent.
| Setting to reverse | Command |
|---|---|
| Hardening edits | cpfence --bulk-disable-wp-hardening |
| Text-math CAPTCHA | cpfence --bulk-disable-wp-captcha |
| Idle logout | cpfence --bulk-disable-wp-idle-logout |
| Limit Login Attempts protection | cpfence --bulk-disable-wp-limit-login |
| XML-RPC restriction | cpfence --bulk-enable-wp-xmlrpc |
| Pingback restriction | cpfence --bulk-enable-wp-pingback |
| Admin file-editor restriction | cpfence --bulk-enable-wp-file-edit |
| Disabled default WordPress cron | cpfence --bulk-enable-wp-cron |
| Filtering of risky post content | cpfence --bulk-enable-xss-in-wp-posts |
| Automatic component updates | cpfence --disable-wp-auto-updates |
Choose only the setting that needs changing. Allowing risky content or removing protection has security consequences; do not run the whole table as a cleanup script. If you also need to remove the cPFence MU plugin from this excluded installation, back up its wp-content/mu-plugins/cpfence.php file before having the site administrator remove that file only. Preserve other MU plugins and check sign-in afterward. The security MU plugin guide explains the separate server-wide removal command; it does not target only checked sites.
For Multisite, this read-only terminal search can help locate configurations to review:
find /var/www -type f -name wp-config.php -exec grep -H 'MULTISITE' {} +A matching comment or WP_ALLOW_MULTISITE line alone does not prove Multisite is active. Review the installation’s configuration, exclude its actual path, and reverse hardening only on that installation if needed.