
Review and fix vulnerabilities
In cPFence v4+, open Vulnerability Manager to review known vulnerabilities and update eligible components. Administrators can use all controls; support users need target-server access, View/download vulnerability reports, and update permission for changes. Keep a current site backup before updating.
A finding matches an installed version to an advisory; it does not prove exploitation. A clean report covers the known findings in that completed report, not every possible website threat.
Run a current check
Section titled “Run a current check”- Choose Local or one secondary server in Server scope.
- Read the report timestamp and banner. Missing, stale, incomplete, or unavailable data is not a clean result.
- Click Check now and confirm a full-server report. Cancel sends no check.
- Follow the output and return to inspect the refreshed report.
Check now covers the selected server, not only the current Site filter. Refresh reloads the stored report; it does not run a new check. Report is incomplete directs you to CSV when the display limit is reached.
Review findings
Section titled “Review findings”Use Total findings, Critical, High, Medium / Low, or Fix available to narrow the view. Set Search, Severity, Type, or Site, then Apply filters. Hide users only hides displayed results; it does not exclude users from future checks. Use Clear hidden users or Clear to reset.
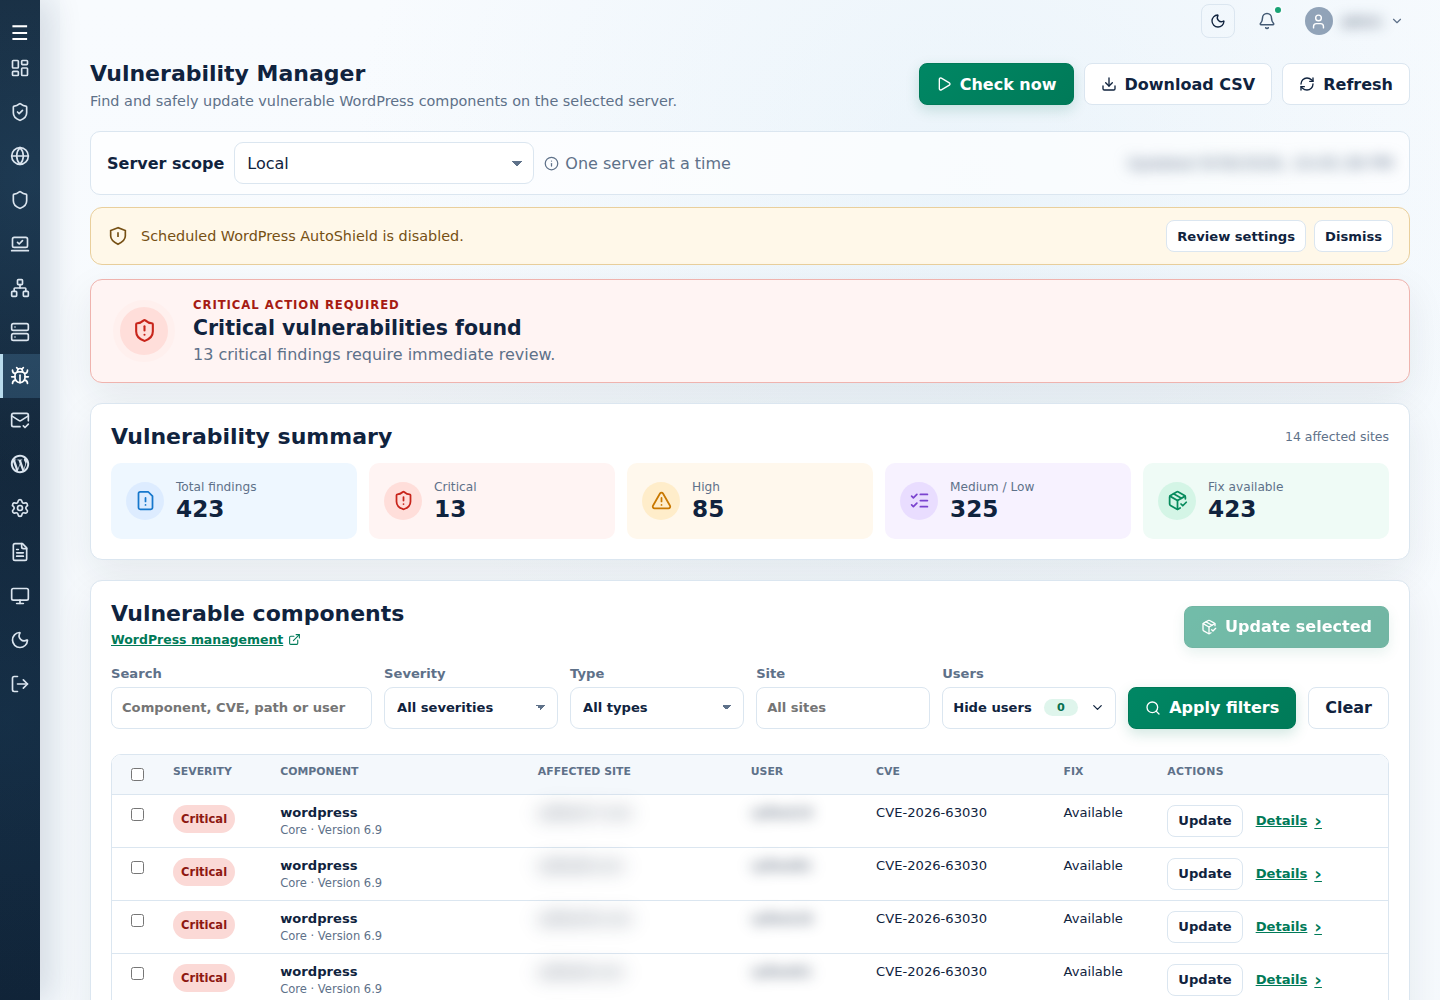
Click column headings to sort, and Previous/Next for more rows. Select all visible vulnerabilities selects visible rows; review retained selections before updating.
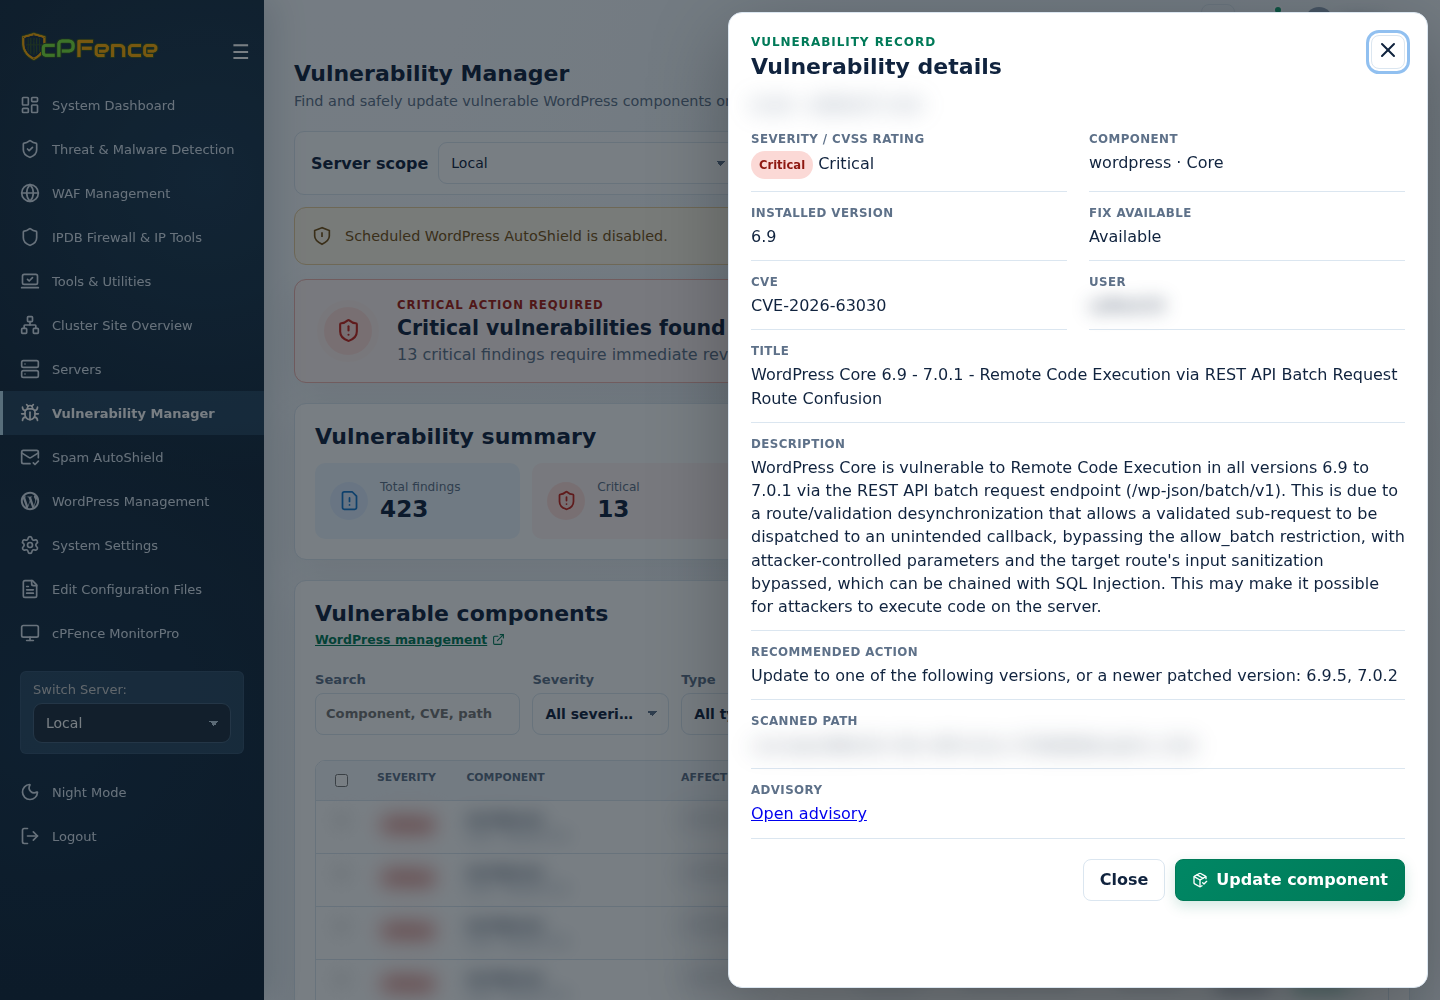
Open Details for affected version, CVE, description, remediation, owner, and path. Open advisory opens the reference. A listed fix is not necessarily available through the automatic update control.
Update selected components
Section titled “Update selected components”- Review the site’s backup and the advisory’s remediation.
- Choose a row’s Update, Update component in Details, or select findings and click Update selected.
- Check the confirmation’s server and component count. Several advisories for the same component/site become one update. Unsupported selections are skipped.
- Confirm, or Cancel to send no update request.
- Follow each component’s output, then run Check now again and check normal site functionality.
Eligible WordPress core, plugin, and theme rows support automatic updates. Unsupported components require your normal application maintenance process. Updating changes site software; this action does not promise a backup or automatic rollback.
Read progress and recover from failure
Section titled “Read progress and recover from failure”| Output | Next step |
|---|---|
| Running | Wait and follow the server/component messages. |
| Finished | Review output. After an update, run Check now for a new report. |
| Needs attention | Inspect errors and each component’s current version; some updates may already have succeeded. |
A timeout or changed report leaves the result uncertain. Refresh, inspect current versions, and select only remaining work before retrying. Do not replay the old request blindly. Monitor progress in the output and confirm it against the latest report.
If an update breaks a site, use its verified backup/restore procedure. If no supported update exists, follow Open advisory and its remediation guidance.
Download or notify
Section titled “Download or notify”Download CSV exports the selected server’s latest report, including rows beyond the display limit. It is not restricted to your table filters. Keep exported site/account paths private.
In System Settings → Notification Settings, review WordPress vulnerability reports and delivery destinations. A saved notification setting does not mean the check completed or the recipient received a report.