
Set up email and SMTP notifications
Use your own SMTP server for cPFence v4+ on Enhance alerts, or keep the server’s local mail delivery. You need View System Settings and Manage Notification Settings; terminal setup needs root on the intended server.
1. Configure SMTP in the WebUI
Section titled “1. Configure SMTP in the WebUI”- Open System Settings, choose one Server scope, and select Notification Settings.
- Enter Notification email and select the events you want to receive.
- Under Delivery connections, choose cPFence SMTP → Set new configuration.
- Enter SMTP host, Port, SMTP username, SMTP password, and From email. The form starts with 587; use the port and sender authorized by your provider.
- Select Save changes and read the result. Configuration sends a test email; check the inbox and spam folder, and verify the sender.
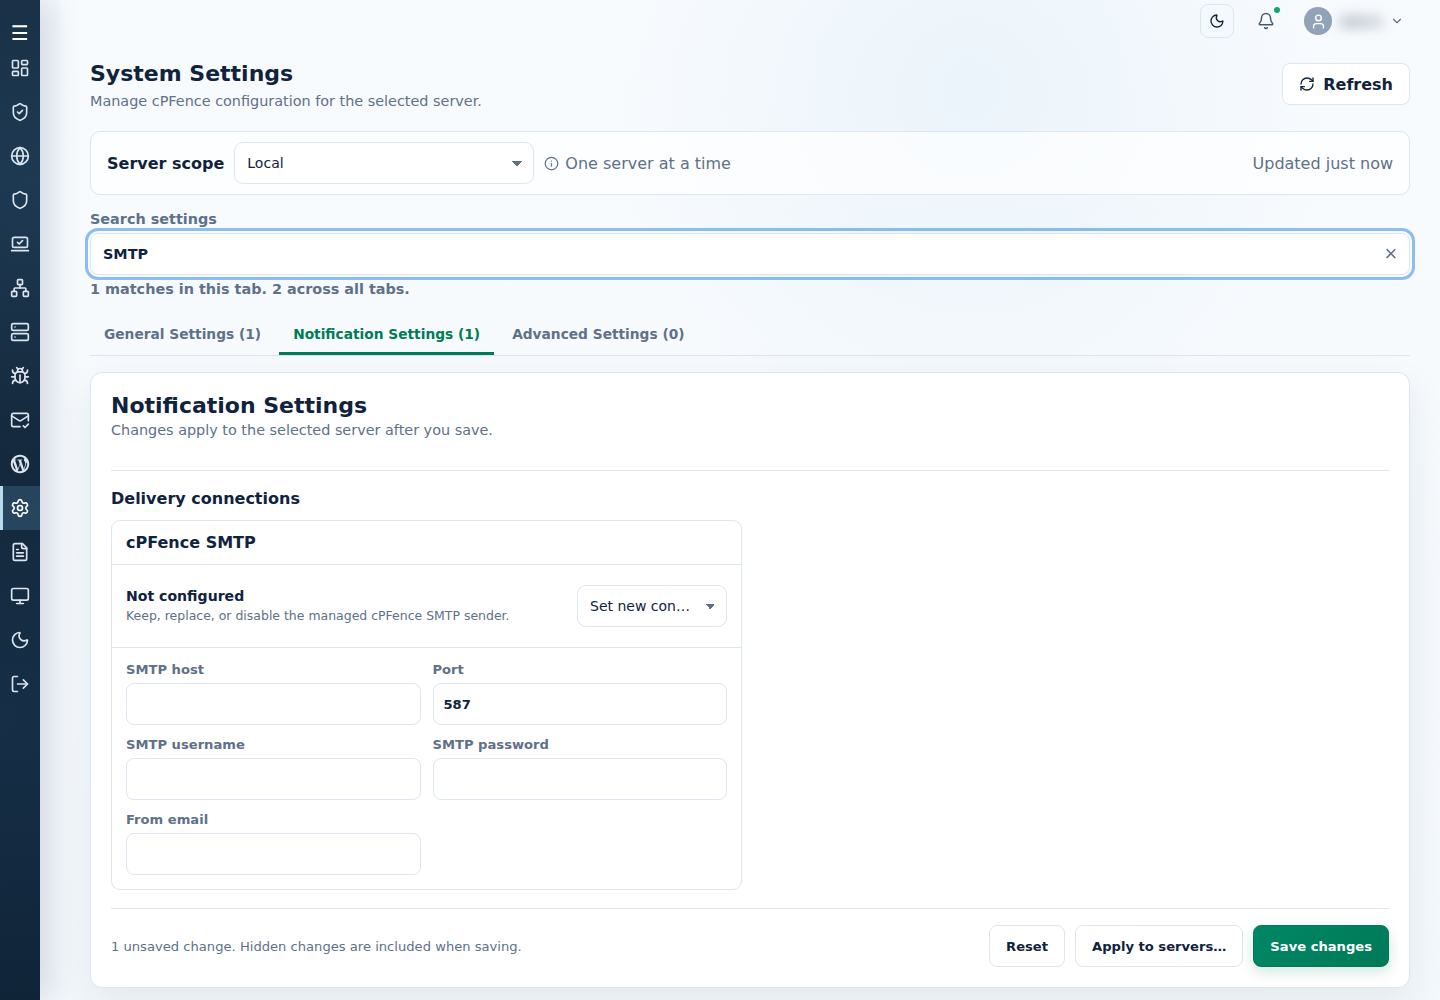
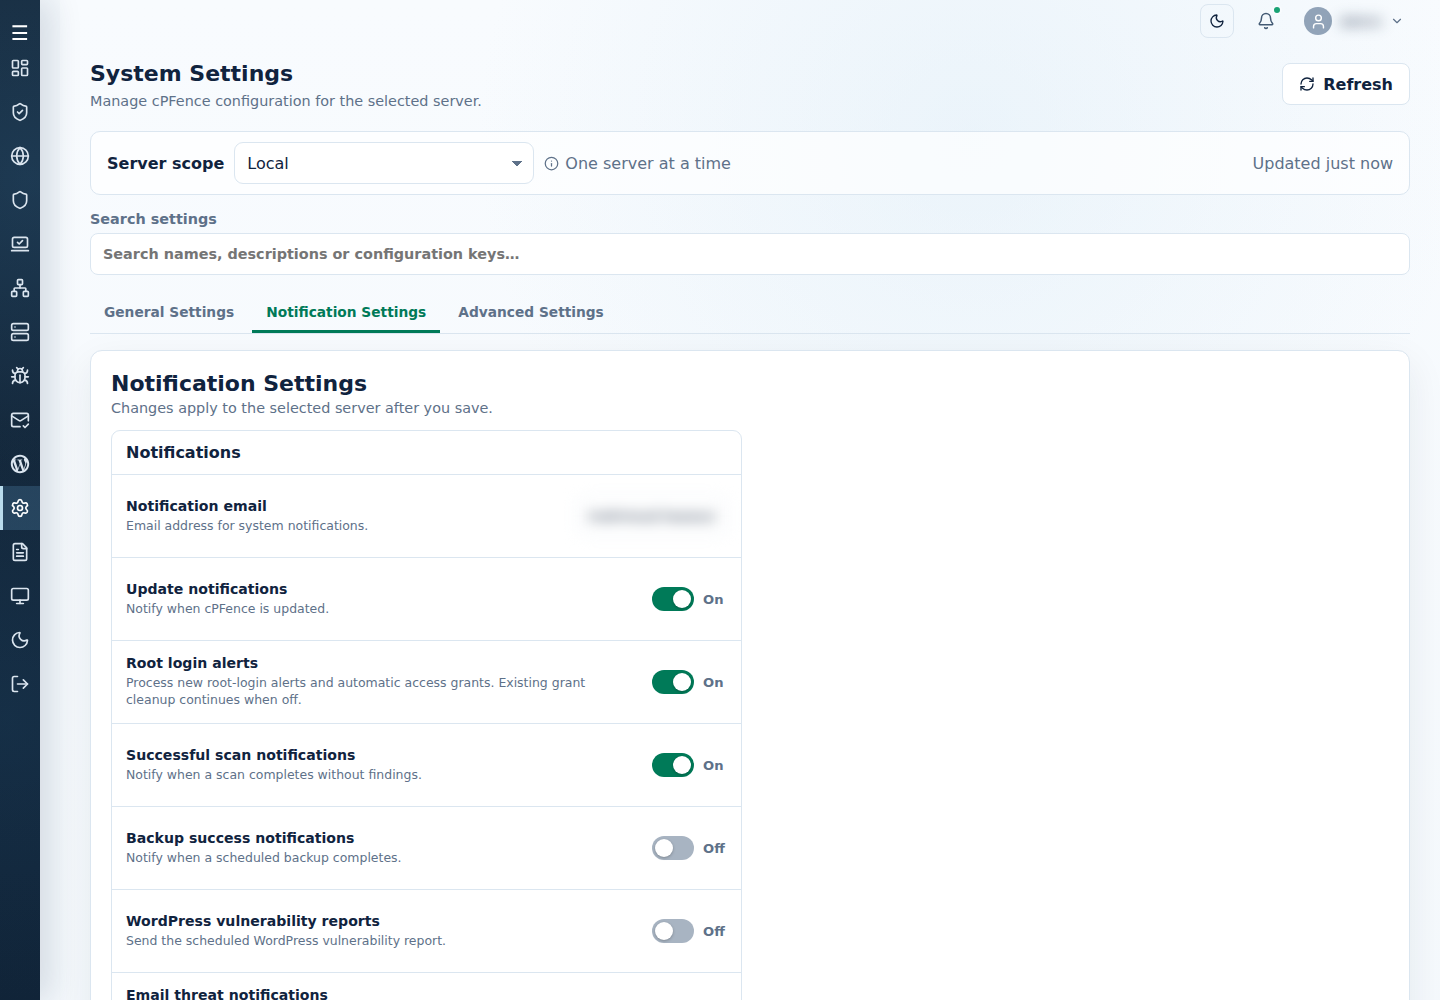
For several servers, stage the SMTP fields and use Apply to servers…. Review destinations and Changed fields, then check each result. Selecting All Servers in the sidebar alone does not copy SMTP settings.
2. Use terminal setup or send a test
Section titled “2. Use terminal setup or send a test”On the intended server, start interactive notification SMTP setup:
cpfence --enable-cpfence-smtpConfirm the recipient and enter the provider’s host, port, credentials, and sender. Enter the port explicitly; a blank terminal port defaults to 25. Setup sends a test message.
To test delivery and change the notification recipient, replace this example address with yours:
This saves the address after a successful send. Saving the WebUI recipient alone does not send a test.
For a manual test without changing the recipient setting, replace the address below and run:
mailx -v -s 'SMTP Test Email from cPFence' '[email protected]' <<< 'This is a test email to confirm the SMTP configuration for cPFence notifications.'This sends a real message using the configured mail sender. Check the result and receipt separately.
To return to local mail delivery, choose Disable cPFence SMTP and save, or run cpfence --disable-cpfence-smtp and confirm. Keep current configuration preserves the saved sender.
3. Choose notification SMTP or global SMTP
Section titled “3. Choose notification SMTP or global SMTP”| Choice | Effect |
|---|---|
| cPFence SMTP | Configures the cPFence sender in /etc/s-nail.rc. Website and mailbox mail are not redirected. |
| Global SMTP | Configures a server-wide Postfix relay and the cPFence sender. Website and mailbox mail can use the relay too. |
On that server, run:
cpfence --enable-global-smtpEnter the private SMTP details, specifying the port. Read the Postfix and existing-relay confirmations. Declining Postfix setup configures only the notification sender. Accepting setup sends a test; verify both notifications and normal outgoing mail.
Setup owns its marked blocks and /etc/postfix/cpfcli_sasl_passwd files, preserving unrelated text. cpfence --disable-global-smtp removes the owned relay and notification sender after confirmation, then applies the Postfix change. Disabling cPFence SMTP in the WebUI leaves a global relay in place.
Troubleshoot missing email
Section titled “Troubleshoot missing email”- Check the recipient, event switch, and owning module’s state.
- Review the setup error and provider’s host, port, authentication, and sender requirements.
- Check spam filtering and provider delivery logs. For local mail, inspect existing mail logs, such as
/var/log/mail.log, or the Postfix journal. - Ask the mail administrator to check routing, DNS, and SPF/DKIM/DMARC if messages are rejected or marked as spam.
Use Slack notifications if you prefer alerts in a channel. Review notification event settings separately.