
Clear LiteSpeed Cache
- Choose the intended servers and sites. Start with one installation.
- Check the sites whose stale pages need a purge.
- Open Choose action → Bulk tools → Performance, then choose Clear LiteSpeed cache under LiteSpeed.
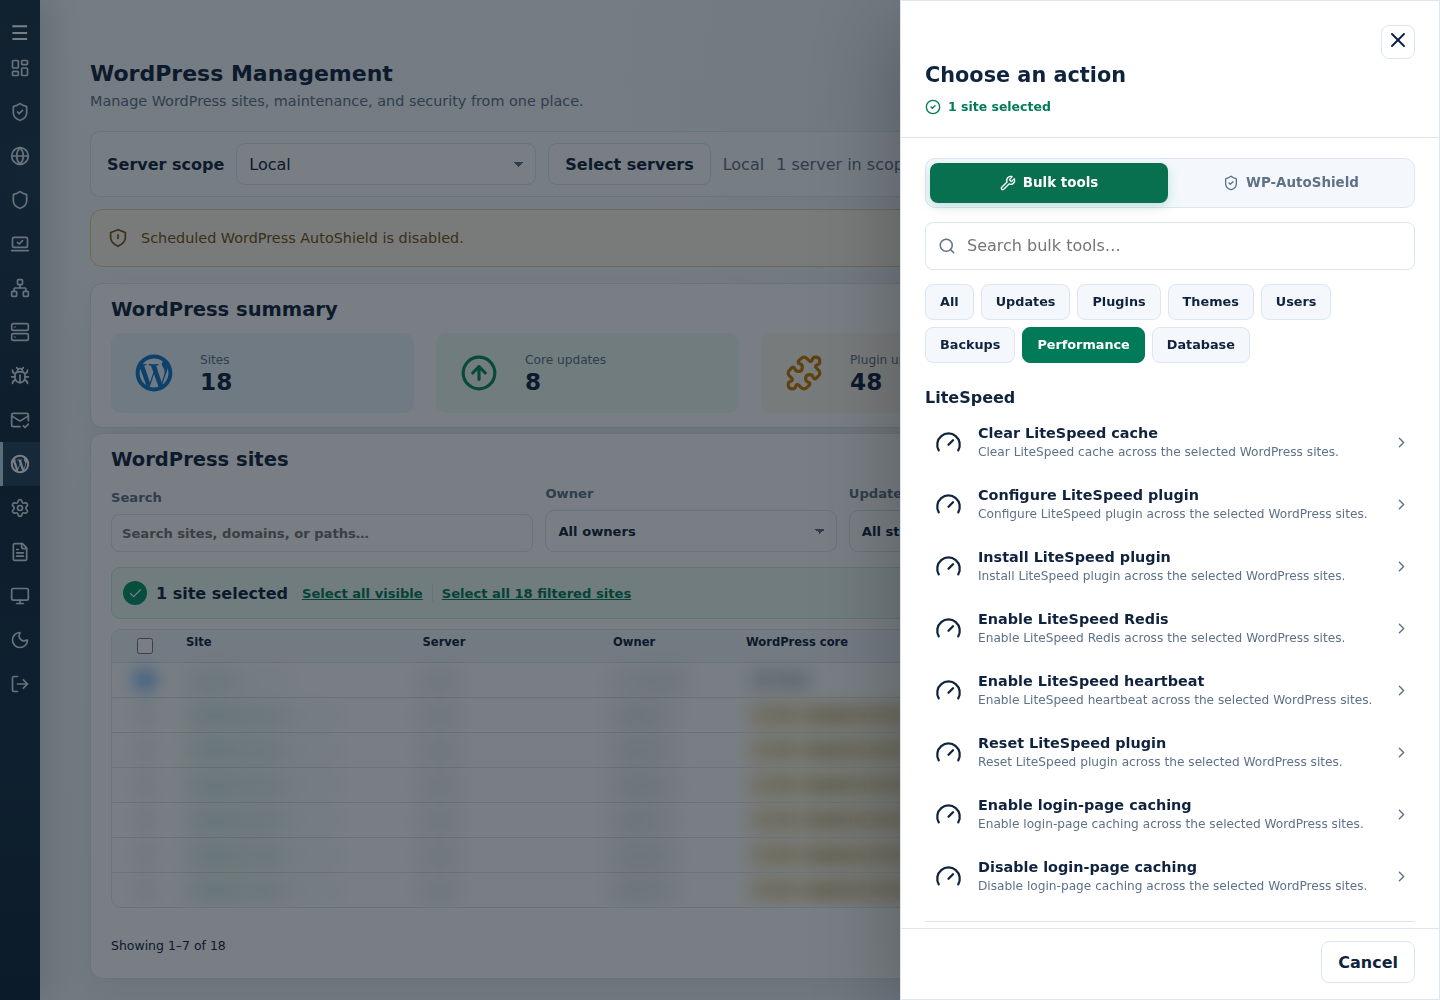
- Review the action and targets, then confirm. Read every site’s final result, including skips. Finished can include failed sites; see Read the outcome.
Confirm the purge result and reload the affected page. Requests can rebuild the cache afterwards. nginx/FastCGI caches have separate controls; do not assume this purges every caching layer.
Command-line method
Section titled “Command-line method”If you prefer the terminal, run this as root on the server hosting the sites:
cpfence --bulk-clear-litespeed-cacheReview /var/log/cpfenceav/wp-sites-list.txt and the inventory prompt first. The command uses that server’s listed WordPress installations, not the sites checked in the WebUI. Confirm the purge, read each site’s result and reload the affected page. This is useful after a major update or when stale cached pages cause display problems.
If you also need to clear nginx/FastCGI caches, its separate command is:
cpfence --bulk-clear-nginx-cacheRun the FastCGI command on the main control panel server after reviewing its cluster domain list and Enhance API setup. Its targets differ from the WordPress site list; see website bulk tools. Check its own output rather than assuming a successful LiteSpeed purge cleared both layers.