
Manage IPDB and DDoS protection
Use cPFence v4+ IPDB Firewall & IP Tools → Settings to set IPDB Protection, DDoS Protection and Under-Attack Mode for one server, then Save. Support users need protection-setting permission.
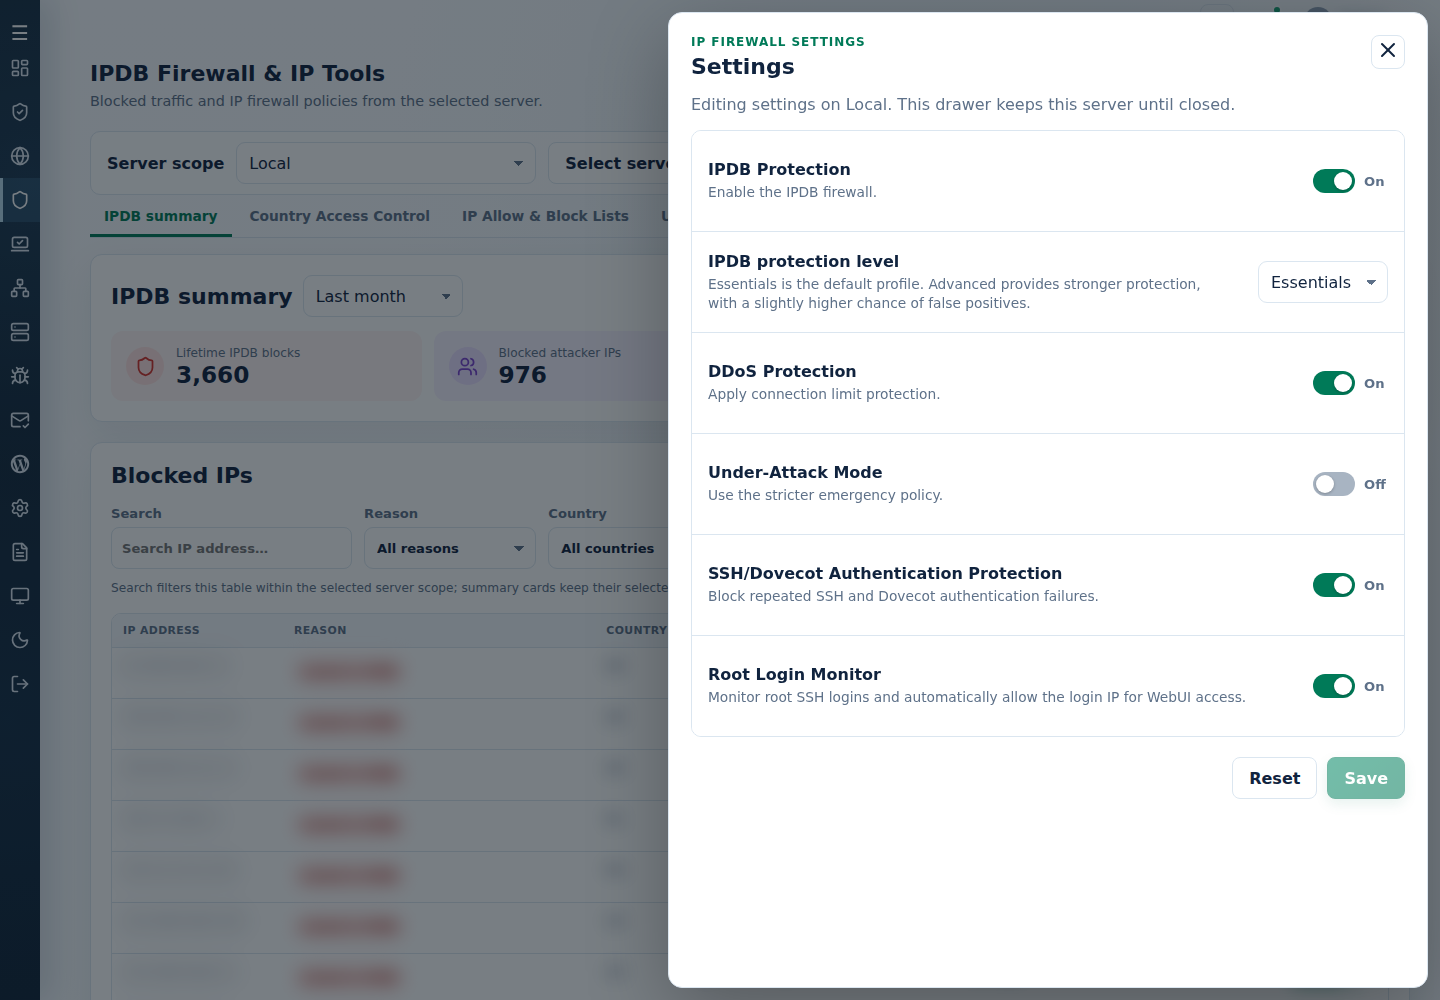
For multiple servers, choose the matching Advanced Tools action, check the sidebar targets and read each result.
Review DDoS and brute-force records
Section titled “Review DDoS and brute-force records”- On System Dashboard, choose the affected server scope and select DDoS & Brute-force Attacks Blocked.
- Check Source is DDoS & brute-force, filter the IP/country/server, then Apply filters.
- Read recorded counts and LAST SEEN alongside service health. Check current policy on the IPDB page before changing access.
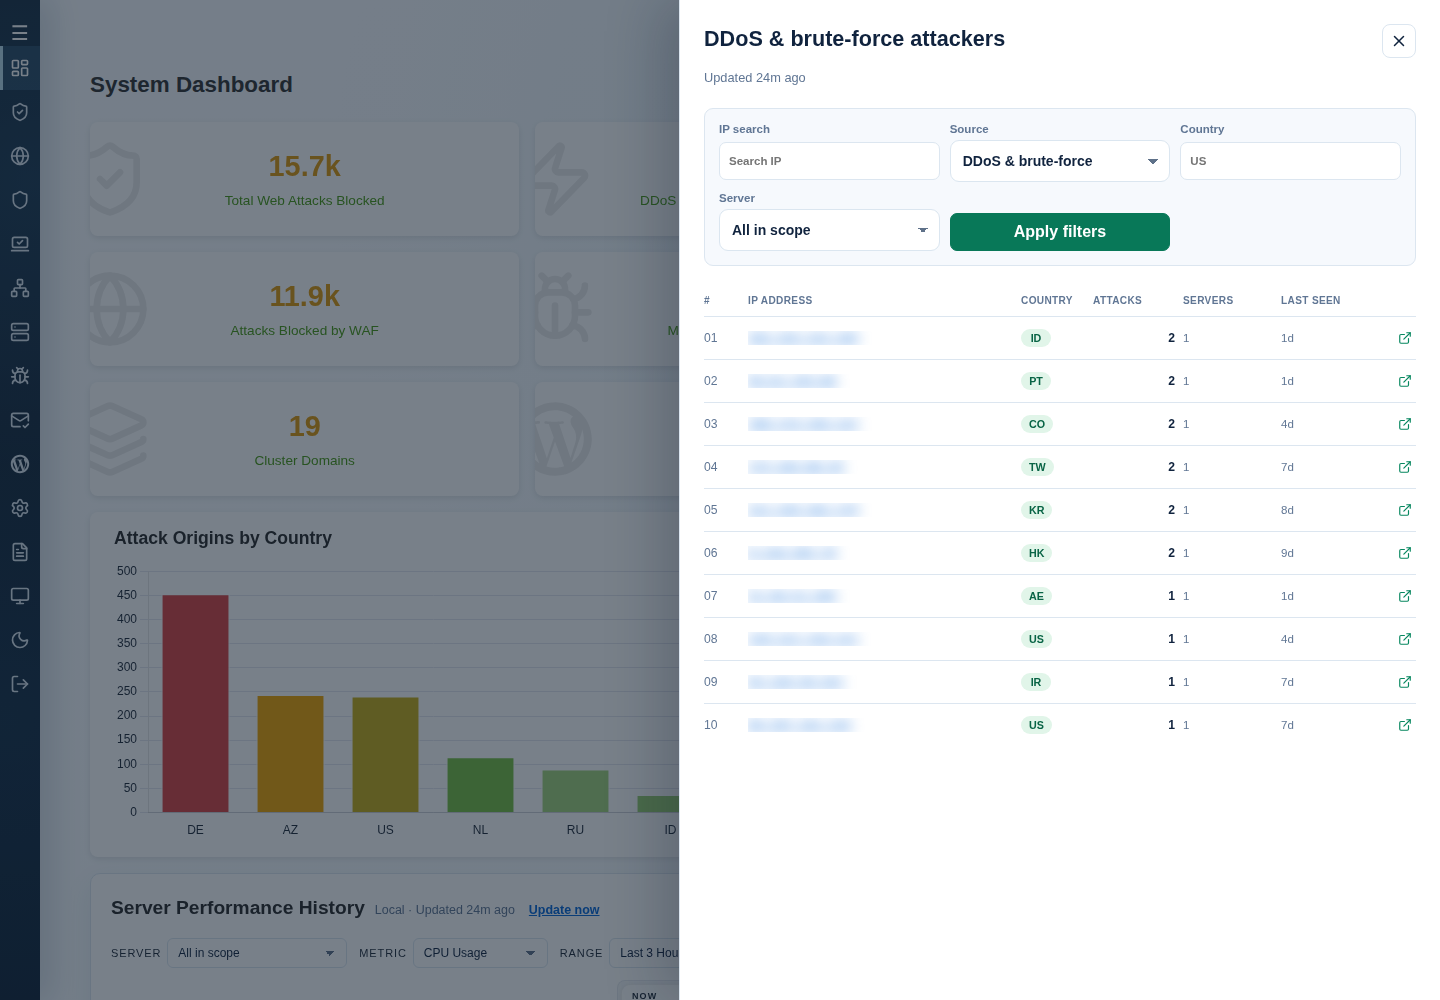
Follow the shared dashboard drawer guidance for scope, freshness, external IP links and more retained rows.
Using the CLI
Section titled “Using the CLI”Run the intended action as root on the licensed target:
| Action | Command |
|---|---|
| Enable IPDB | cpfence --enable-ipdb |
| Disable IPDB | cpfence --disable-ipdb |
| Restart IPDB | cpfence --restart-ipdb |
| Enable DDoS protection | cpfence --enable-DDos |
| Disable DDoS protection | cpfence --disable-DDos |
| Enable under-attack mode | cpfence --under-attack-on |
| Disable under-attack mode | cpfence --under-attack-off |
Connection limit in System Settings defaults to 100 concurrent connections per source. Save through the settings controls. After a direct CONNECTIONS_LIMIT edit in /etc/cpfcli/config.conf, apply it with cpfence --restart-ipdb while IPDB is enabled.
Monitor incidents in IPDB summary or run cpfence --monitor-ipdb-blocks. See traffic diagnosis before treating many requests as an attack.