
Block or unblock a sender ASN
Open Spam AutoShield and choose the mail server whose policy you want to inspect. The master must be on for stored entries to take effect; see the illustrated Spam AutoShield guide.
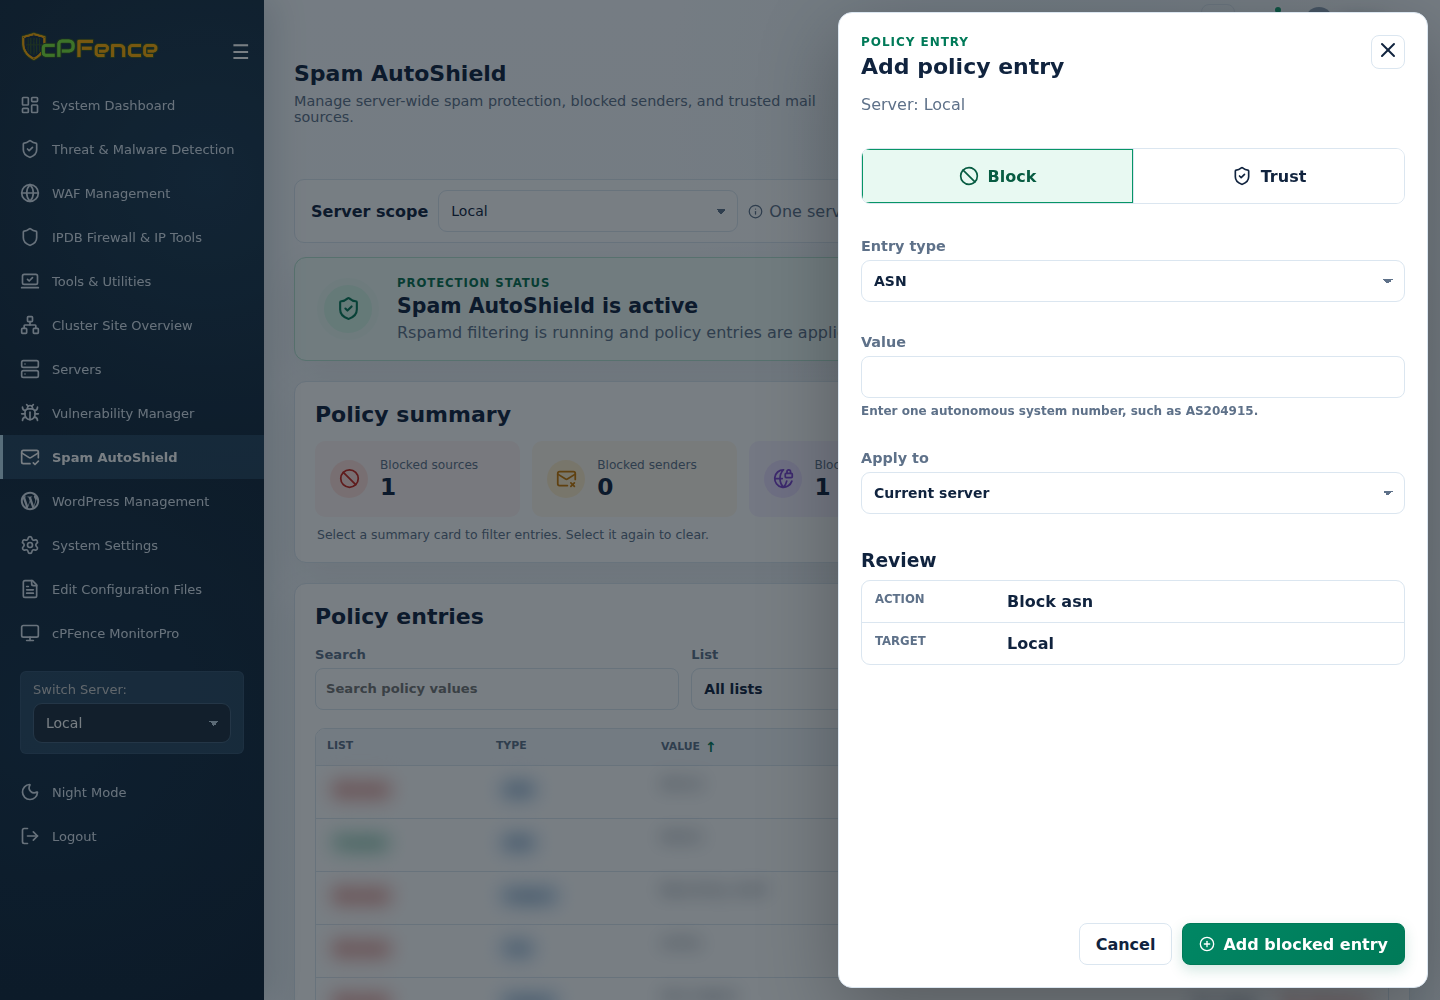
- Click Add entry and choose Block.
- Set Entry type to ASN and enter an ASN such as
AS64500. - Choose Apply to, review the servers, then click Add blocked entry.
- Read every server’s result and refresh the intended list.
To remove the block, filter List and Type, find the exact value, and use Remove on the displayed server. Review its confirmation and result.
An ASN can cover many senders. Check legitimate mail from that network before applying a broad block.
Command-line method
Section titled “Command-line method”From a root terminal on the intended mail server, add an ASN block:
cpfence --add-spam-autoshield-asn AS204915Remove that same block:
cpfence --del-spam-autoshield-asn AS204915Replace the example ASN with the verified sender network you intend to manage. Both AS-prefixed and numeric ASN values are accepted. These commands update this mail server’s policy, not the WebUI’s Apply to selection. Read the result and refresh its ASN block list.
This can help when an abusive network rotates sender IPs, but it also affects legitimate senders from that network. Prefer a narrower address or IP block when sufficient. Removing this entry does not remove separate sender/domain blocks.