
Reset LiteSpeed Cache configuration
- Choose the intended servers and sites. Start with one installation.
- Save custom settings and confirm the reset is intended.
- Open Choose action → Bulk tools → Performance, then choose Reset LiteSpeed plugin under LiteSpeed.
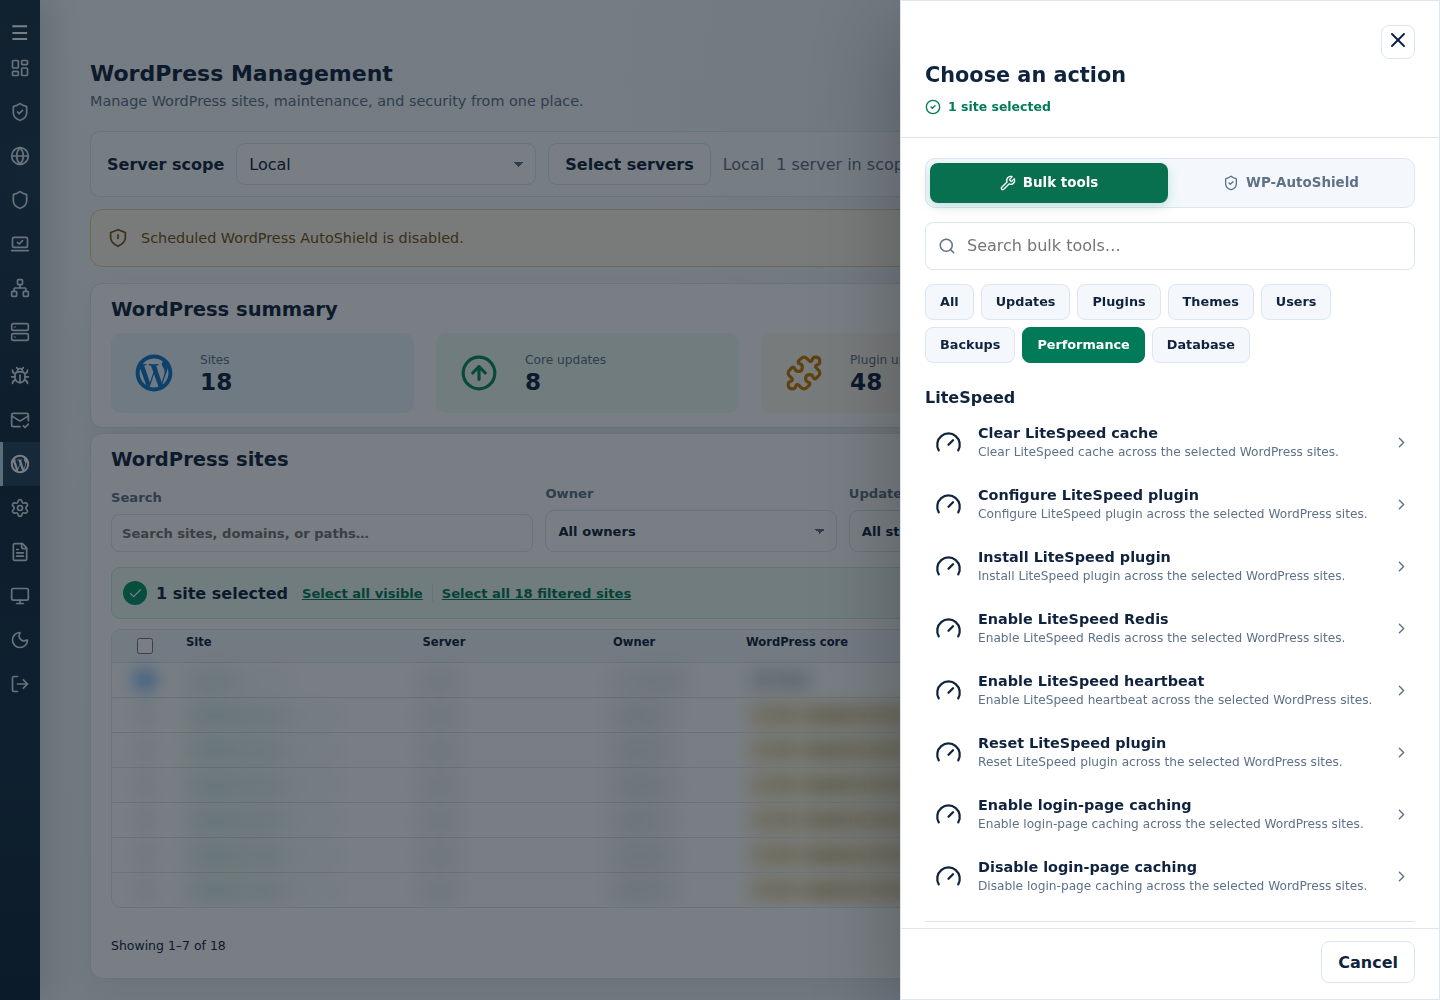
- Review the action and targets, then confirm. Read every site’s final result, including skips. Finished can include failed sites; see Read the outcome.
This resets configuration rather than simply purging cached pages. Reapply the intended preset or saved settings and check site behavior.
Command-line method
Section titled “Command-line method”From a root terminal on the server hosting the sites, run:
cpfence --bulk-reset-ls-pluginReview /var/log/cpfenceav/wp-sites-list.txt and the inventory and reset confirmations first. This uses the server’s listed installations, not checked WebUI rows. Save custom LiteSpeed Cache settings before replacing them with factory defaults.
Read each site’s final result. Then restore its saved configuration or apply the supported preset deliberately. Check caching, login and normal pages afterward. If the settings are already correct and you only need fresh pages, purge the cache instead.