
Back up and restore cPFence settings
Back up settings before substantial changes. These cPFence v4+ archives can contain credentials and quarantine contents; keep them private. They do not replace website, database, or operating-system backups.
Use root for CLI backup/restore, or a WebUI account with backup/restore permission and access to the target servers. Ordinary backup/restore requires a valid license. Allow disk space and a maintenance window for restore, which can start or stop protection according to the archived settings.
Create a backup
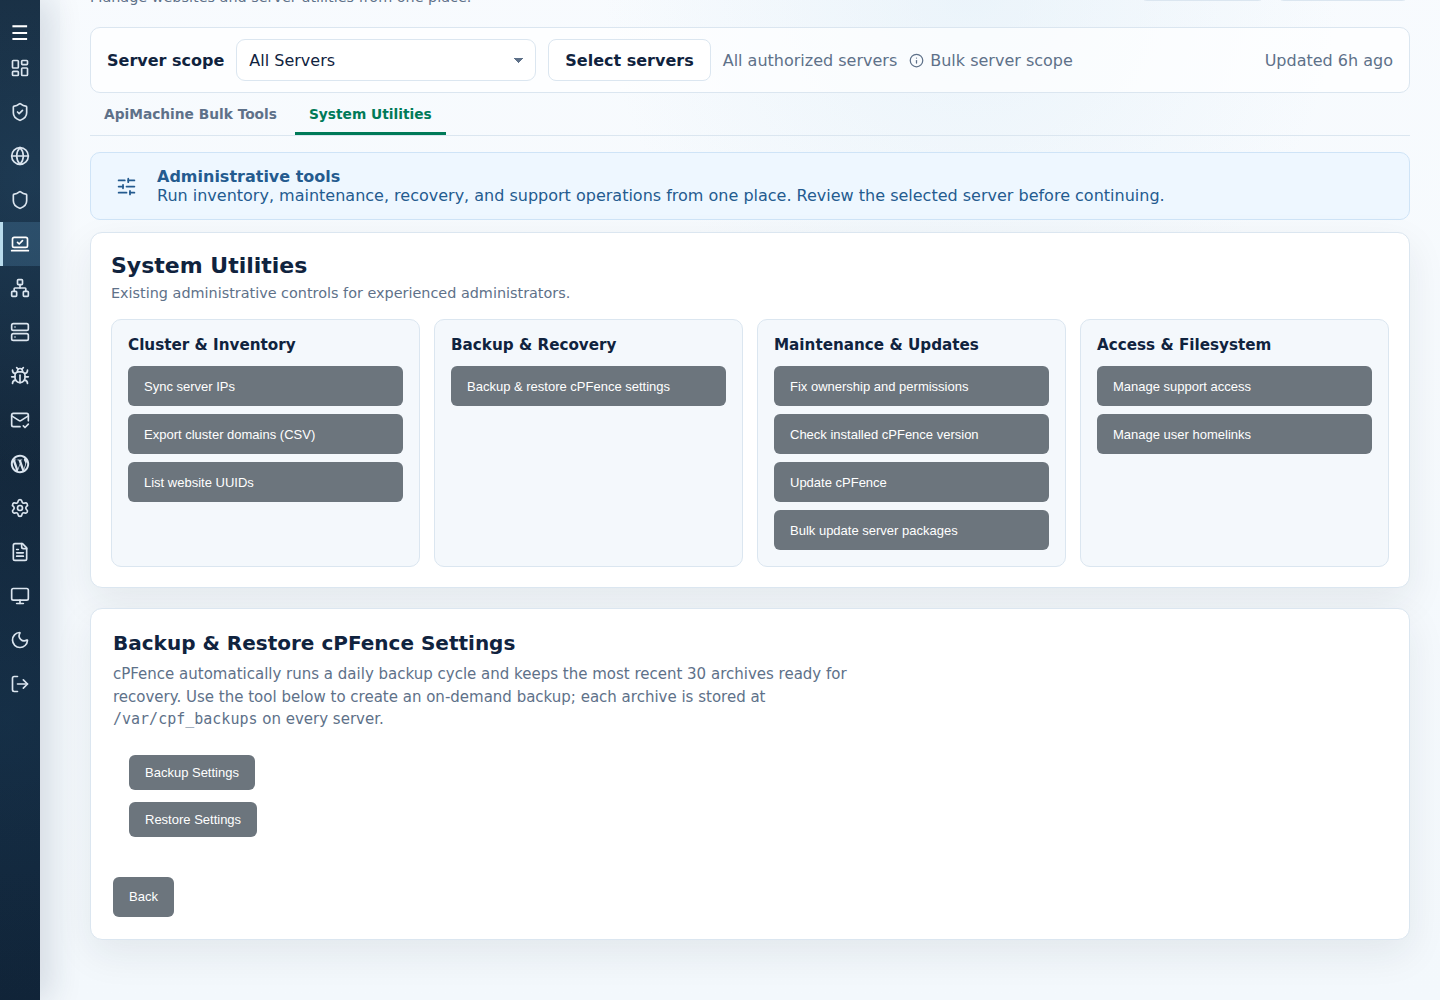
Section titled “Create a backup”- Open Tools & Utilities → System Utilities and choose the server or subset.
- Select Backup & restore cPFence settings → Backup Settings.
- Confirm the targets and wait for successful output from each server.
- Keep the reported archive under
/var/cpf_backups/and copy it securely to your private backup storage.
CLI equivalent:
cpfence --backup-cpf-settingsSuccess reports a filename in the form cpfence_backup_YYYYMMDDHHMMSS.tar.gz. The daily backup cycle keeps the latest 30 archives; each server has its own backups.
Choose the right restore
Section titled “Choose the right restore”| Restore | Use it for |
|---|---|
| Ordinary settings | Apply supported settings and activation while keeping the destination license and account security. It does not recover archived quarantine files or full identity/history. |
| Portable settings | Ordinary restore on a different server transfers supported portable settings while preserving destination identity, account security, history, and mail cursors. Server/site-bound items are filtered. |
| Full same-server recovery | Explicit --full restores eligible archived state, including identity/trust, database, scan logs, quarantine, and account security. Requires a complete archive matching the original machine and panel. |
| v3 settings import | --legacy imports supported v3 settings. Use the migration installer for a complete v3 upgrade. |
Full recovery can restore an earlier MFA state. Have the archived credentials and authenticator/recovery codes available.
Restore settings in the WebUI
Section titled “Restore settings in the WebUI”- Create a current backup and select the intended server.
- Open Backup & restore cPFence settings → Restore Settings.
- Enter the exact archive filename already in that server’s
/var/cpf_backups/.NEWESTchooses each selected server’s newest backup, which may differ between servers. - Confirm the targets and wait for Restore process completed; configured runtime verified.
- Check
cpfence --status, refresh settings, and verify account access and secondary server connections. Review any unavailable-role notices.
A lost browser stream does not prove completion. Inspect state before submitting another restore.
Restore from the terminal
Section titled “Restore from the terminal”Keep the trusted archive in /var/cpf_backups/. Replace the placeholder with its actual filename:
cpfence --restore-cpf-settings cpfence_backup_YYYYMMDDHHMMSS.tar.gzFor full recovery on the original server:
cpfence --restore-cpf-settings --full cpfence_backup_YYYYMMDDHHMMSS.tar.gzFor a v3 settings archive:
cpfence --restore-cpf-settings --legacy cpfence_backup_YYYYMMDDHHMMSS.tar.gzPass the filename, not an arbitrary path. The WebUI uses ordinary restore.
To select the latest archive interactively when you do not supply a filename:
cpfence --restore-cpf-settingsCheck the offered filename before accepting.
After an ordinary restore, current cPFence verifies and applies the archived protection settings; a separate restart is not normally needed. Check that the destination license is valid. If it needs replacing, run cpfence --install-license cPFence-XXXXXXXXXXXXXXXX, replacing the placeholder with your client-area key. See license activation.
Moving to another machine? Follow Move cPFence to a new server.
If restore fails
Section titled “If restore fails”- File not found: check the target server, directory, and
cpfence_backup_YYYYMMDDHHMMSS.tar.gzfilename. - Invalid archive: use a verified copy; do not edit checksums or loosen safety checks.
- Wrong server or incomplete full backup: choose a matching complete archive, or use ordinary portable settings restore.
- Busy or recovery pending: wait or follow the recovery error. Keep progress files; a pending migration resumes through its installer.
- Activation failed: retain the error and backup, check actual protection status, and contact support if recovery remains unresolved.