
Install LiteSpeed Cache
- Choose the intended servers and sites. Start with one installation.
- Check that LiteSpeed Cache is intended for these customers.
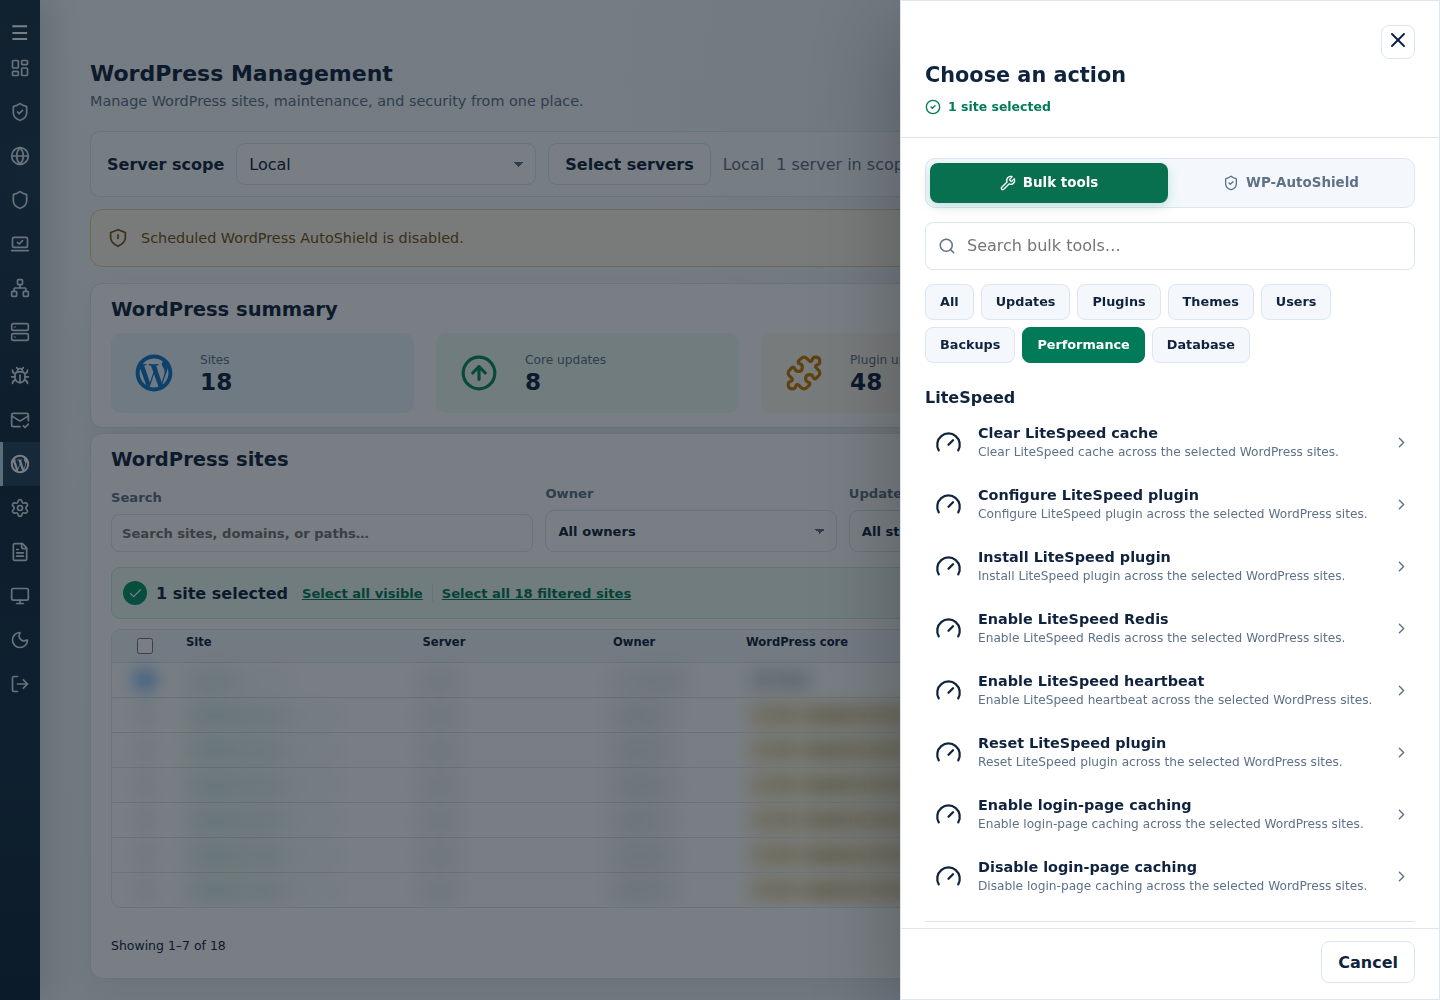
- Open Choose action → Bulk tools → Performance, then choose Install LiteSpeed plugin under LiteSpeed.
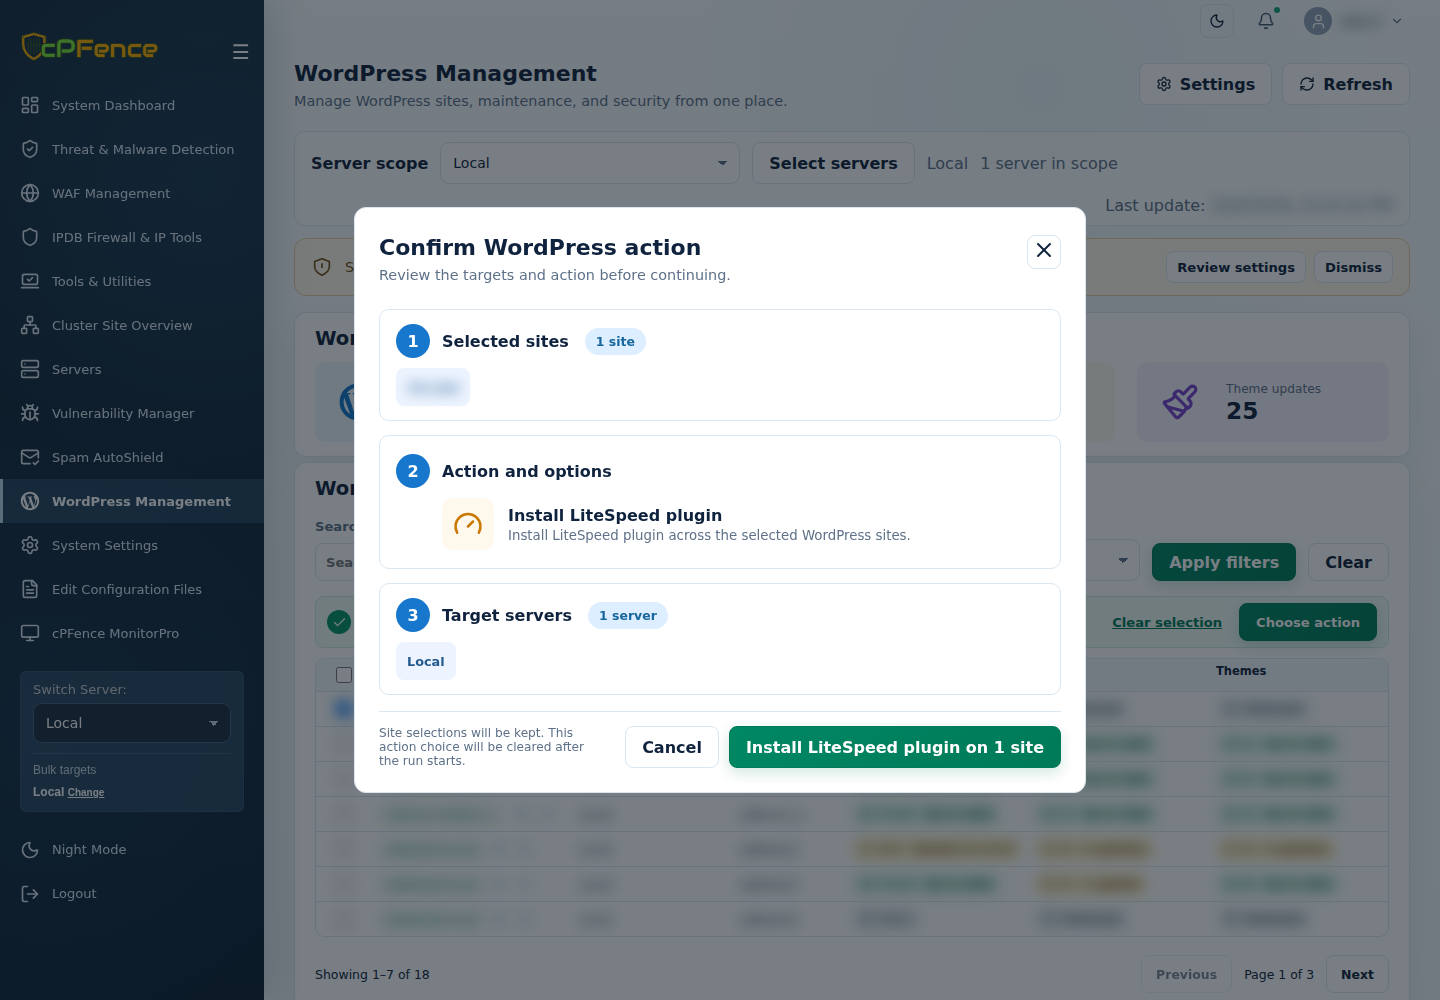
- In Confirm WordPress action, check Selected sites, Action and options and Target servers, then confirm Install LiteSpeed plugin on …, or choose Cancel. Read every site’s final result, including skips. Finished can include failed sites; see Read the outcome.
Inspect installation and activation per site, then use the separate configuration action. Do not assume a successful upload or dispatch means every site has the plugin.
Command-line method
Section titled “Command-line method”From a root terminal on the server hosting the sites, run:
cpfence --bulk-install-ls-pluginReview /var/log/cpfenceav/wp-sites-list.txt and the inventory prompt first. This uses the server’s listed installations, not checked WebUI rows. Installation can replace existing LiteSpeed Cache plugin files, so preserve custom changes before confirming.
The action installs and activates LiteSpeed Cache. Check every site’s final output, installed plugin and public pages. Then use cpfence --bulk-configure-ls-plugin when you intend to apply the supported preset; installation and tuning are separate tasks.