
Set up Slack notifications
If you’d like to receive cPFence v4+ on Enhance alerts on your desktop or mobile via Slack, follow the steps below. This guide uses the Slack desktop app.
You need access to your Slack workspace and permission to add an app. In cPFence, you need Manage Notification Settings for each server you configure.
Step 1: Install Slack
Section titled “Step 1: Install Slack”If you don’t already have it, download the Slack apps for both PC and mobile, then sign in to the same workspace on both devices.
Step 2: Create a Slack channel
Section titled “Step 2: Create a Slack channel”- Open the Slack desktop app.
- Click + Add channels in the left sidebar and choose Create a channel. In layouts that put this under the + button, select Channel instead.
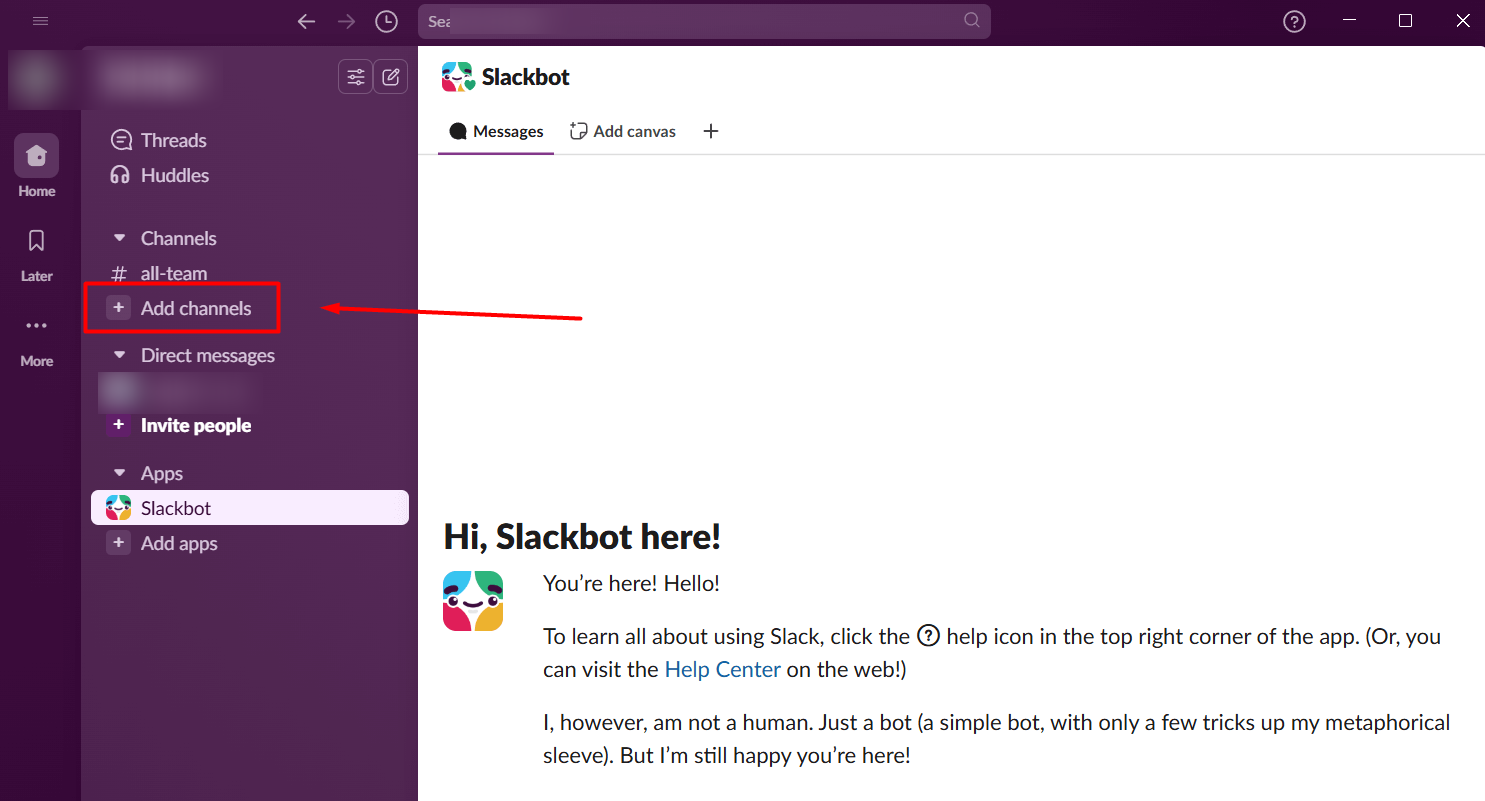
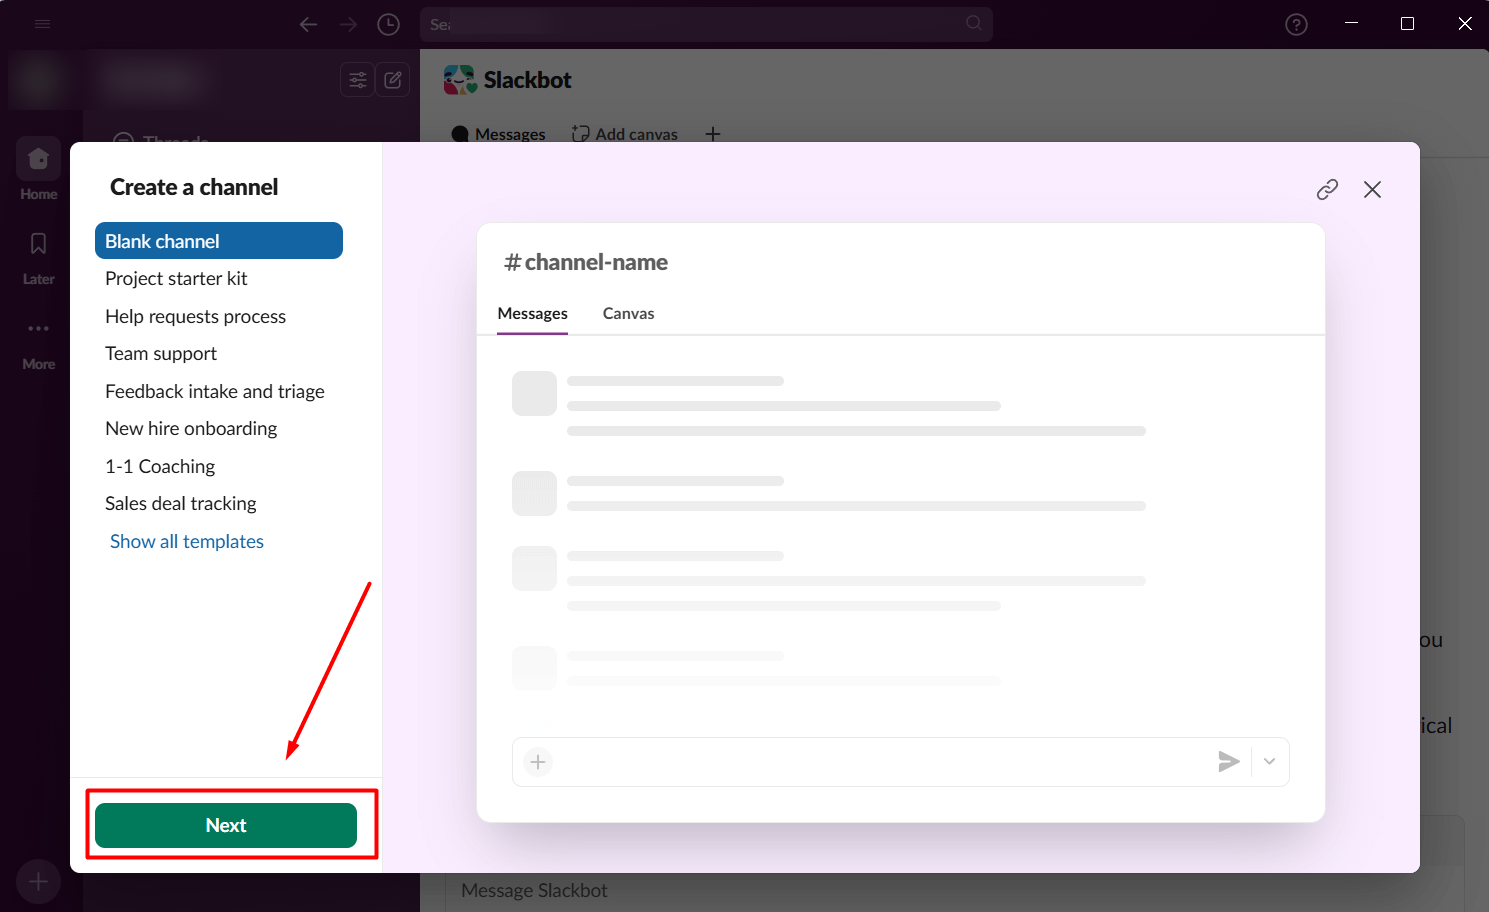
- Choose Blank channel if Slack offers templates, then click Next.
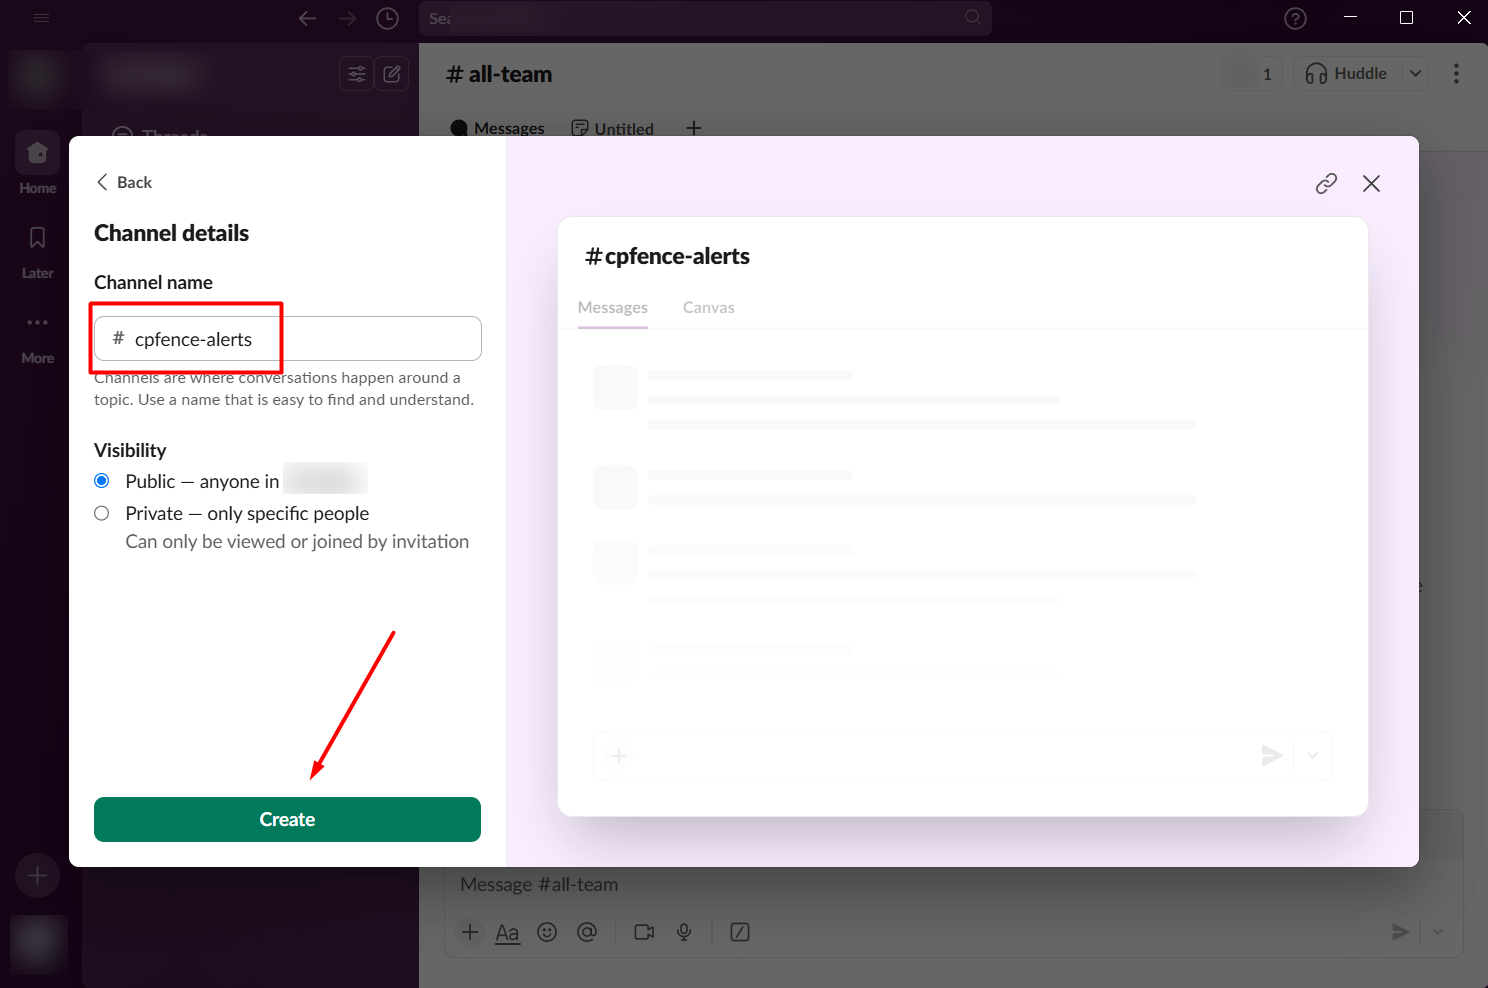
- Name your channel, for example
cpfence-alerts. Choose its visibility and click Create.
Step 3: Create a Slack app with webhook access
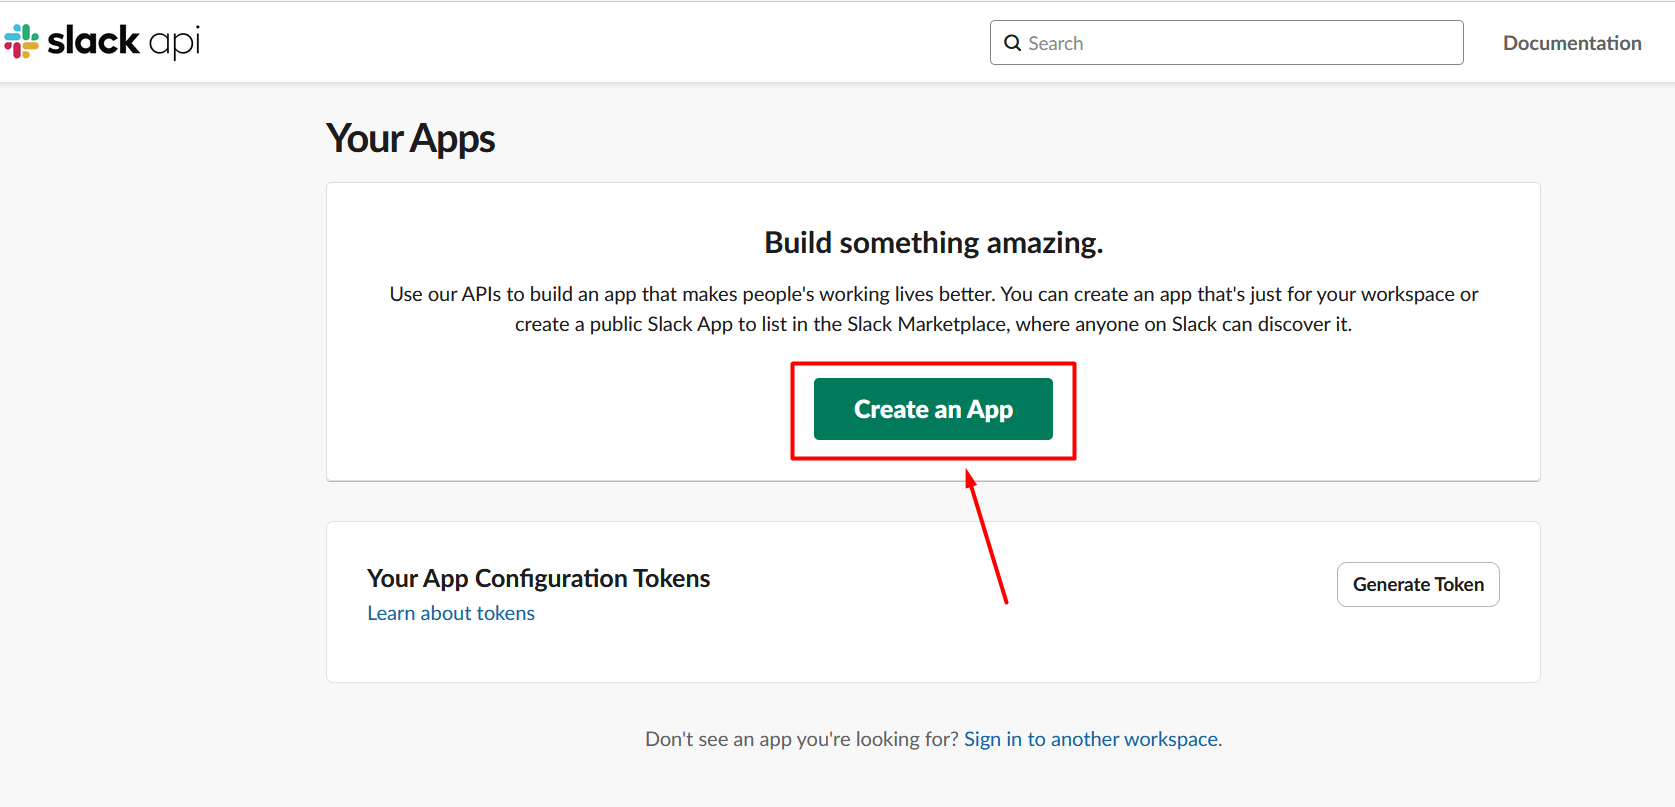
Section titled “Step 3: Create a Slack app with webhook access”- Visit Slack’s app dashboard and log in to the intended workspace.
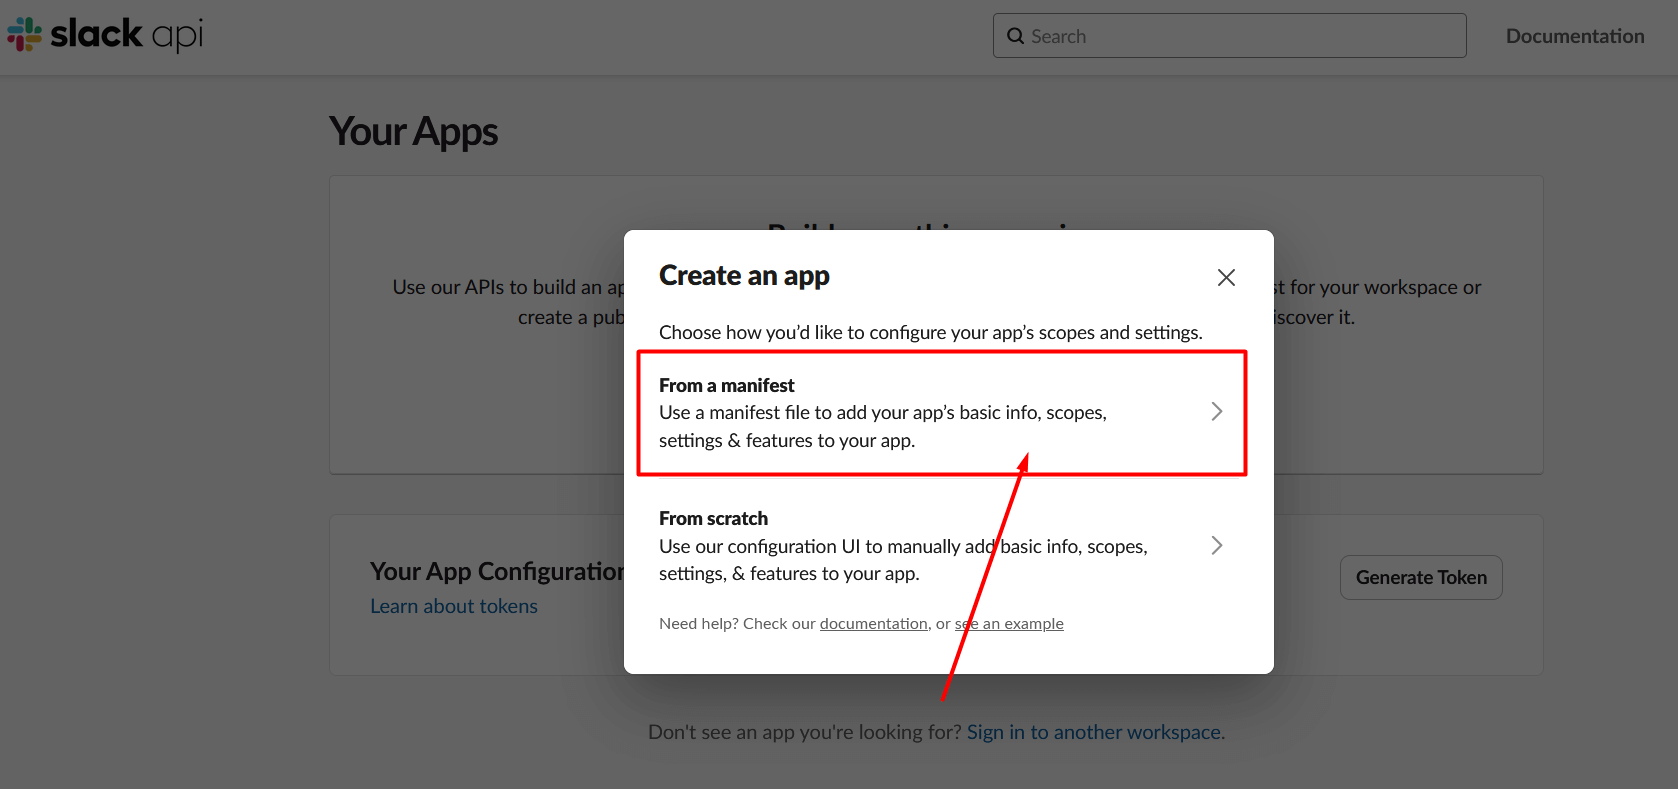
- Click Create an App. If you already have an app for these alerts, open it and continue with Step 4.
- Choose From a manifest.
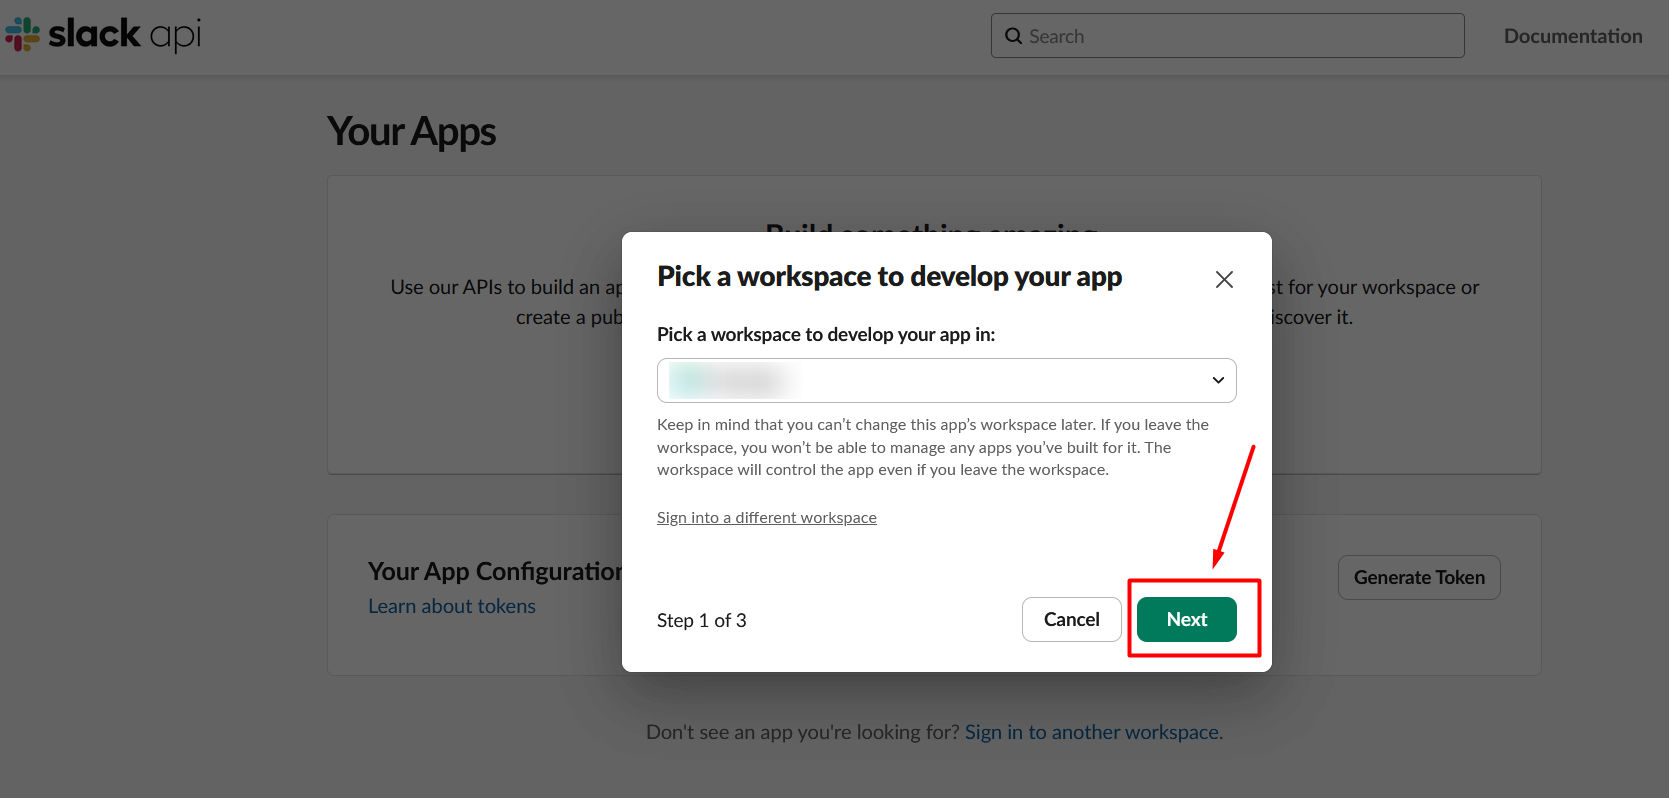
- Pick your workspace and click Next.
- Select the JSON tab and paste the following manifest. Replace
Your Hosting Cowith the name you want for the app:
{ "display_information": { "name": "Your Hosting Co" }, "settings": { "org_deploy_enabled": false, "socket_mode_enabled": false, "is_hosted": false, "token_rotation_enabled": false }}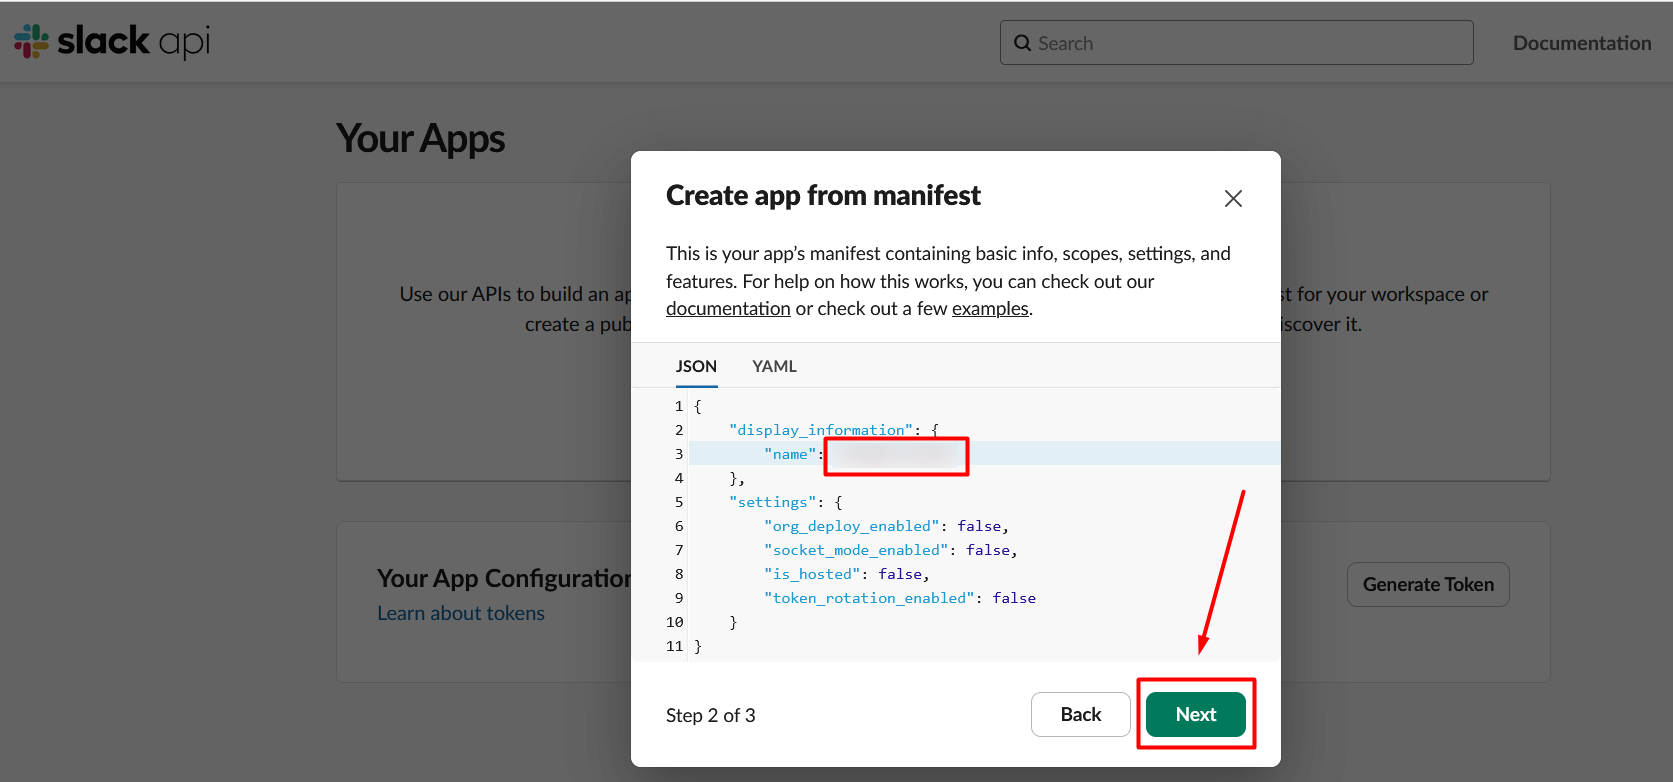
- Click Next, review the app summary, then click Create. If your workspace requires app approval, ask its administrator to approve the app before continuing.
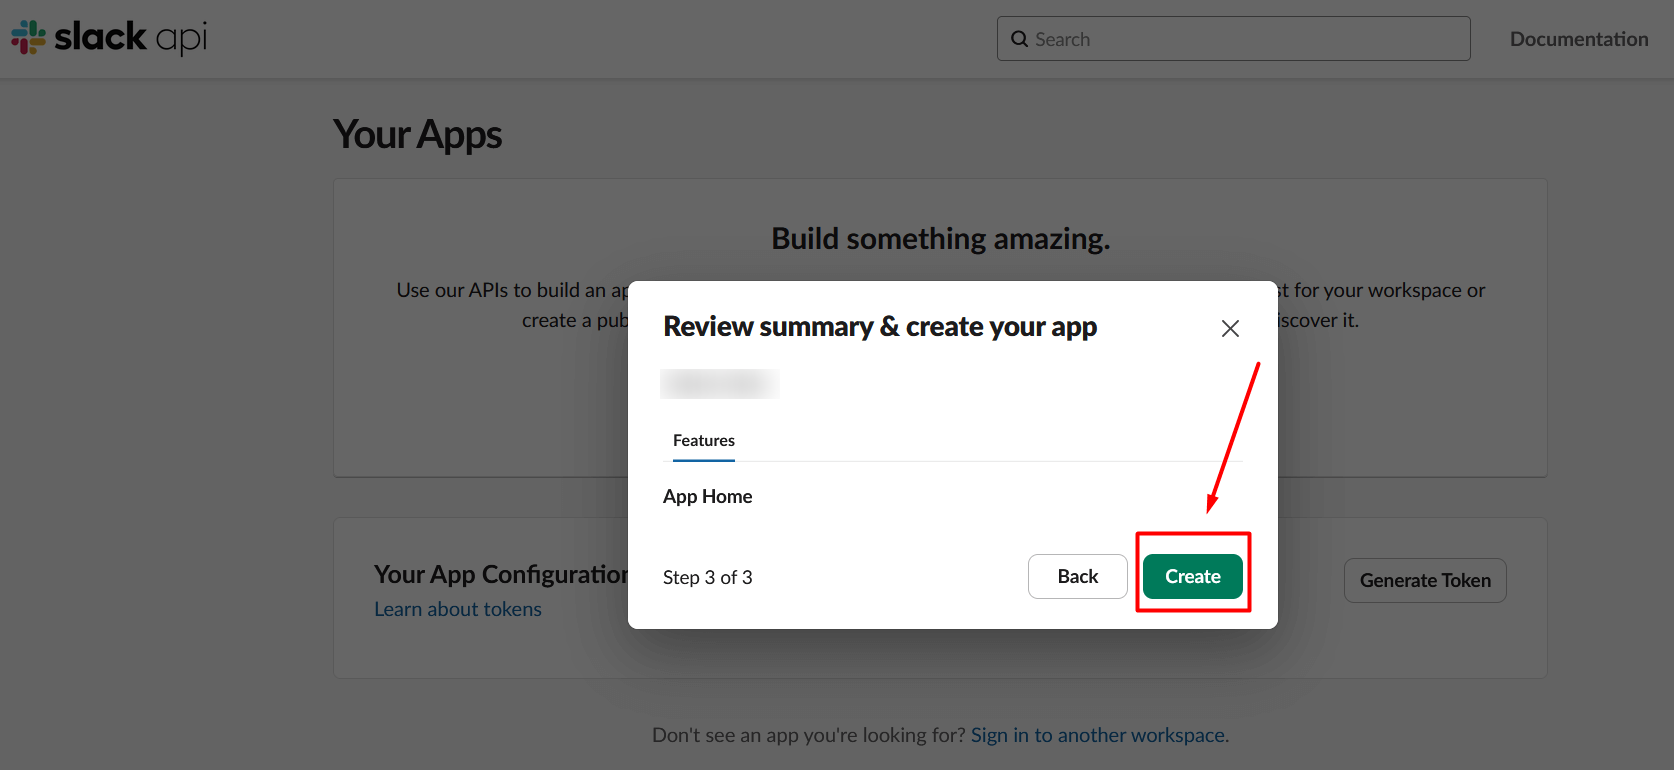
The manifest creation method is also covered in Slack’s app-manifest instructions.
Step 4: Enable incoming webhooks
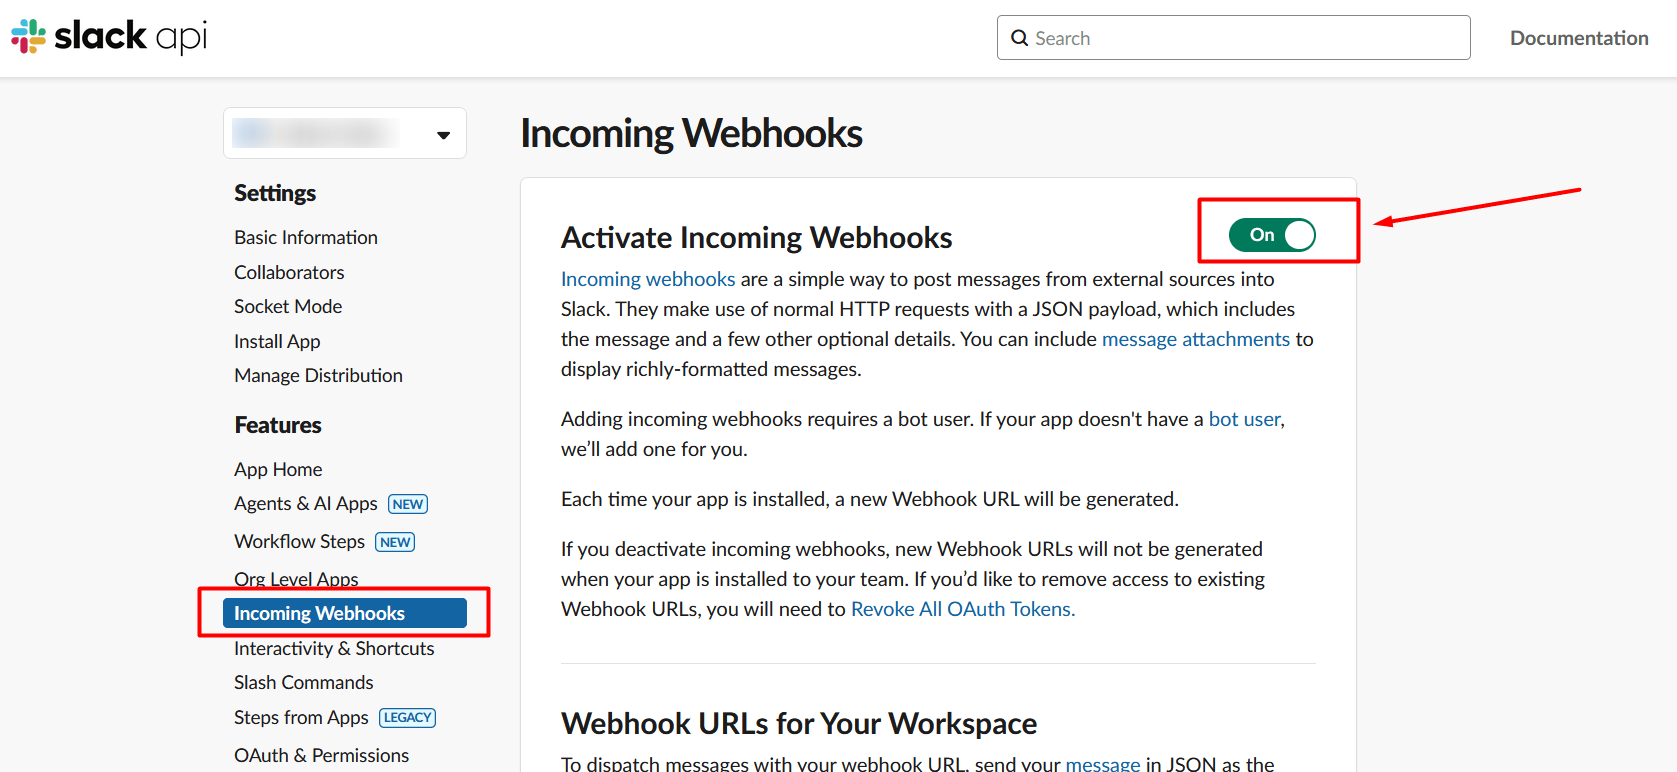
Section titled “Step 4: Enable incoming webhooks”- In your app settings, open Incoming Webhooks and turn Activate Incoming Webhooks on.
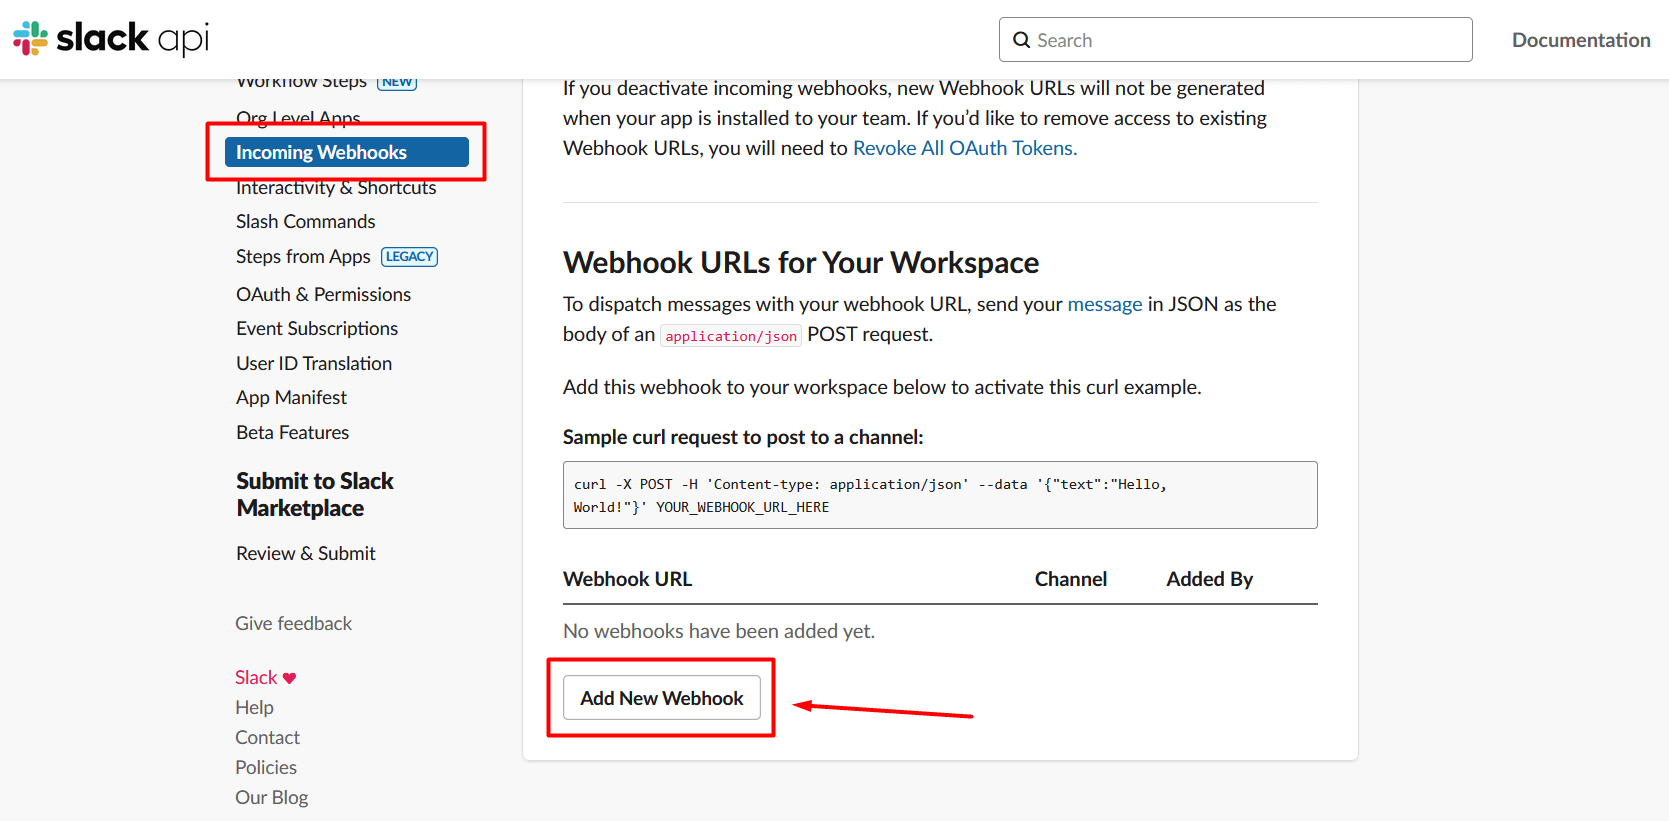
- Click Add New Webhook to Workspace (shown as Add New Webhook in the original screenshot).
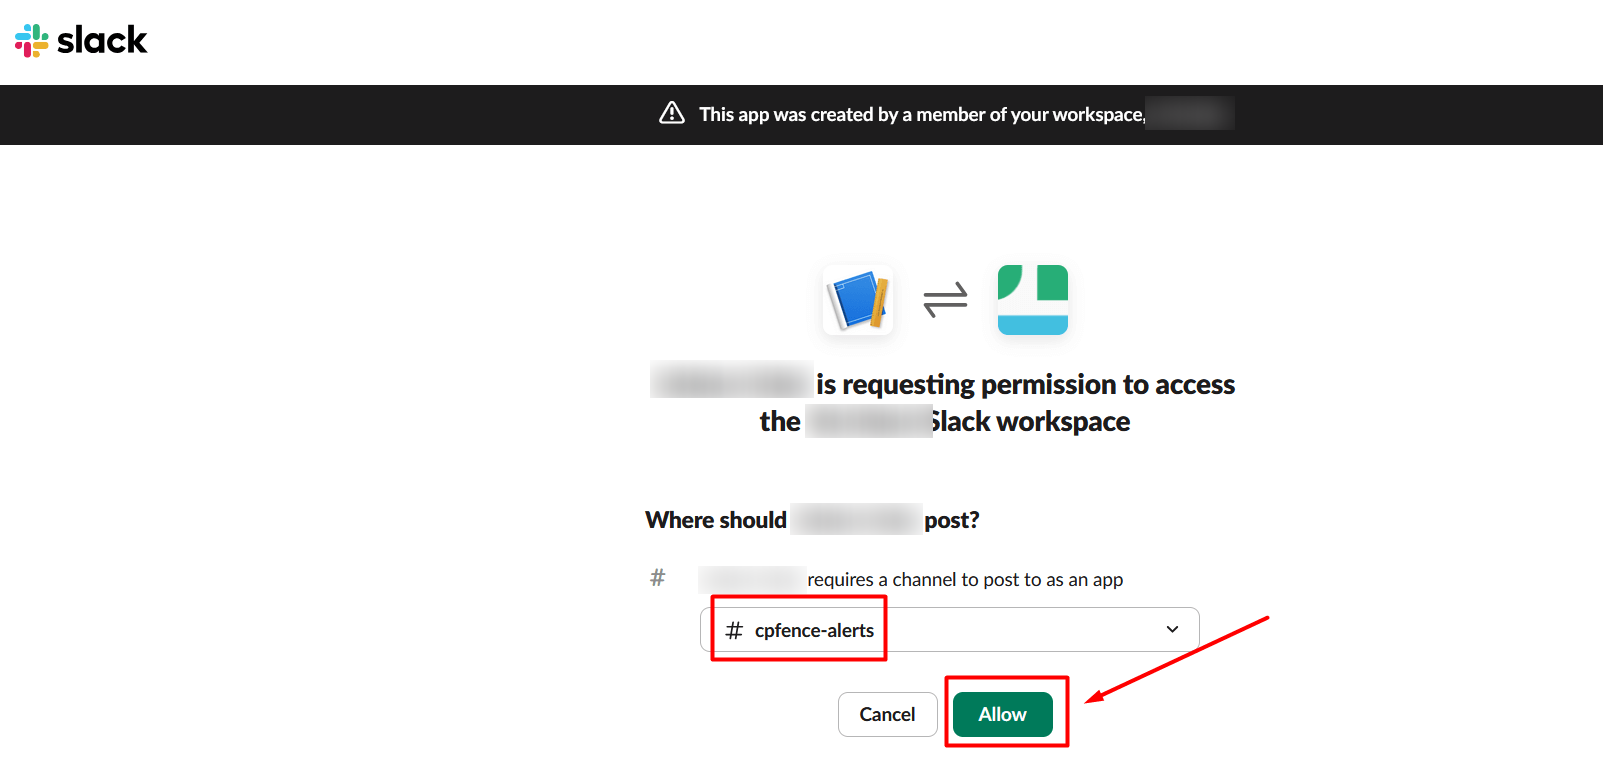
- Choose
#cpfence-alertsand click Allow or Authorize, depending on the dialog. Check that the selected workspace and channel are correct.
Step 5: Copy the webhook URL
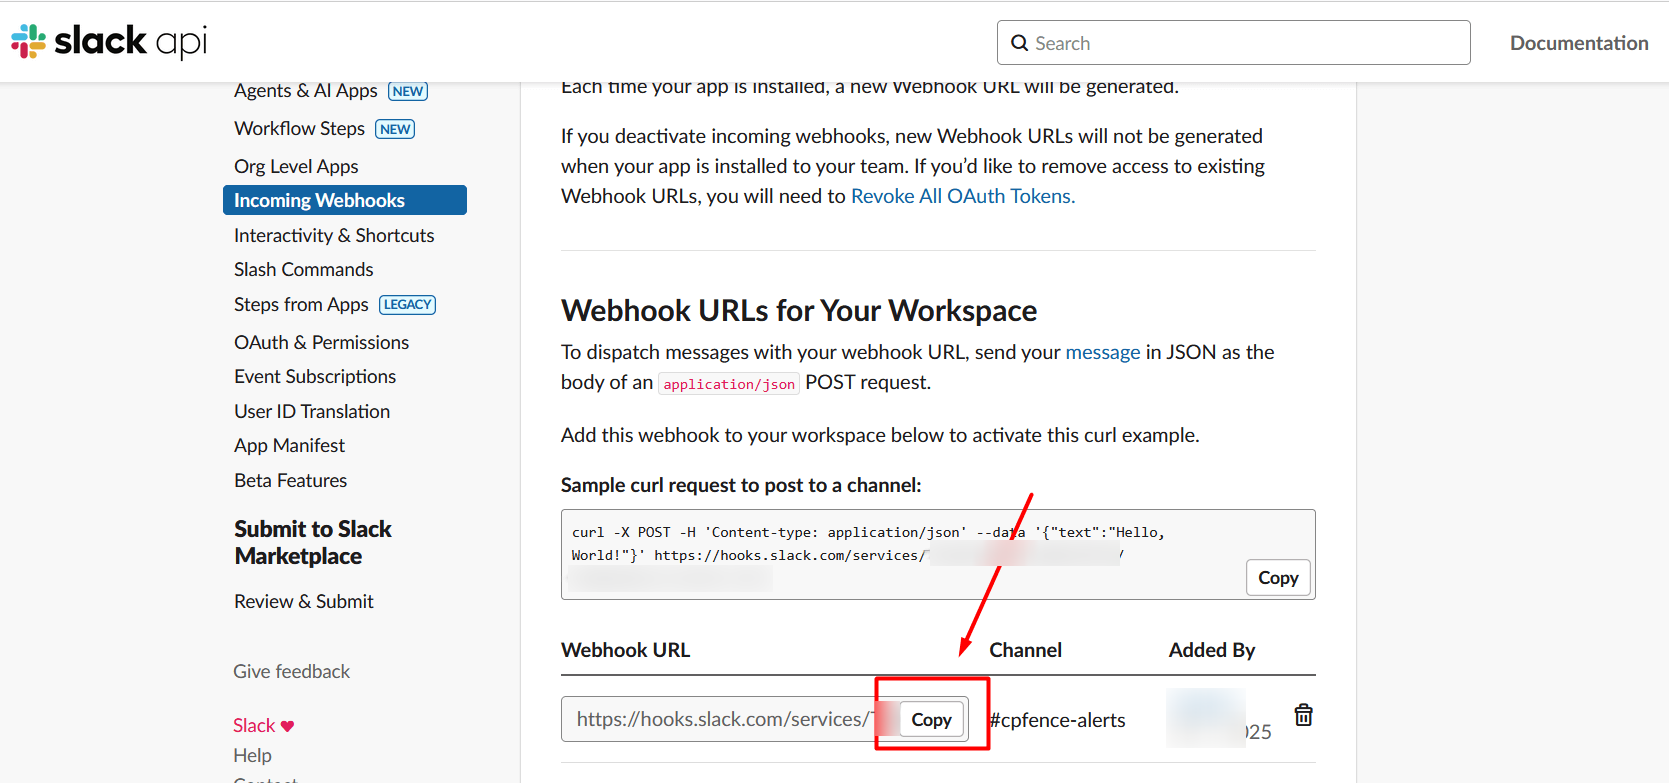
Section titled “Step 5: Copy the webhook URL”Slack returns you to Incoming Webhooks and shows a new entry under Webhook URLs for Your Workspace. Click Copy beside that webhook URL.
For workspace approval or webhook issues, see Slack’s incoming-webhook instructions.
Step 6: Configure the webhook in cPFence
Section titled “Step 6: Configure the webhook in cPFence”- In your cPFence WebUI, open System Settings.
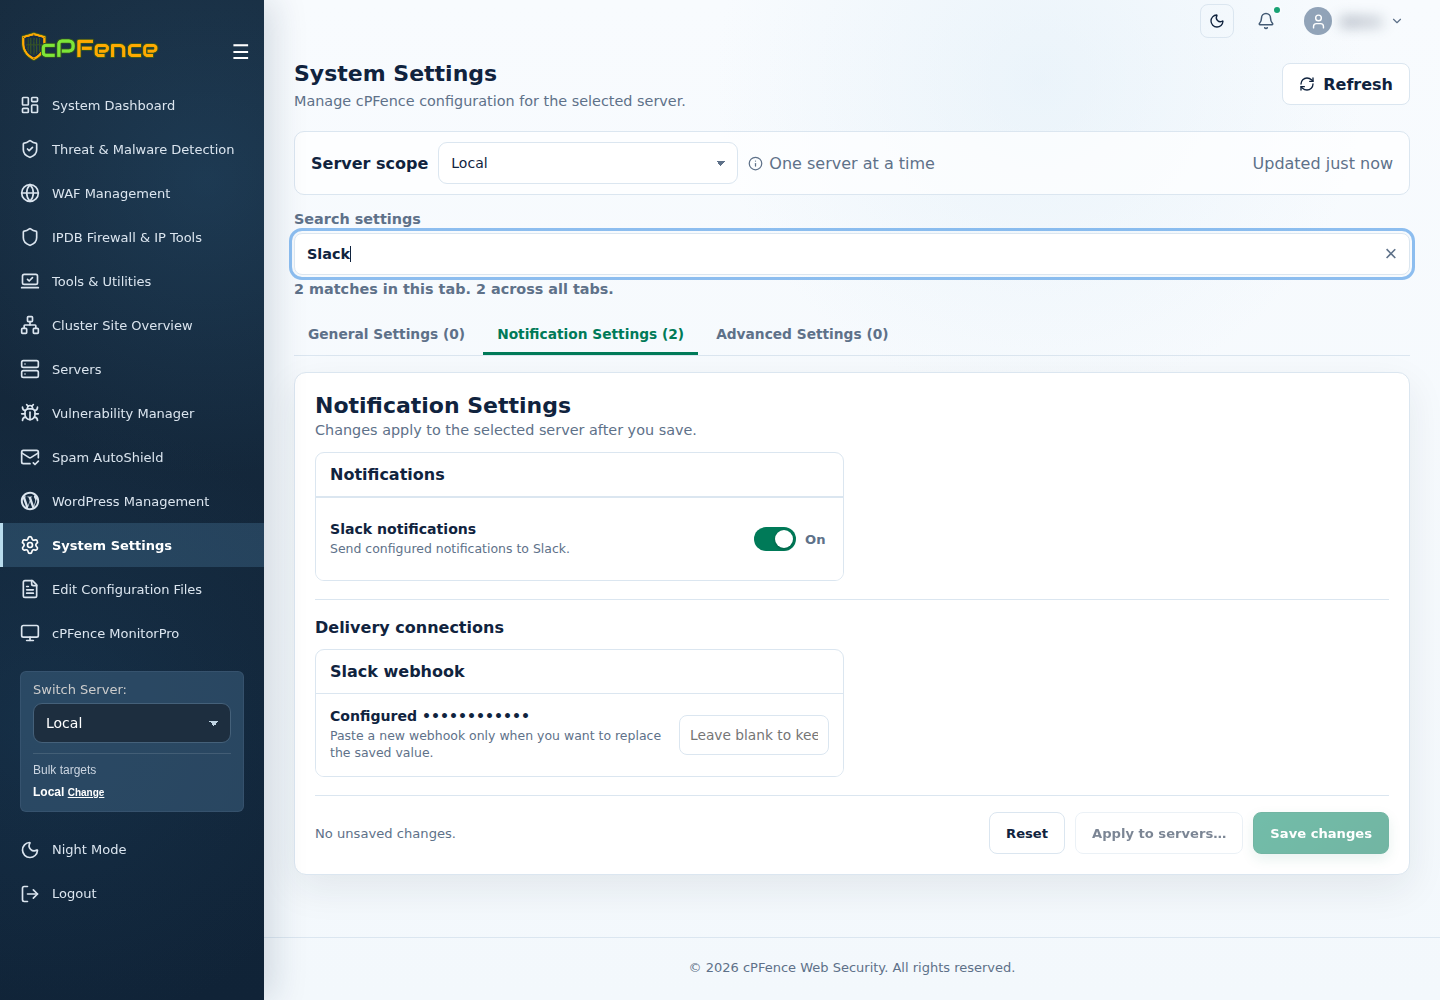
- Choose the intended Server scope, then select Notification Settings. Settings are saved for one server at a time.
- Type
Slackin Search settings to find the switch and webhook connection. - Turn Slack notifications on and click Save changes. Check the save result before continuing.
- Under Delivery connections → Slack webhook, paste the URL you copied. Click Save changes again. Saving a webhook while Slack is enabled sends a test notification.
- Open your Slack channel and confirm that the cPFence test message arrived. A saved setting or submitted request alone does not confirm delivery.
- Clear the search and review the event switches you want enabled in Notification Settings. The related protection module must also be enabled for its events to occur.
For secondary servers, repeat the setup on each intended server, or use Apply to servers…. Review the selected destinations and changed fields before applying. Check each server’s result and test message; one successful server does not establish success for the whole cluster.
Set up Slack using the CLI instead
Section titled “Set up Slack using the CLI instead”As root on the server you want to configure, run these commands in order:
cpfence --slack-notifications-oncpfence --set-slack-webhookEnter your webhook URL at the interactive prompt, rather than putting it in the command. Check the command result and confirm the test message in Slack. Repeat on each intended server; these commands configure the server where you run them.
To stop sending Slack alerts later:
cpfence --slack-notifications-offBonus: Adjust notification settings
Section titled “Bonus: Adjust notification settings”To receive mobile push alerts, open Slack and configure its notification preferences:
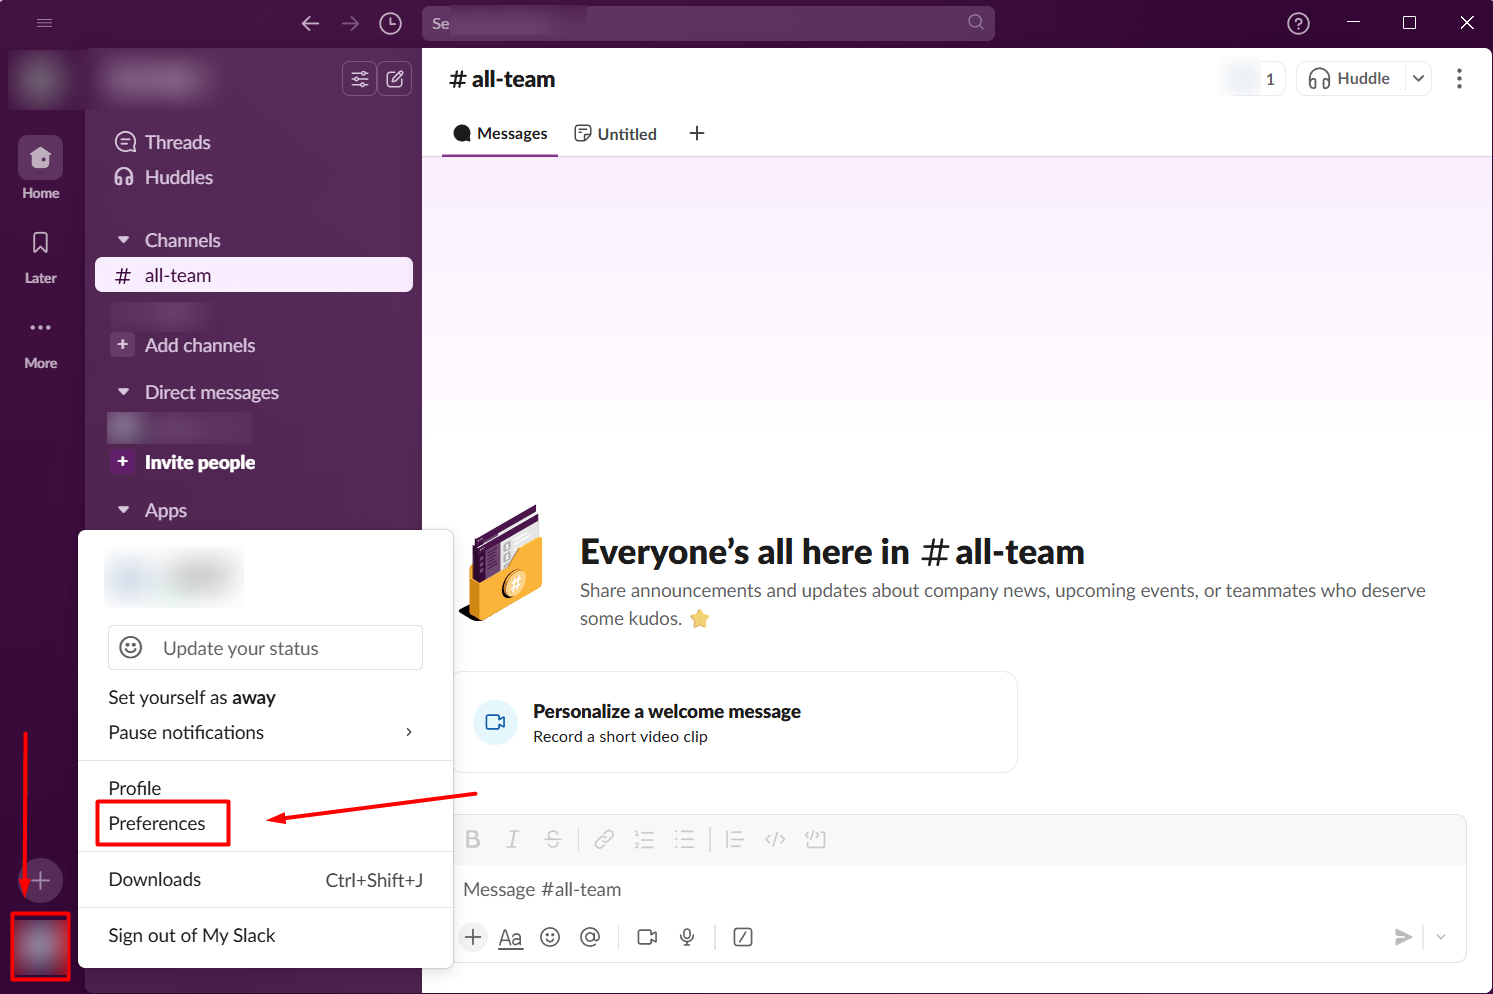
- Click your profile picture, then Preferences.
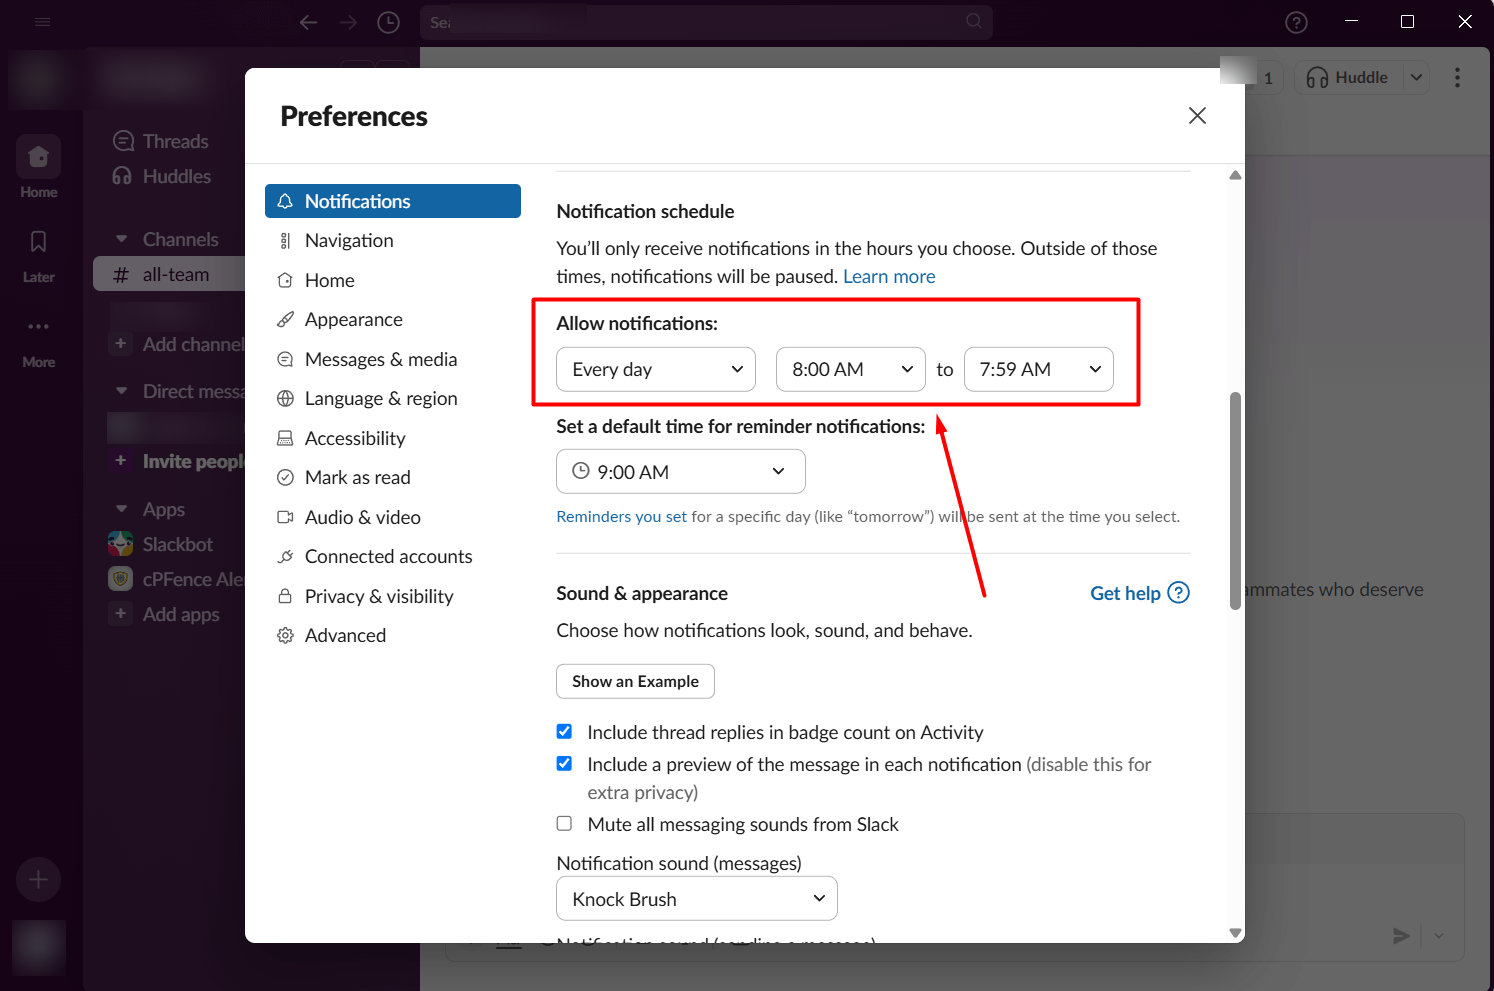
- Open Notifications and choose your notification schedule and sound preferences.
- Open the alerts channel and check its notification preferences so new alerts notify you.
- On your phone, sign in to the same workspace, enable Slack notifications in the phone’s settings, and check Slack’s mobile notification preferences. If messages appear in the channel but your phone is silent, check paused notifications and the notification schedule.
Use only Slack notifications (optional)
Section titled “Use only Slack notifications (optional)”If you prefer to keep your email inbox clean and manage alerts in Slack:
- Confirm that the Slack test arrived first.
- In System Settings → Notification Settings on the intended server, clear Notification email and click Save changes.
- Leave Slack notifications on and keep the intended event switches enabled.
If you prefer the configuration-file method from the original guide, set this line in /opt/cpfence/config.conf on the intended server:
EMAIL_RECIPIENT=""Use the configuration file editor and check the save result. Preserve all other settings. To receive email again, follow email and SMTP setup and confirm delivery.
Troubleshooting
Section titled “Troubleshooting”- Cannot create the app or authorize the channel: check workspace app approval and your membership of a private channel.
- No test message: check the save or command result, server connection, Slack enablement and whether the URL belongs to the intended workspace/channel. Do not disable email until Slack delivery is confirmed.
- Webhook refused: check whether the webhook was revoked or its channel archived. Create a replacement and save it privately.
- Test arrives but an event does not: check the owning module, event switch and notification cooldown. A test does not trigger every event.
- Message arrives but there is no mobile alert: check Slack’s channel preferences, notification schedule and your phone’s notification permissions.
Need further assistance? Open a support ticket through your client portal.