
Check WordPress integrity and review results
In cPFence v4+, Threat & Malware Detection → WordPress Integrity lists sites and their recorded core-file checks. Support users need access to the target servers and permission to view history and findings; starting a check also needs scan permission.
Find the sites
Section titled “Find the sites”- Open WordPress Integrity and choose Local, one secondary server, All Servers or All Servers (No Local). Use Select servers to choose a server subset before filtering or selecting sites.
- Search sites, domains or paths, choose Owner and Status, then Apply filters. Use Clear to reset the filters.
- Review Sites, Checked, Findings and Quarantined. Use Previous and Next to read additional sites or recent checks.
- Open a site’s Details or an entry under Recent integrity checks.
Select a summary card to narrow the results; select it again to clear that card’s filter.
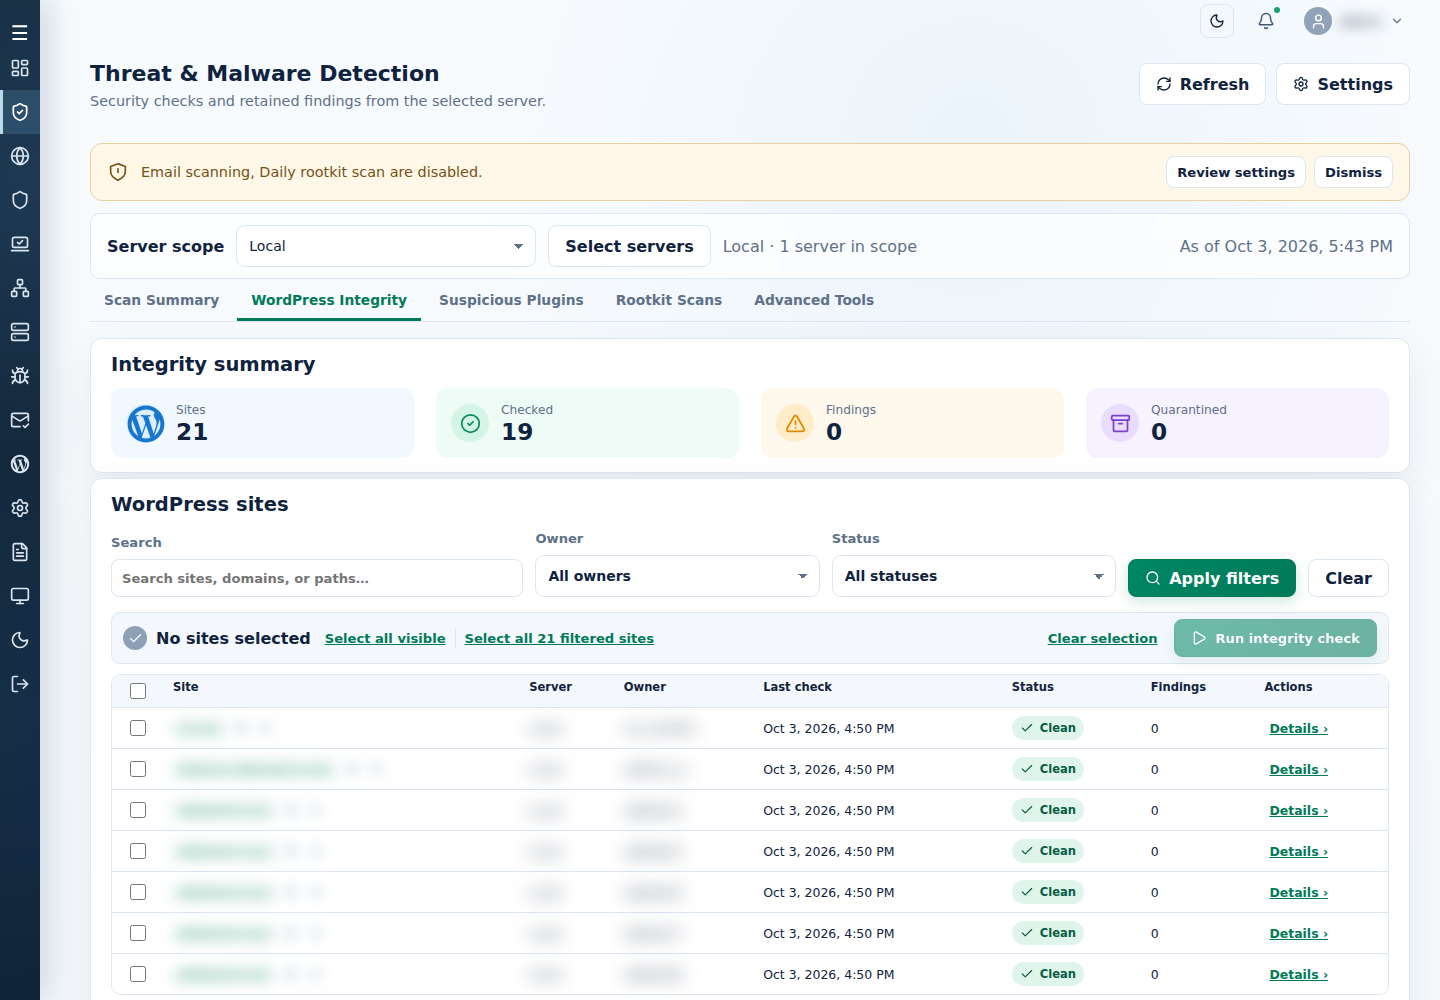
Status choices distinguish Clean, Issues found, Not checked, Failed or incomplete, Excluded or skipped and Quarantined. An excluded or unchecked site is not a clean result.
Read a check’s details
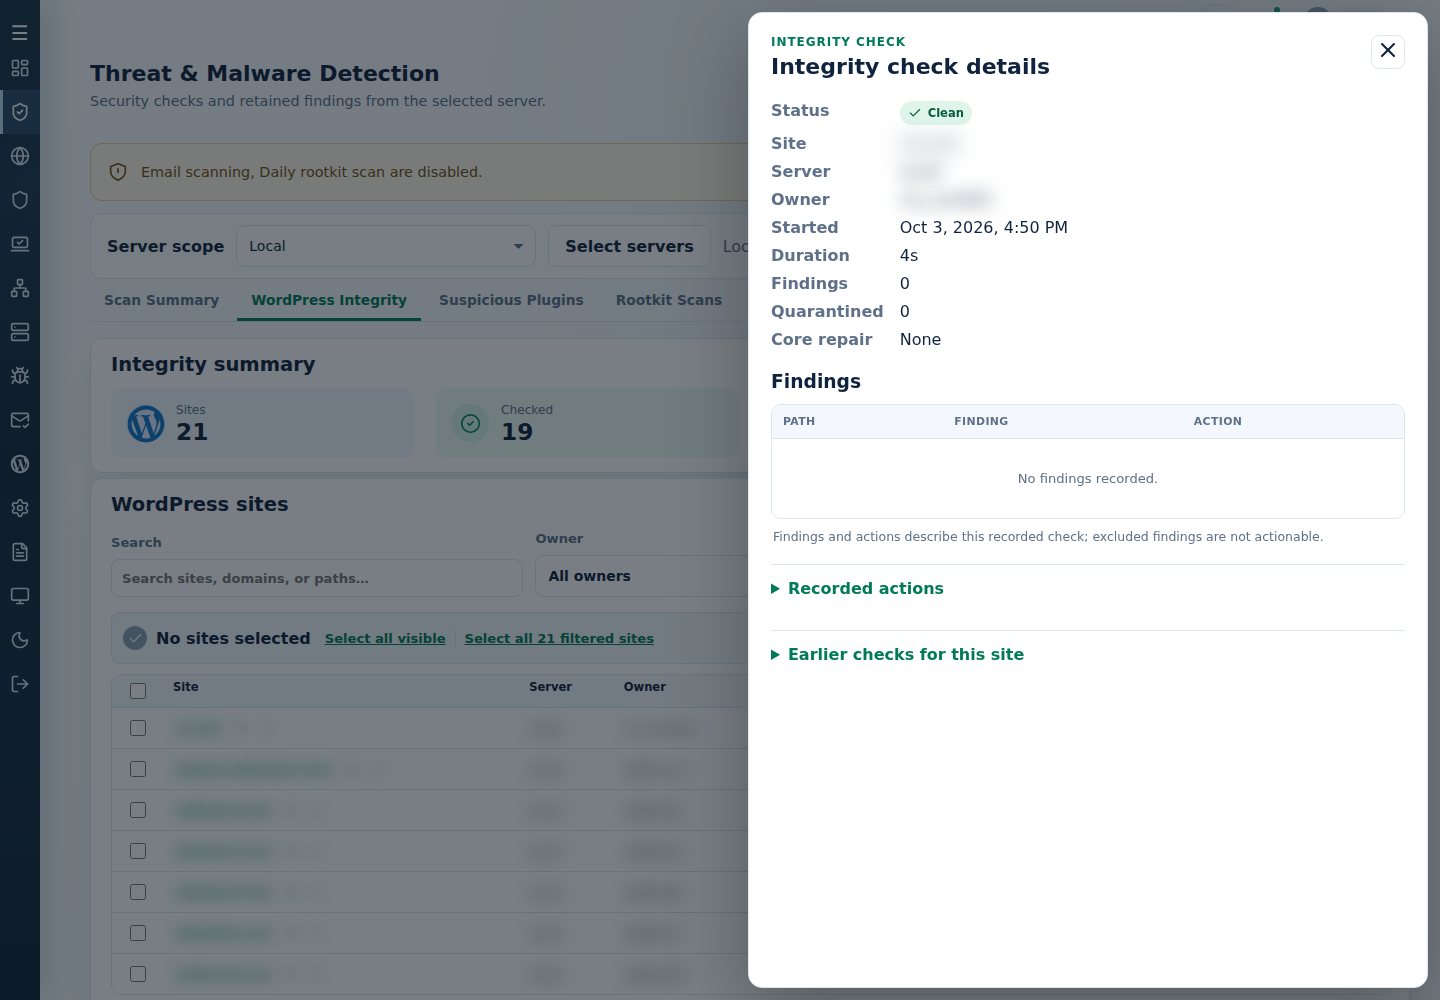
Section titled “Read a check’s details”Check Status, Site, Server, Owner, Started, Duration, Findings, Quarantined and Core repair. Read the Findings and Recorded actions separately; expand Earlier checks for this site to compare retained records. Copy site ID can help identify the intended site when contacting support; keep identifiers private.
Excluded findings are not actionable. The details describe the recorded check, not a fresh inspection of every current file.
Run an integrity check
Section titled “Run an integrity check”Starting a check needs a connected target with an eligible license. See the shared scan prerequisites and server scope.
- Review integrity policy and exclusions. Preserve backups before allowing automatic file actions.
- Filter the inventory, then select the intended sites. Select all visible covers the visible rows; Select all … filtered sites includes matches on other pages. Use Clear selection before choosing a different set.
- Select Run integrity check to open Confirm integrity check.
- Review Selected sites, Action and options, Target servers and each server’s Automatic file actions setting. If a setting is unavailable or the selection changed, refresh the inventory and review the targets again.
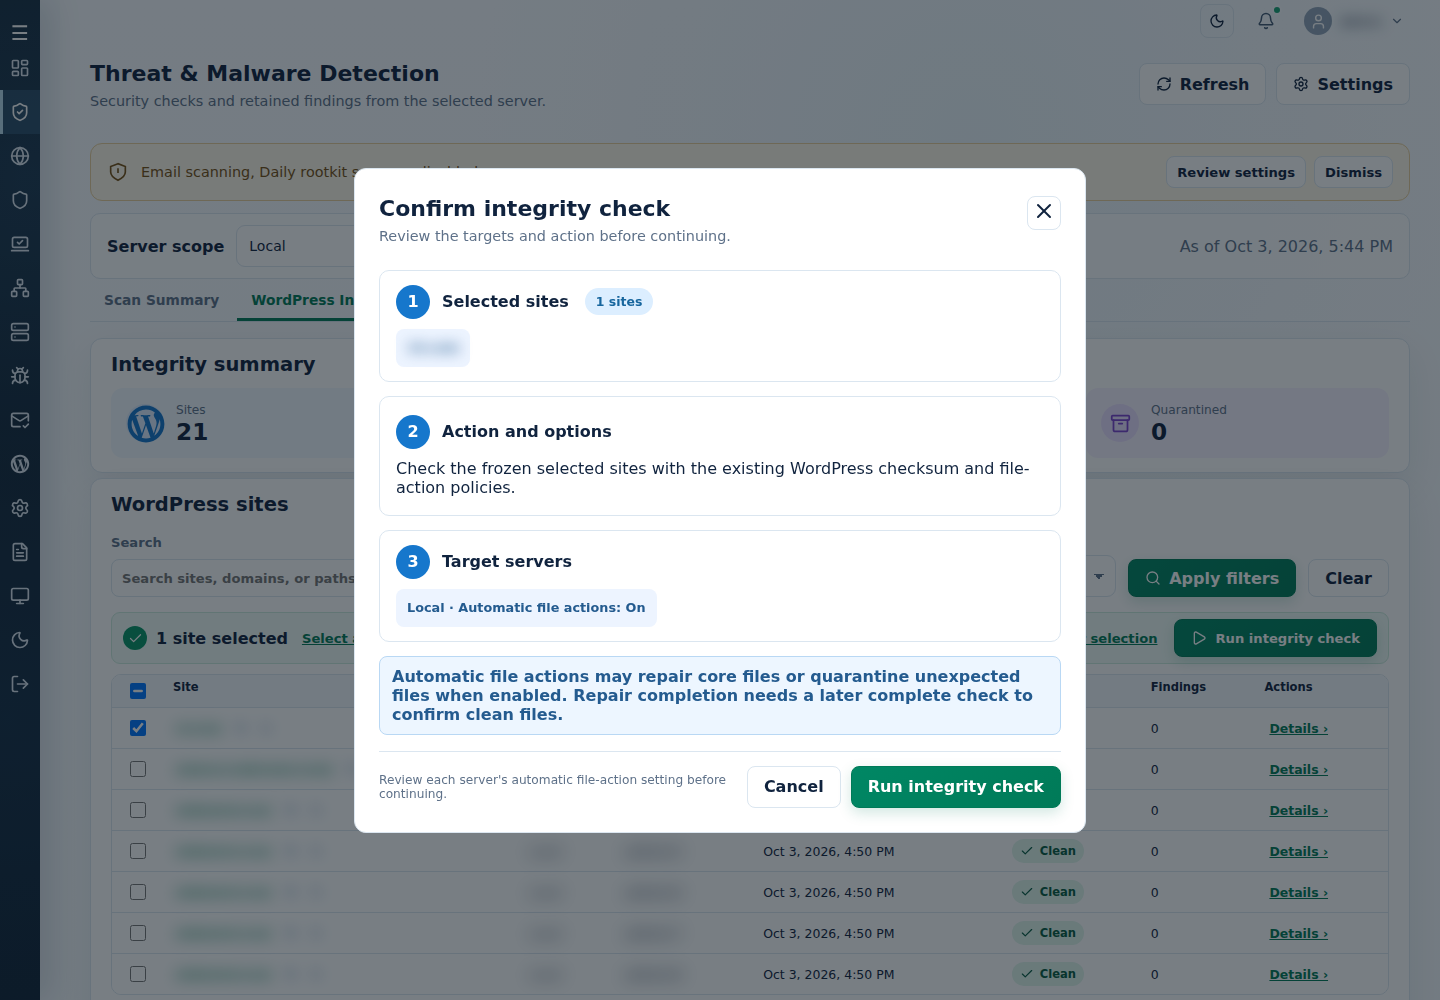
- Choose Cancel to leave without starting, or Run integrity check to submit the reviewed check.
- Read every target’s output. After the request finishes, return and refresh the inventory or recent checks to inspect the recorded final result.
Use Copy output for a private record, Cancel to request cancellation, then Back and Refresh to check retained history; cancellation alone does not establish the final check status. If output shows Needs attention, a busy target or an interruption, inspect that history before retrying. For recovery, see restore quarantined files or restore WordPress core.