
Import and schedule an IP list
cPFence v4+ accepts custom IPv4/IPv6 addresses and CIDRs from a file or URL.
Import a list
Section titled “Import a list”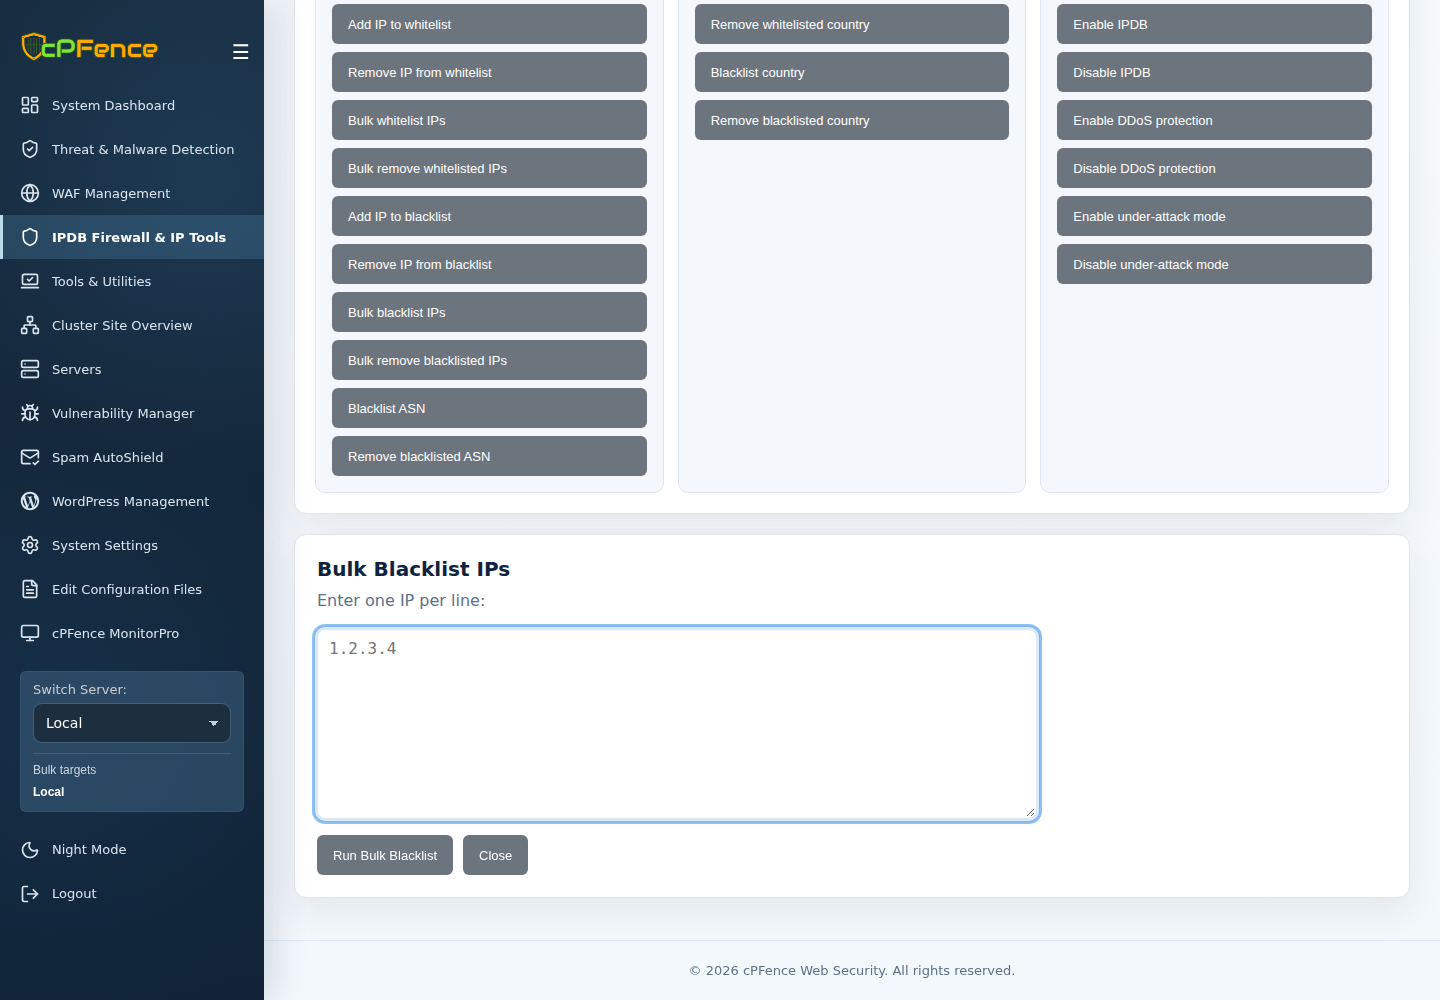
- Prepare a plain-text list with one address or CIDR per line. Keep a copy for recovery.
- Open IPDB Firewall & IP Tools → Advanced Tools and choose the intended bulk add/remove whitelist or blacklist action.
- Check the sidebar targets and paste the reviewed addresses, one per line. Use the CLI below to import a URL or local file.
- Confirm, read each result, then check current policy on each server.
As root, use the corresponding local command:
| Action | Command |
|---|---|
| Import blacklist | cpfence --bulk-blacklist-ip https://example.com/blocklist.txt |
| Import whitelist | cpfence --bulk-whitelist-ip /root/allowlist.txt |
| Remove listed blacklist entries | cpfence --bulk-del-bl-ip /root/blocklist.txt |
| Remove listed whitelist entries | cpfence --bulk-del-wl-ip /root/allowlist.txt |
Schedule a trusted custom feed
Section titled “Schedule a trusted custom feed”An administrator can add a root crontab entry, substituting their feed URL:
0 * * * * /usr/bin/cpfence --bulk-blacklist-ip https://example.com/blocklist.txtSee bulk-list troubleshooting. Custom scheduling is separate from cPFence’s built-in updates.