
Manage Spam AutoShield
Spam AutoShield manages mail filtering policies and outbound sender limits on Enhance. Mailbox malware scanning and mail quarantine have separate switches; enabling Spam AutoShield does not enable them.
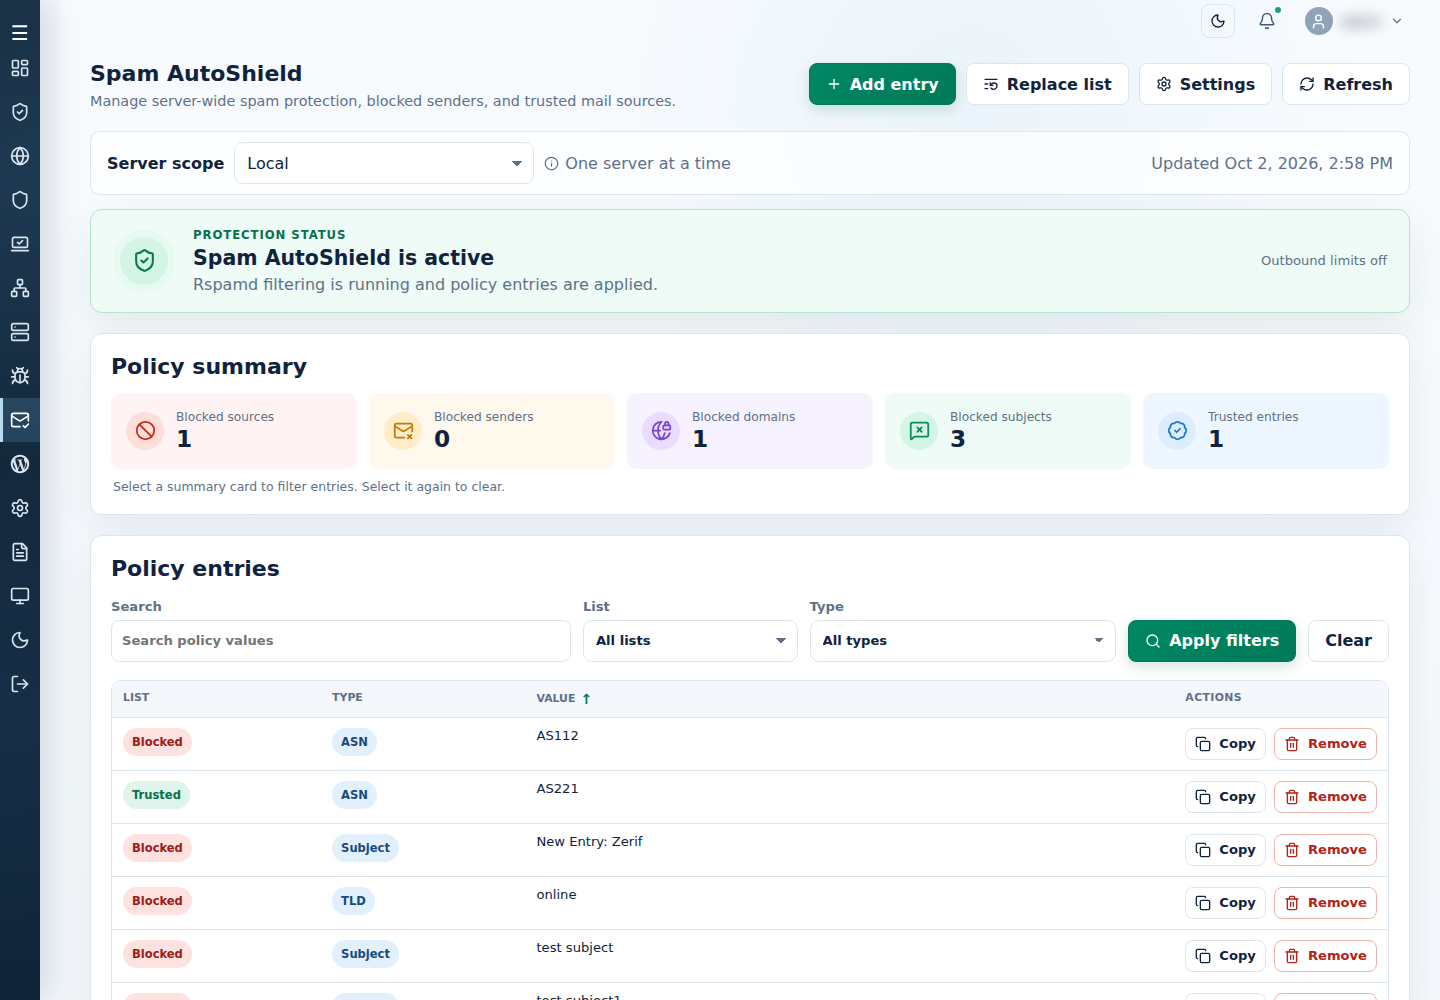
Choose one Server scope to read its status and policies. Support users need server access plus policy or training/settings permission for the action. Filters change the table, not mutation targets. Stored entries need the master on to be enforced.
1. Enable protection and outbound limits
Section titled “1. Enable protection and outbound limits”- Open Settings and check Apply actions to.
- Choose Current server, Selected servers or All authorized servers.
- Use Turn on / Turn off, review the targets and confirm.
Use Edit rate limits to open the corresponding System Settings fields:
| Setting | Packaged default | Dependency |
|---|---|---|
| Spam AutoShield | Off | Master for filtering and its owned limit maintenance. |
| Outbound rate limits | On | Effective only while Spam AutoShield is on. |
| SMTP hourly limit | 200 | Positive message count per mailbox per hour; requires both switches on. |
| Website hourly limit | 200 | Positive message count per website per hour; requires both switches on. |
For a blocked sender, inspect Outgoing email entries and investigate the unwanted mail before removing its block.
2. Add a typed block or trusted entry
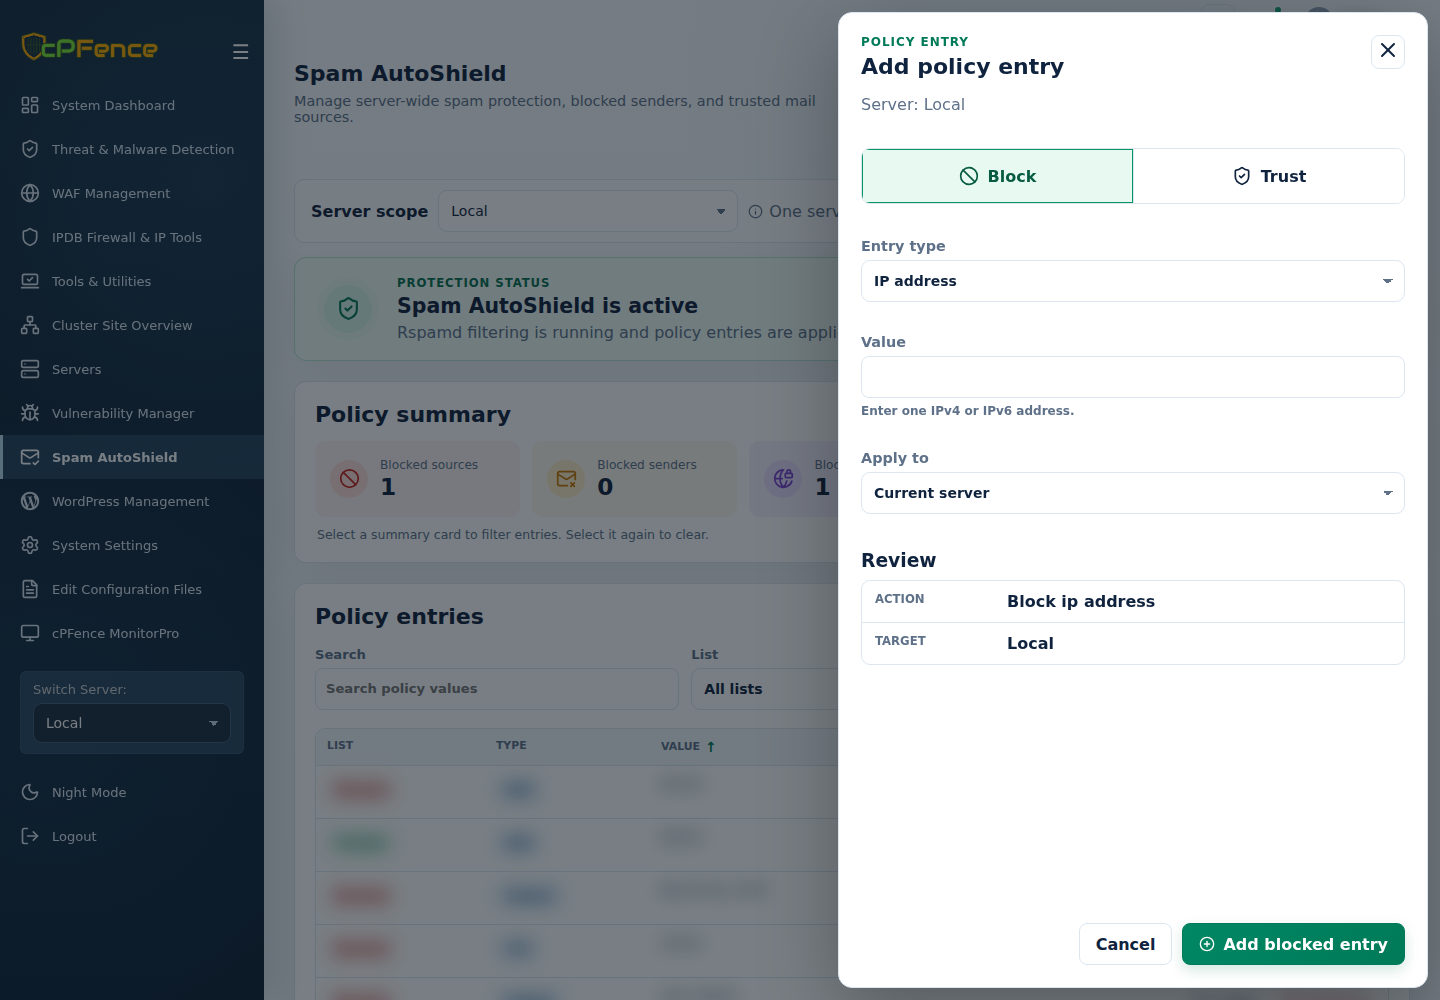
Section titled “2. Add a typed block or trusted entry”- Click Add entry and choose Block or Trust.
- Select Entry type and supply one Value matching its format.
- Set Apply to and review the displayed action and targets.
- Click Add blocked entry or Add trusted entry. Read every target’s result, then refresh the intended server’s list.
| List | Entry types and formats |
|---|---|
| Block | IP address: one IPv4/IPv6 address. Incoming email and Outgoing email: complete addresses with different directions. Domain: a name without a URL path. ASN: a number such as AS64500. Subject: subject text. TLD: the suffix to block. |
| Trust | Email, Domain, ASN: the corresponding complete address, domain name or autonomous system number. |
Trust applies to that mail policy; authentication and other checks still matter.
Use Search, List, Type, sorting and pagination to locate entries. Copy copies a value. Remove removes the selected entry on the displayed server after confirmation; it does not clear every list.
3. Replace one complete list
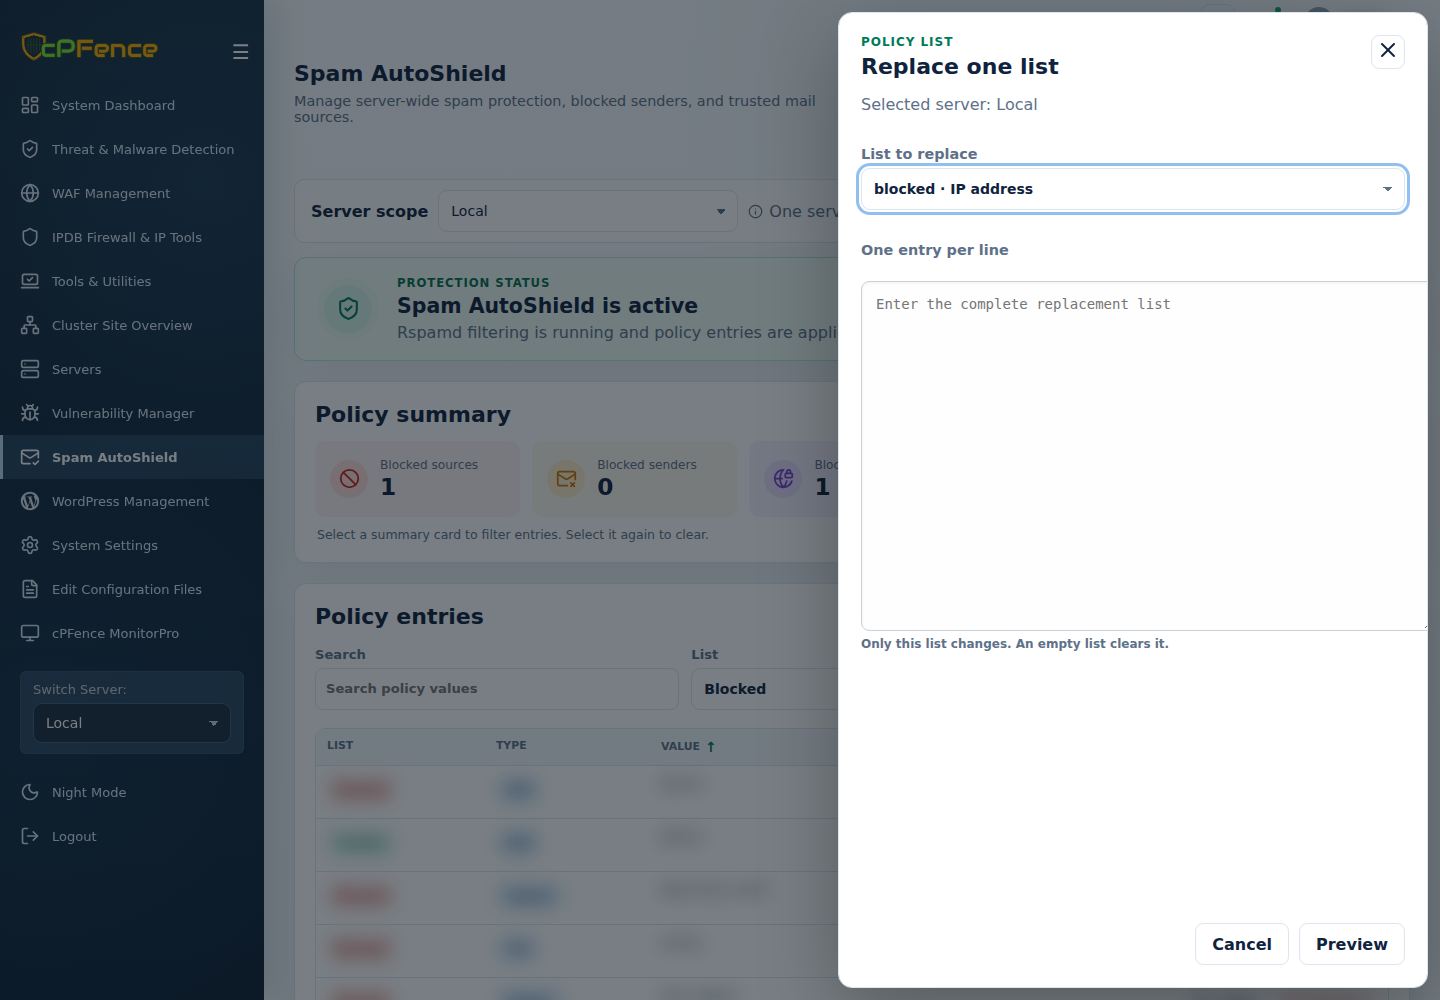
Section titled “3. Replace one complete list”- Choose the specific server and click Replace list.
- Select List to replace and enter the complete replacement, One entry per line.
- Click Preview and check the old/new counts and server.
- Apply only when that complete list is intended. Cancel leaves it unchanged. An empty replacement clears that list.
Save the old list before replacement. For a concurrent-edit conflict, refresh and preview again. Use these controls for managed maps in Edit Configuration Files.
For recovery, choose the same server and list, paste its saved previous entries, then review a fresh Preview and deliberately Confirm replacement. This changes that complete list again; it does not undo other lists or intervening changes automatically.
4. Configuration and training
Section titled “4. Configuration and training”In Settings, check Apply actions to before each operation.
| Action | What to expect |
|---|---|
| Apply recommended configuration | Validates/applies the supported Rspamd policy and associated mail configuration. Preserve custom configuration and review the final output. |
| Train spam filter | Trains Rspamd using the downloaded cPFence training dataset. Rspamd and Redis must be running. The output includes a 30-second cancellation window and resource warning; training data can occupy about 1.5 GB of RAM. Run only with spare capacity. |
| Reset training data | Permanently clears training data in Redis database 0. Review the target and Redis ownership before confirming; this is broader than removing a single policy entry. |
Wait for Finished, Canceled or Needs attention. Cancellation does not erase earlier learning. A started job is not a completed dataset.
During training, use Cancel training and return and confirm the named targets. Cancellation can take about 30 seconds. If cancellation cannot be verified on every selected server, inspect the running output before trying again or starting another training run.
Command-line method
Section titled “Command-line method”Sign in as root to the server hosting the mail services. Each CLI command below affects that server; it does not automatically apply to every server selected in the WebUI. Choose the action you need, then check its result.
| Action | Command |
|---|---|
| Activate Spam AutoShield | cpfence --activate-spam-autoshield |
| Deactivate Spam AutoShield | cpfence --deactivate-spam-autoshield |
| Apply the recommended configuration | cpfence --configure-spam-autoshield |
Keep custom mail configuration before applying the recommended setup. Deactivate only for intended maintenance or troubleshooting; stored policies are not enforced while the master is off.
Block or unblock a sender
Section titled “Block or unblock a sender”Replace these example values with the sender you investigated. Add and remove are separate choices, not a sequence you must run together.
| Type | Block | Remove the block |
|---|---|---|
| IP | cpfence --add-spam-autoshield-ip 203.0.113.10 |
cpfence --del-spam-autoshield-ip 203.0.113.10 |
| Incoming email | cpfence --add-spam-autoshield-email [email protected] |
cpfence --del-spam-autoshield-email [email protected] |
| Domain | cpfence --add-spam-autoshield-domain example.com |
cpfence --del-spam-autoshield-domain example.com |
| Subject | cpfence --add-spam-autoshield-subject "Unwanted subject" |
cpfence --del-spam-autoshield-subject "Unwanted subject" |
| TLD | cpfence --add-spam-autoshield-tld xyz |
cpfence --del-spam-autoshield-tld xyz |
For subject and TLD commands, you can omit the value and follow the prompt. Quote a subject containing spaces. Blocking a whole domain or TLD can affect legitimate messages too; use the narrowest intended entry.
v4+ also provides sender ASN blocks, outgoing-user blocks and separate trusted email/domain/ASN lists. See the focused tasks below for their commands and consequences.
Training and reset
Section titled “Training and reset”To start the reviewed Rspamd training task:
cpfence --rspamd-training-toolCheck the resource prerequisites above, read the cancellation window, and wait for the actual final result. Afterwards, rspamc stat shows the filter’s statistics; it does not prove every message will be classified correctly.
To deliberately clear training data, use:
cpfence --reset-rspamd-training-dataFor a complete policy-list replacement, v4+ provides cpfence --replace-spam-autoshield-list TYPE FILE. Supply the reviewed complete file, check its preview and type REPLACE only when that replacement is intended. An empty file clears the selected list; preserve its previous entries for recovery. See Replace one complete list for the matching WebUI flow.
Focused mail tasks
Section titled “Focused mail tasks”Block/unblock IPs, ASNs, domains, incoming addresses, outgoing addresses or subjects. Trust exceptions have separate ASN, domain and email steps.
Also see recommended configuration, outbound limits, training reset and the incoming / outgoing blocked lists.
Troubleshooting
Section titled “Troubleshooting”For no effect, check the master, mail services, entry type and server. For Needs attention, read each target’s result and check current state before retrying.
Configure mailbox scanning, Email Quarantine, Email spam protection and notification channels separately in their settings.