
Enable or disable Redis caching
Use the Enhance main control panel server with a valid cPFence license and a Super admin API key. WebUI users need access to the selected websites and permission for this action.
From the WebUI
Section titled “From the WebUI”- Open Tools & Utilities → ApiMachine Bulk Tools.
- Choose Cluster scope or Select servers, apply your filters, then check the intended website rows. Review the selection rules; filtering alone does not select websites.
- Open Choose action → Caching → Enable Redis caching or Disable Redis caching.
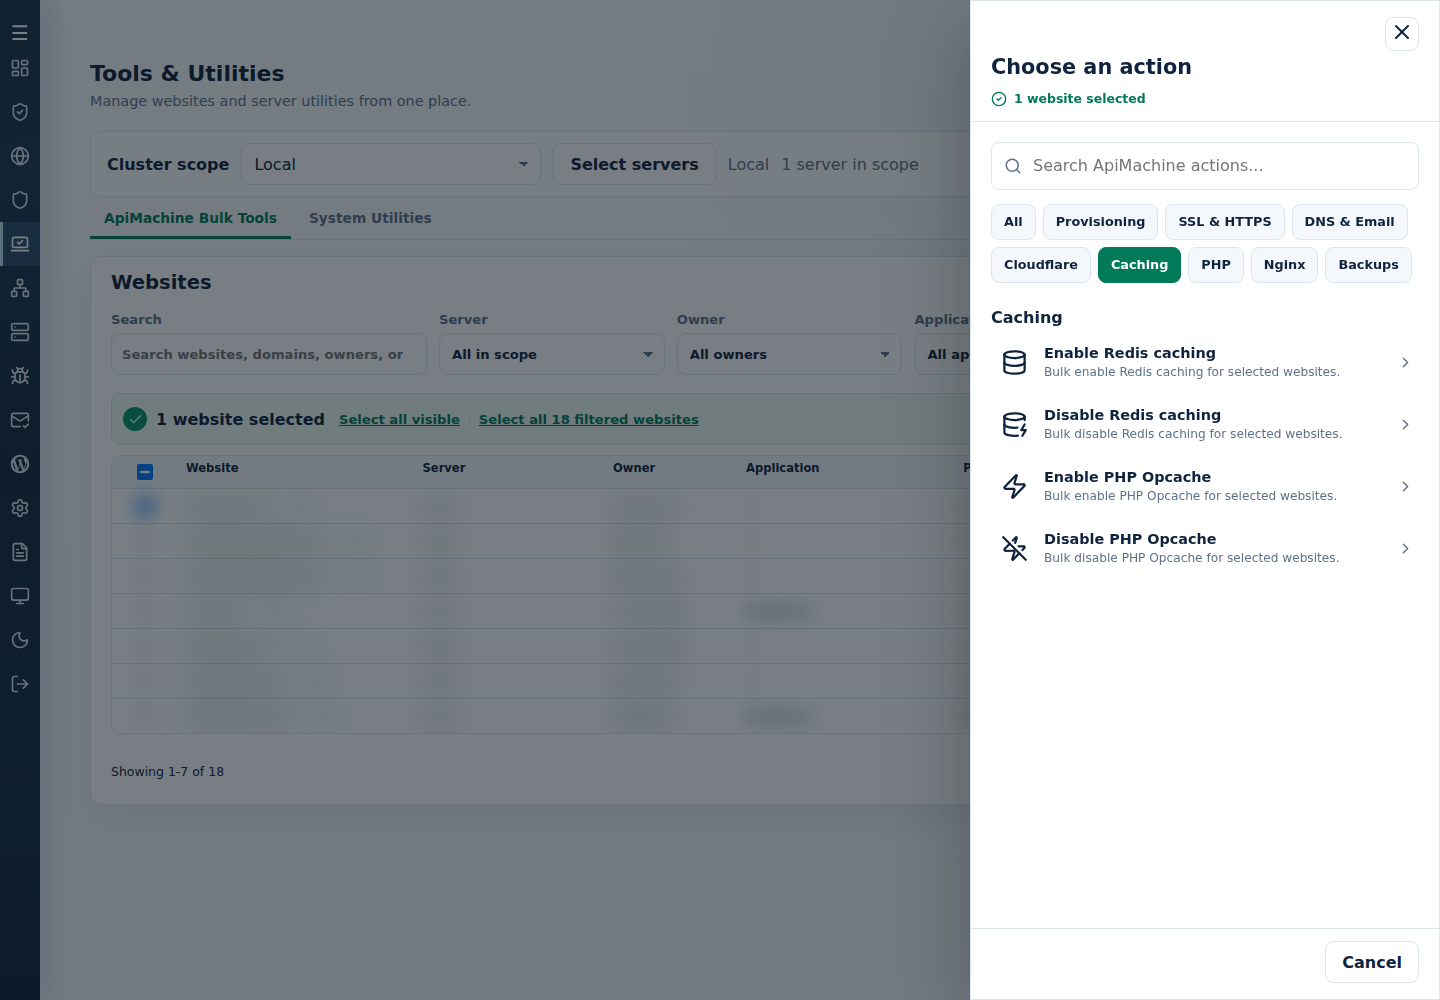
- Review the selected websites and Confirm and run. Read Finished or Needs attention and the per-target output.
Keep LiteSpeed or application-level caching aligned with the Enhance Redis setting. After changing it, test normal requests and inspect any failed websites.
Redis settings are applied to the selected supported websites; application configuration still needs to match.
From the terminal
Section titled “From the terminal”Use root on the main control panel server. Generate and edit the CLI site list first so that /var/log/cpfenceav/cluster-sites-list.txt contains only your intended targets.
| Action | Command |
|---|---|
| Enable Redis caching | cpfence --bulk-enable-redis-cluster |
| Disable Redis caching | cpfence --bulk-disable-redis-cluster |
Run the command for your intended choice and confirm its target list.
For failures, read each target’s error and check its actual state before retrying. Keep the retry selection limited to the intended websites.